Want to make your hosted payment page look professional and collect the data you need?
Customizing your page is a great way to reinforce your brand, build trust, and get key customer insights. This article will walk you through the customization process for Helcim Payment Pages.
In this article
Using the Theme Settings tab
The Theme Settings tab of the page editor provides a user-friendly interface to modify the visual elements of your payment page.
To get there, go to All Tools > Payment Pages, then select a page from the list to edit. Then, select Theme Settings along the top of the page.
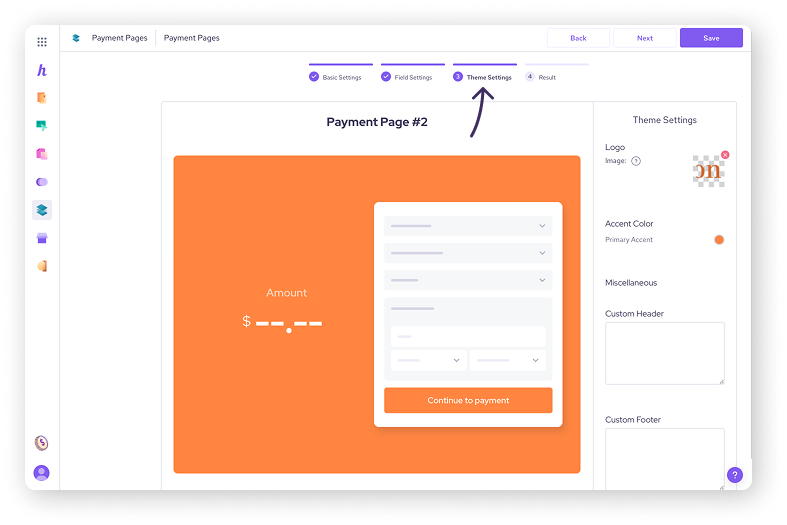
Logo upload
Upload your business logo to display it prominently on the payment page. This helps reinforce your brand and create a professional look.
| For optimal results, upload a PNG or JPG file with a resolution of 350 x 210. |
Color selection
Choose your brand's primary and secondary colors for the page's background, buttons, and text.
| Consistent color schemes create a cohesive brand experience. |
Custom headers and footers
Add custom headers and footers to include additional information, such as contact details, support links, or promotional messages.
To preview how your page looks to a customer:
Hit Save
In the list of pages, select the three dots and Preview
Selecting and configuring fields
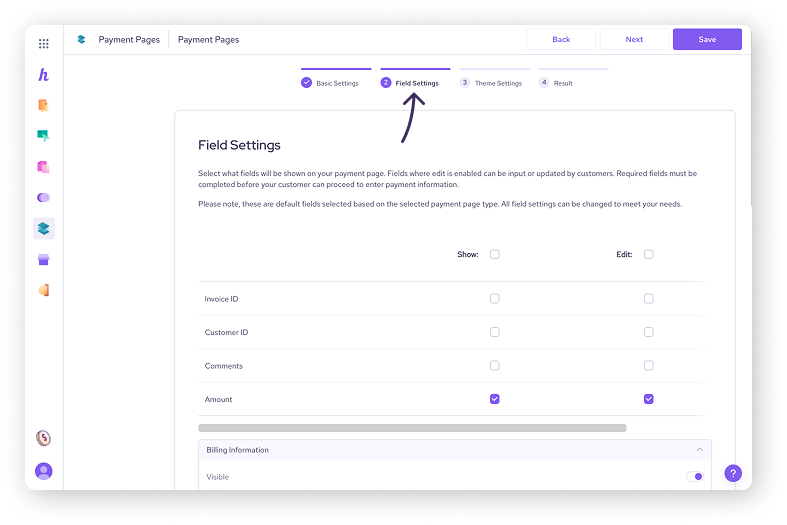
Helcim Payment Pages allow you to control which fields are displayed to customers and how they interact with them. You can adjust this in the Field Settings tab in the page editor.
To get there, go to All Tools > Payment Pages, then select a page from the list to edit. Then, select Field Settings along the top of the page.
For each field, you can choose one of the following options:
Show: Display the field to the customer.
Edit: Allow the customer to modify the information in the field.
Require: Make it mandatory for the customer to fill out the field before proceeding.
Working with custom fields
If the standard fields don't meet your needs, you can create custom fields to collect specific information.
| The custom fields you add to your payment page will match the custom fields on your invoices. This is to ensure the invoices that are generated from payments are populated with the same data. |
Enabling custom fields
Before creating custom fields, you need to enable the Custom Fields option in your Invoice Settings.
Under Custom Field Settings in the Field Settings tab, select Edit
You’ll be directed to the Invoice Theme Designer in a new browser tab
Click on Custom field
Toggle Allow Custom Fields on, then select Save
Creating custom fields (field types, options)
In the Invoice Theme Designer, select Add new field.
Add a title to your field
Then, choose from a field type.
Textbox: For collecting text-based information.
Dropdown: For providing a list of predefined options.
Checkbox: For allowing customers to select one or more options.
Radio button: For allowing customers to select only one option from a group.
For each custom field, you can set whether it's required or not, or add a default value.
Select Create custom field
Click Save in the top right corner to save the field to your invoice.
Adding custom fields to payment pages
Once a custom field is created on your invoices, you can add it to any of your payment pages.
Go back to the Payment Pages tool and open a page from the list
Select Field Settings from the top of the page
Any custom fields you created will appear in the list
Select Show on Page, Allow Edit, or Required Field as desired
Select Save
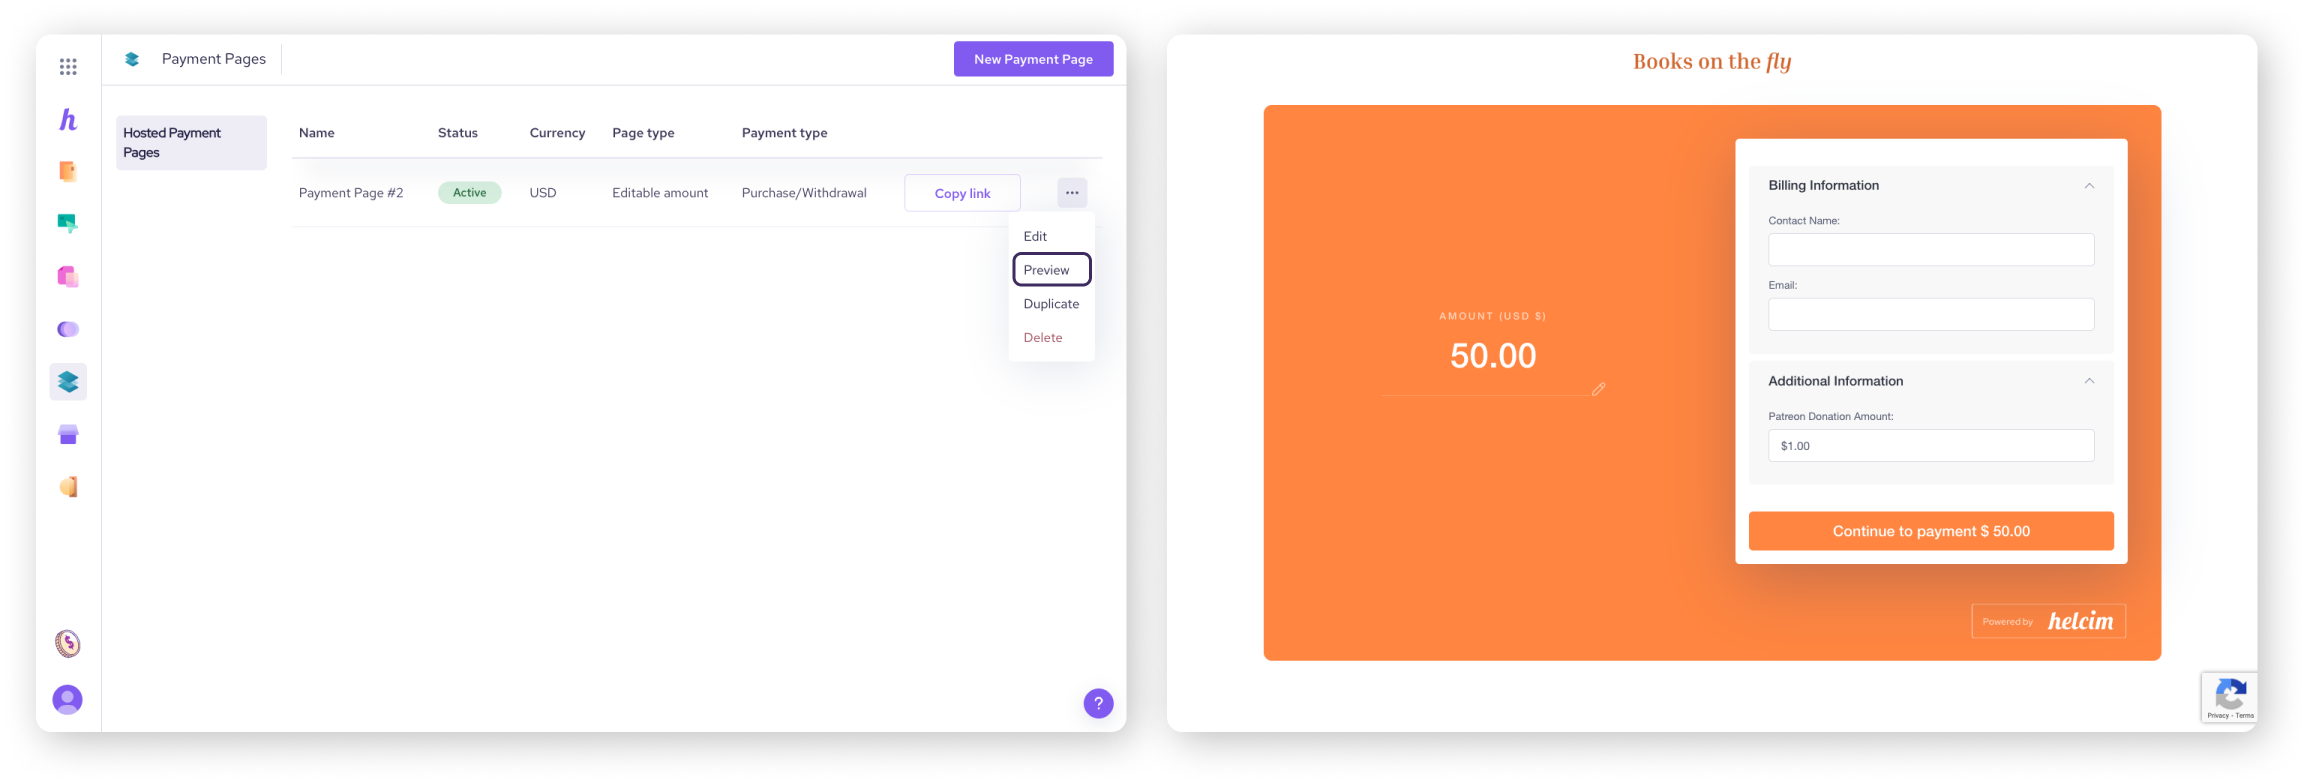
Previewing a page
You can preview a payment page to see what it looks like to your customer.
Hit Save in the payment page editor to save your progress
From the list of your payment pages, select the three dots to the right of a page
Select Preview
A preview of your payment page will open in a new browser tab
Next steps
Now that you know how to customize your payment pages, you can further enhance your knowledge by learning about:
Managing your payment pages: learn how to edit, delete, or duplicate your payment pages
Integrate your payment page: learn how to add your payment page onto your business website
FAQ
How do I ensure my payment page looks good on mobile devices?
Helcim Payment Pages are designed to be responsive, meaning they automatically adjust to different screen sizes. However, it's always a good practice to test your page on a mobile device to ensure optimal viewing.
You can easily do this by scanning the QR code for the page using your device camera. The page will automatically open in your mobile browser.
Can I change the font on my payment page?
There’s currently no way to adjust the font for your payment page within the page editor.
If you want more flexibility in how your page is styled, consider working with a developer to implement HelcimPay.JS, our low-code integration option.