In our ongoing commitment to cost-effective solutions for small businesses, we will be deprecating the ZJ-5809 Lightweight Thermal Printer immediately. We will still be offering support and troubleshooting assistance for merchants to use. In line with this, we are excited to introduce the Helcim Smart Terminal as a comprehensive and streamlined POS solution, including built-in printed receipt functionality. You can now pre-order the Helcim Smart Terminal on your Helcim dashboard.
Follow the setup instructions below to connect the Helcim Payments app with the ZJ-5809 Lightweight Thermal Printer.
First, make sure the sticker is removed from the battery's charging surface.
- Remove battery cover
- Remove battery from printer
- Turn battery over to see charging surface
- Remove sticker
Workstation Instructions For Windows
To begin, you will need to install the drivers to connect the printer to your Helcim Payments app. You can access the necessary files here.
Click on Next to begin the installation.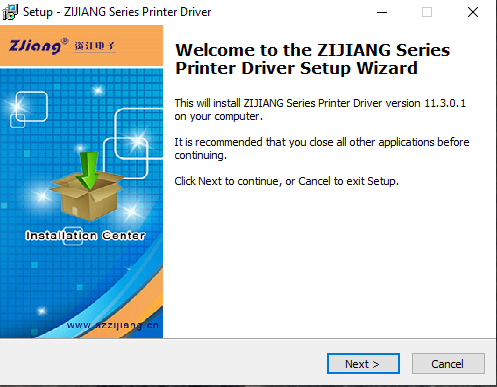 Then select Install.
Now, you will need to connect the printer to your device using the USB cord, once it is connected select ZJ-58 Series Printer. Make sure your printer is turned on by pressing the power button on the printer. A blue light under the battery symbol will indicate that it is on.
After this is done, click on USB Port Check in the setup wizard to continue the installation. The printer will now print a receipt with a message similar to current printer USB port is USB001.
If you get an error message that states Not USB Printer please check out our troubleshooting tips at the bottom of this article.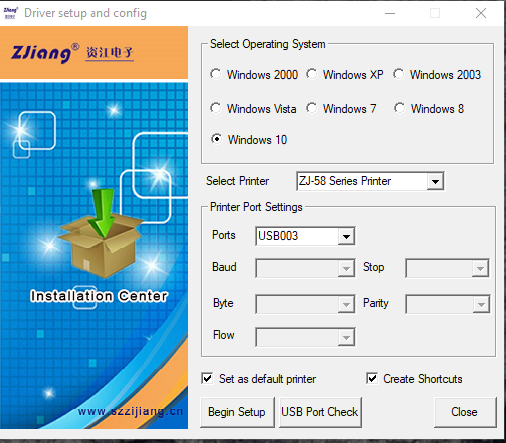 Once the port has been confirmed with a receipt print out, click on Begin Setup to continue. Once the setup is completed, a properties window will be available. In the properties screen, do not change the printer name.
If you want to test the printer you can select Print Test Page, otherwise select OK to close the screen.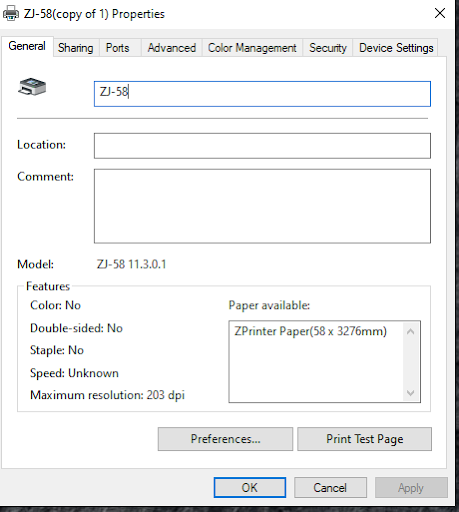
Once your setup is complete, you can open the Helcim Payments App and navigate to Settings and Local Peripherals..jpg)
Once you are on the Local Peripherals page, click on Add Printer. You can now create a custom name using the textbox for Printer Nickname so it is easily identifiable. Next, wait for the system to finish scanning the printer, then select ZJ-5809 Thermal Printer from the list under Printer Name.
Once you can see the printer, click on Save to add the printer..jpeg)
You should now see the printer displayed in the app.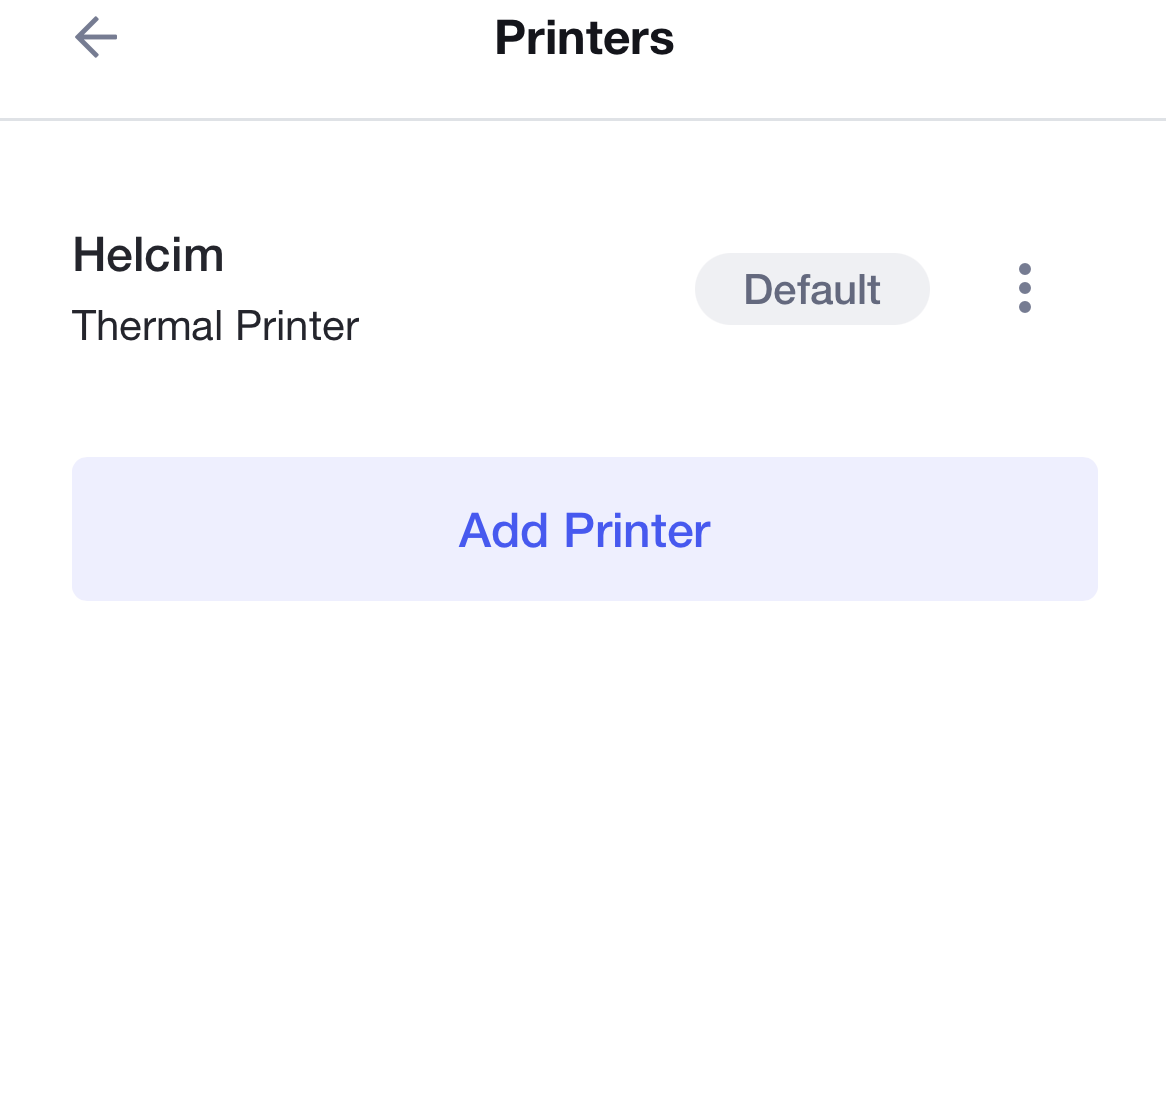
You can now print your receipts from any point within the Helcim Payments App without having to print preview the receipt first.
Workstation Instructions For macOS
To begin installing the printer on your Mac Workstation, you will need to start by downloading the files. You can access the necessary files here.
Next, open the ZJ-5809Driver.pkg, then open and run the installer.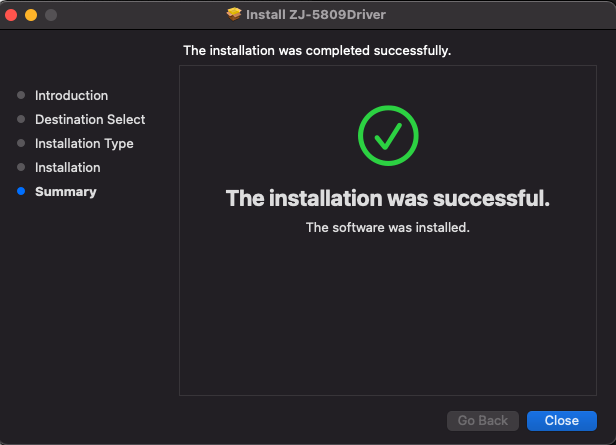 Once this is complete you can click Close.
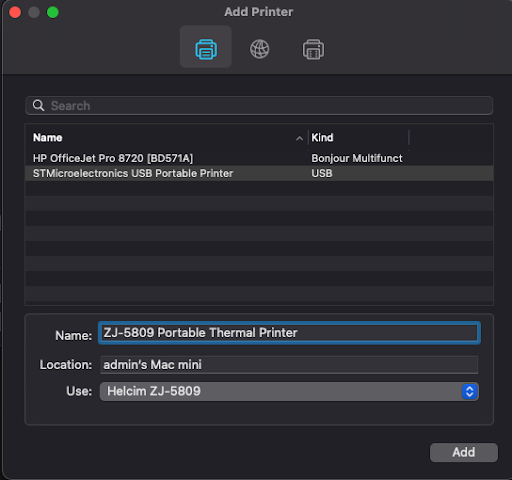
Use the keyboard shortcut Command and SPACE then search for Printers and Scanners and click Add (+) to set up a printer.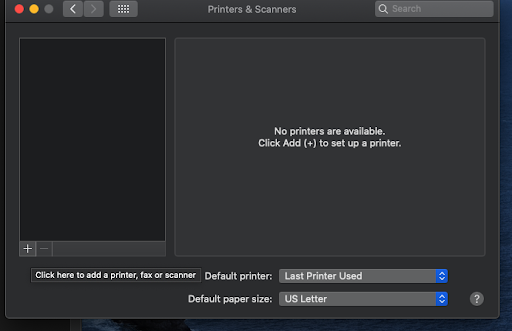 Next, select STMicroelectronics USB Portable Printer. A test page will print.
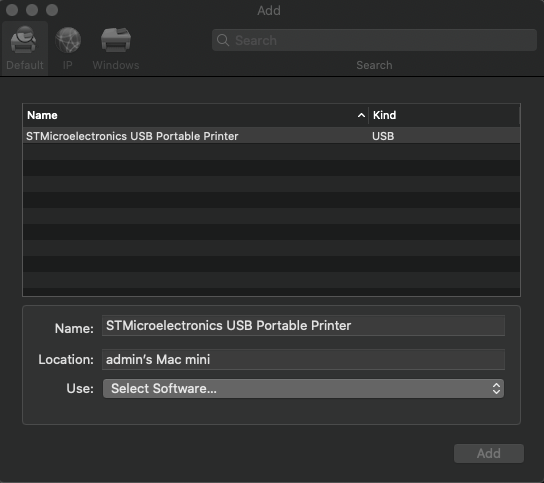 Under Use choose Select Software to open a new window, then search through the list and select Helcim ZJ-5809. You can choose to change the name of the printer to ZJ-5809 or leave it as is.
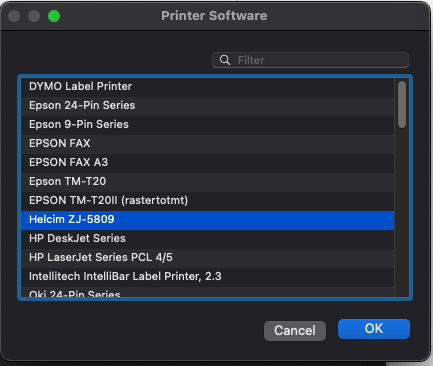
 The printer setup is now complete and you should see the printer displayed on your device.
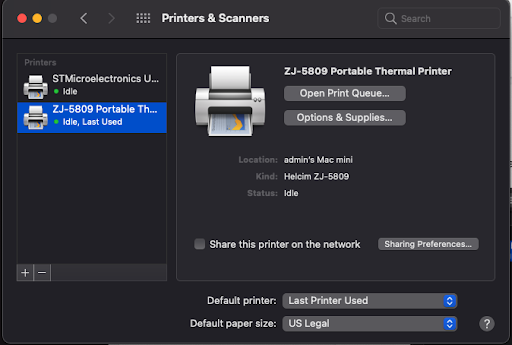
Once your setup is complete, you can open the Helcim Payments App and navigate to Settings and Local Peripherals..jpg)
Once you are on the Local Peripherals page, click on Add Printer. You can now create a custom name using the textbox for Printer Nickname so it is easily identifiable. Next, wait for the system to finish scanning the printer, then select ZJ-5809 Thermal Printer from the list under Printer Name.
Once you can see the printer, click on Save to add the printer..jpeg)
You should now see the printer displayed in the app..PNG)
You can now print your receipts from any point within the Helcim Payments App without having to print preview the receipt first.
Tablet and Mobile Device Instructions for Android
To begin installing the printer on your mobile device or tablet, start by turning it on. Once the printer is on, it will be automatically detected by your device.
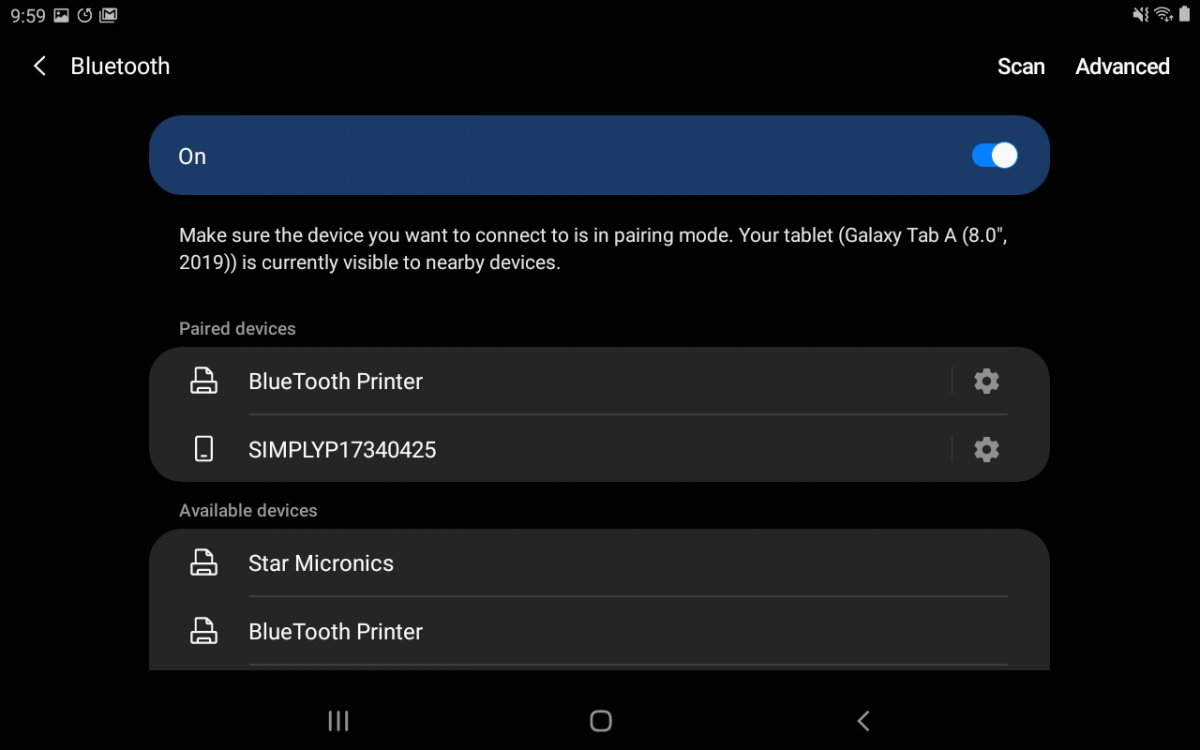
Next, open your device's Bluetooth settings and find the Bluetooth Printer.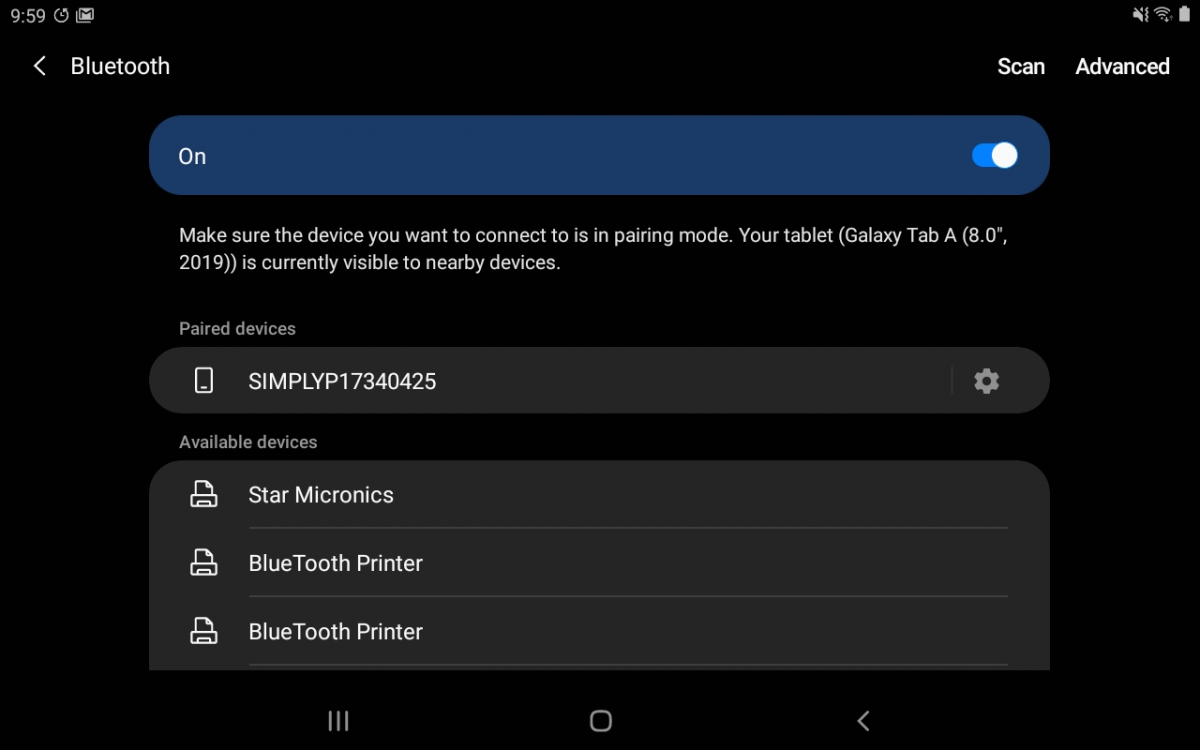 Select the Bluetooth Printer and pair the printer with your device. When prompted for the PIN, enter with 1 2 3 4 or 0 0 0 0.
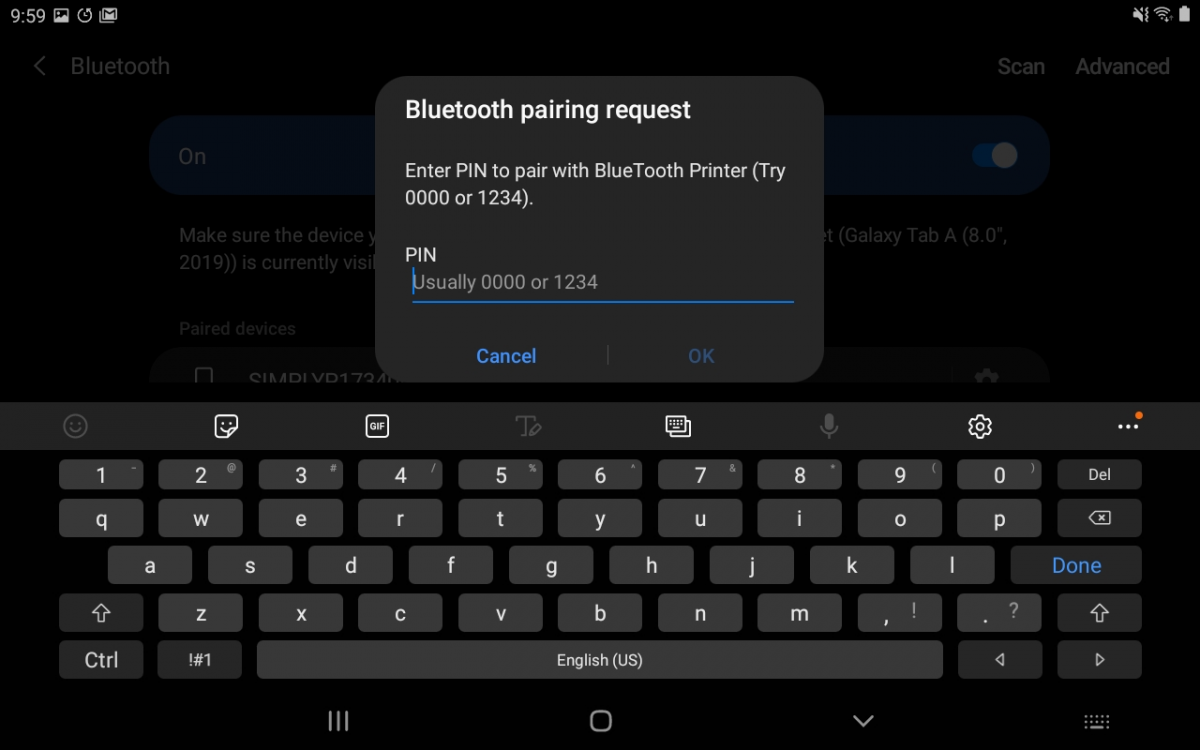
 Once you have successfully paired the Helcim Payments app with the printer, open the app and select Settings Icon and select ZJ-5809 Portable Thermal Printer from the list of available devices.
Your printer is now installed and ready to use.
Tablet and Mobile Device Instructions for iOS
To begin connecting the printer with your Helcim Payments app open the app and click on the Settings icon. Next, select Local Peripherals and Add Printer..jpg) The app will now begin scanning for all available ZJ-5809 Thermal Printers and will populate the field under Bluetooth Name when you select the drop-down menu.
The app will now begin scanning for all available ZJ-5809 Thermal Printers and will populate the field under Bluetooth Name when you select the drop-down menu.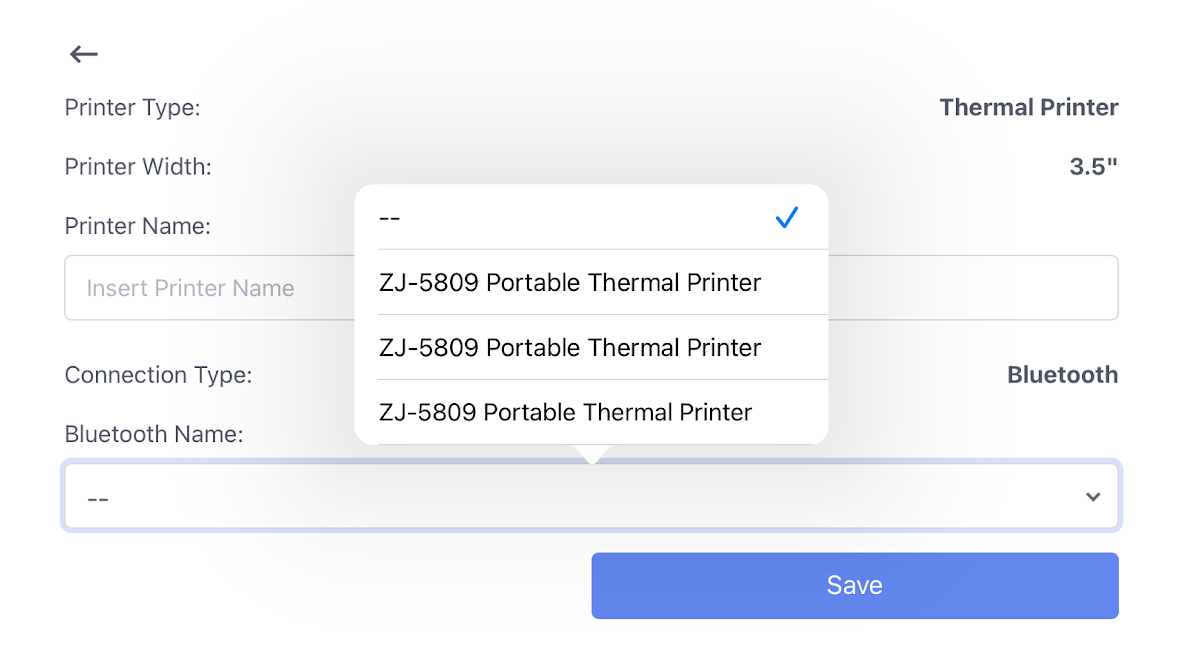 After selecting the printer, you can customize the name using the Printer Name text box so you can uniquely identify that print. Ex. Front Desk Printer, Kitchen Printer, Sales Desk A
.jpeg) After you have selected and named your printer, you can select Save. If this is the only printer added to your app it will be automatically assigned as your default printer.
After you have selected and named your printer, you can select Save. If this is the only printer added to your app it will be automatically assigned as your default printer.
.PNG)
Your printer is now installed and you're ready to begin printing receipts.
Troubleshooting the ZJ-5809 Lightweight Thermal Printer
Here are some helpful tips for installing and using the ZJ-5809 Lightweight Thermal Printer.
The indicator light is flashing red when printing:
- This can be due to the printer head becoming too warm, if printing no longer works please contact Helcim Support for assistance.
You can't search for the printer when connecting it by Bluetooth:
- This can be due to printer defects on certain devices, confirm you're installing the printer on a supported device.
The error icon is flashing red when printing:
- This usually means the printer tray is empty, please reload the paper.
The receipts include additional characters at the top once printed:
- Try restarting the printer, then reprint a receipt. If the issue continues please contact Helcim.
Receipts are printing gibberish and weird characters:
- The USB cable used to connect the printer to your computer is most likely causing issues. Try swapping the cable for a high quality micro-usb to usb cord and try again. If this issue persists, consider reaching out to Helcim to organize an exchange for a new printer.
The printer isn't charging, or the battery light is flashing red and blue:
- Remove the back of the printer and check if there is a piece of tape blocking the battery from charging properly. Once removed, the printer should charge fully.
When doing a USB Port Check, the message Not USB Printer appears: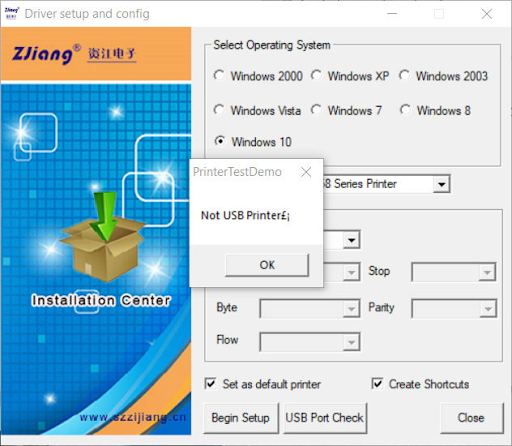
- Open Printers and Scanners. Navigate to Bluetooth and Other Devices.
- Scroll down to other devices and see if USB Portable Printer exists.
- If it does exist, return to the setup and select one of the following from the Ports dropdown: USB001 (most common option), USB002, or USB003. Once selected, press Begin Setup and if it proceeds to the next setup screen then the printer was added successfully.
- If USB Portable Printer does not exist, then try with a different micro USB cord. If this problem persists then a replacement printer will be required.
The printer stopped printing receipts or printed a partial receipt before stopping:
- This could indicate there's a connection issue between the printer and the computer. This will cause the printer to pause its printing until the issue has been resolved. If this ever occurs verify the cable that is connected to your printer then proceed to the following steps:
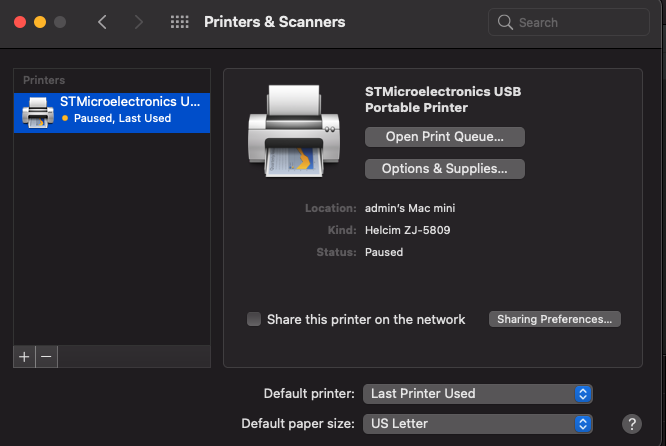
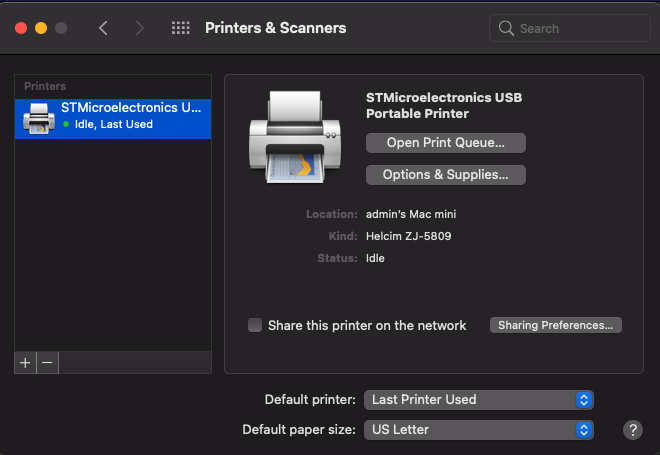
- Go to Printers and Scanners.
- If you see this image, the printer is paused and will need to be resumed.
- Select the printer and there will be a list of the print jobs in the queue.
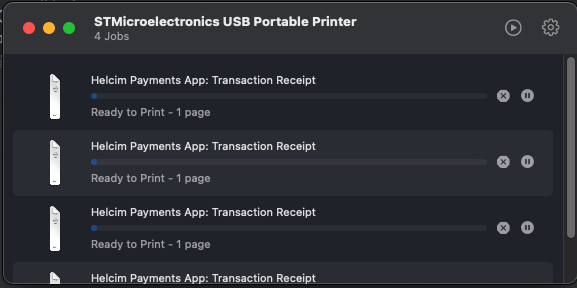
- Simply press the play button in the top right corner and the printer should resume. If the printer is connected properly and the issue still persists, remove the printer and re-install it following the install instructions. During the installation process, verify that the test page is still printing. If it does, then the issue should be resolved after setup.
- After all the steps above are completed you should see the image below, indicating your printer is ready and able to print again.
- If after all these steps the issue is not resolved, consider switching to a new micro USB to USB cable. The current cable may be causing the difficulties.
During installation the following message appears and the install cannot be completed: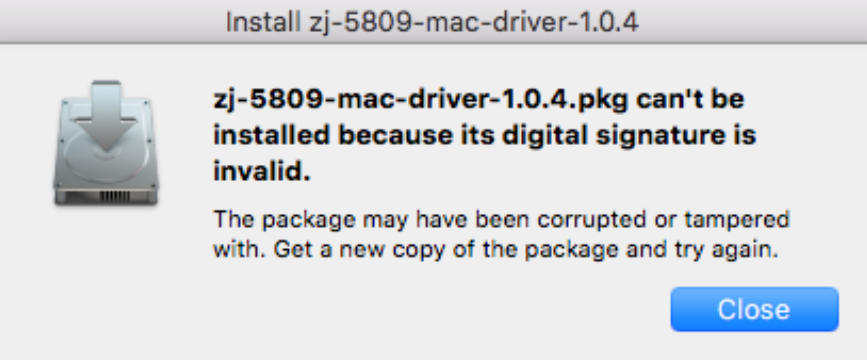
- Normally when install drivers/packages are created, companies create a digital signature to verify that the software is coming from a trusted source. This ensures that antiviruses and other security applications do not mark them as malicious software. However, the digital signature used to create the printer driver was for newer versions of MacOS, so older versions cannot verify the signature. Due to this we have a separate install file located here that does not have a digital signature. Apple will think that this software is malicious software due to the lack of a signature so to circumvent this you can bypass it by doing one of the following:
Option 1: Press Command + Click install file and press open: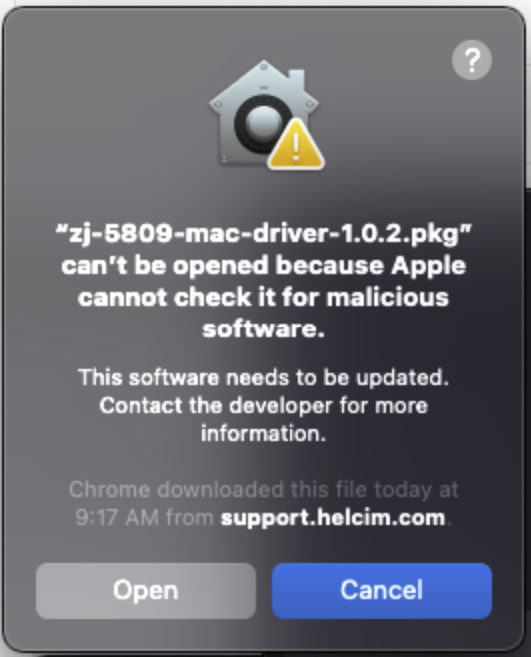
Option 2: If that does not work, press Command + Space and search for Security and Privacy. Then you will see something similar to the following: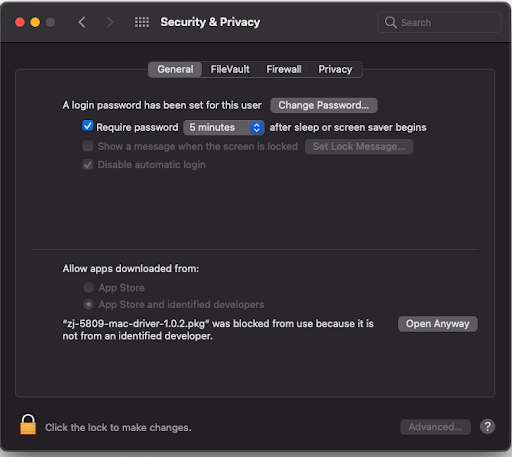
Select Open Anyway to bypass the security warnings and the installer should run as normal.