A hosted payment page allows you to easily collect online payments from your customers.
This guide will walk you through the process of creating one, from accessing the tool to setting up your page and preparing it for customization. By the end of this process, you'll have a functional payment page for selling a product, collecting donations, or receiving invoice payments online.
In this article
Accessing payment pages
To get started, you'll need to navigate to the Payment Pages tool within your Helcim account.
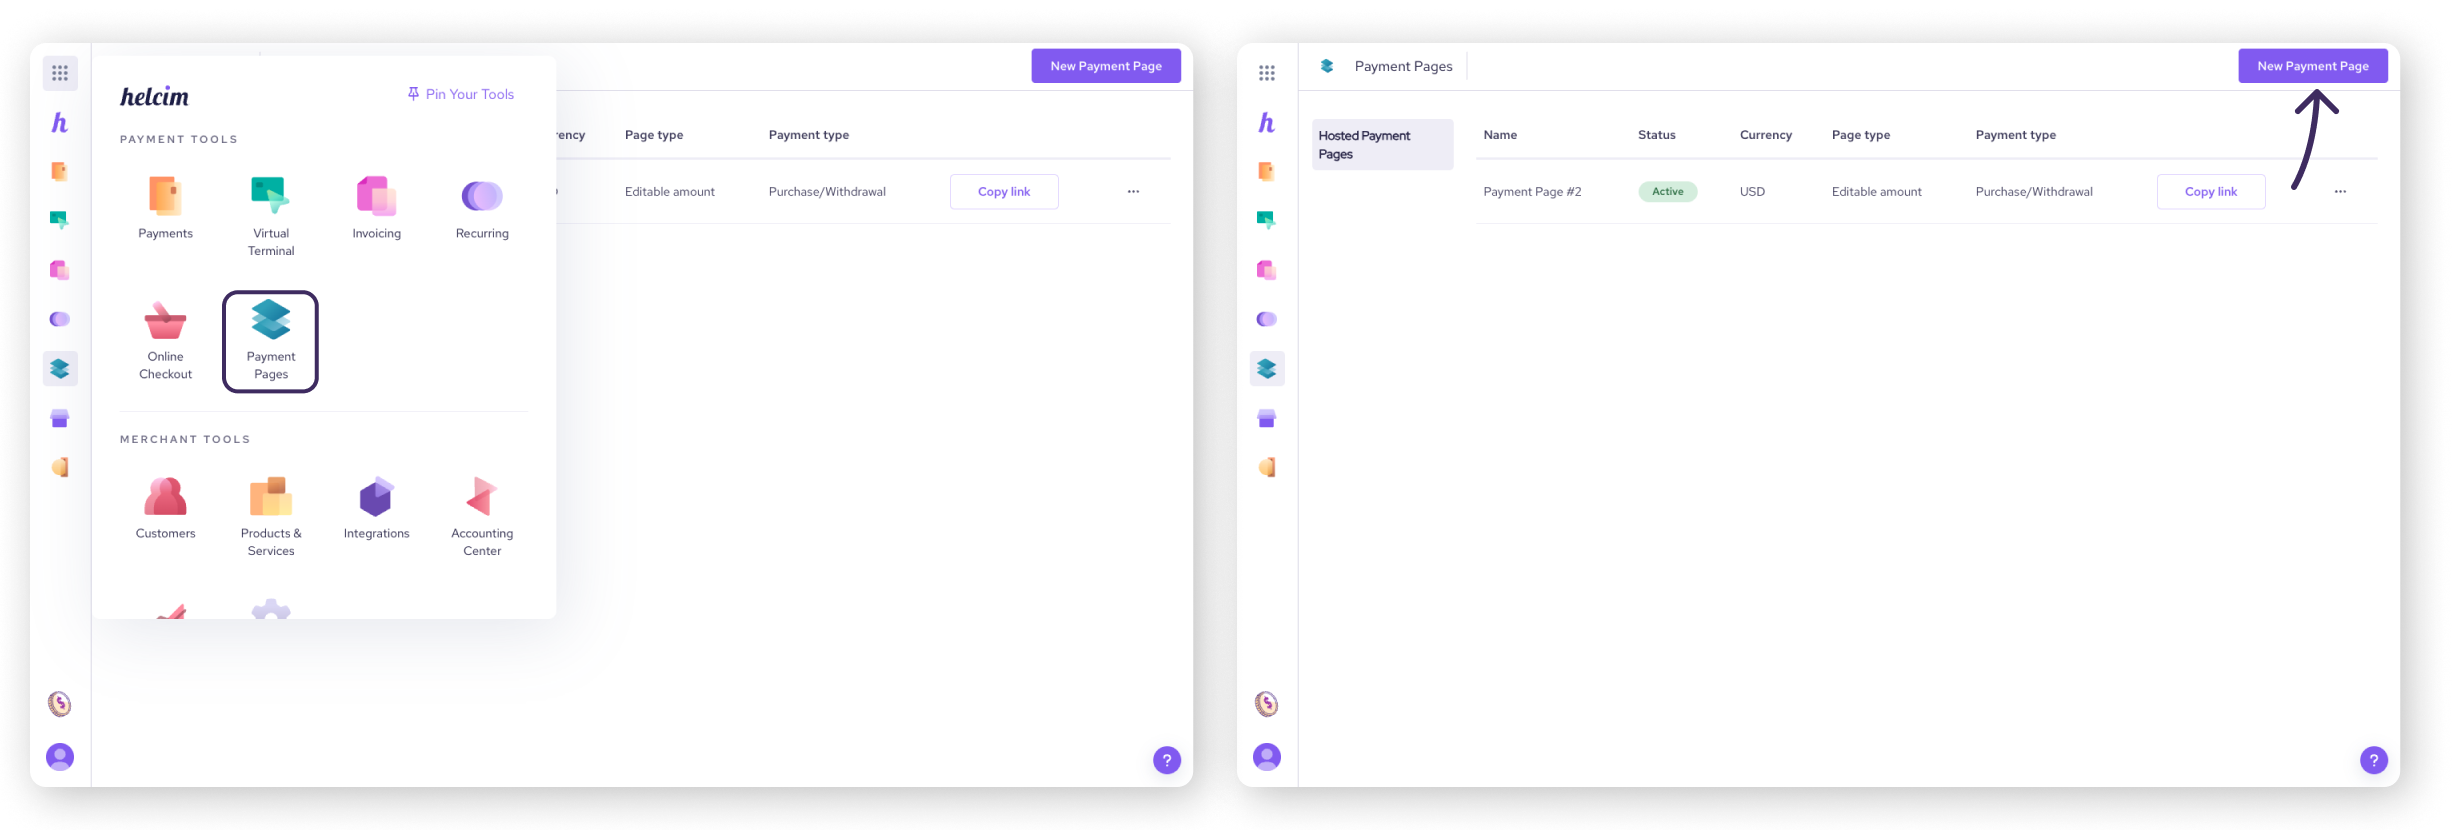
Click on All Tools in the main navigation menu.
Select Payment Pages from the list of tools.
Click the New Payment Page button.
Choosing a payment page type
Helcim offers several pre-designed page types to streamline your setup. Each type is tailored to a specific purpose, with suggested fields to get you started.
Select the type of page below you want to create from the available options.
Customer registration
Use these pages to collect and store customer payment information, such as for classes, events, or future transactions.
Invoice payment
These pages are designed for customers to pay invoices, with options for both set and variable amounts. They're ideal for accepting payments from other systems where customers can enter their invoice number and the amount due.
Editable amount
Allow customers to pay any amount they choose, making these pages perfect for donations.
Fixed amount
Use these pages to collect a specific, unchanging amount, such as for a membership fee or a set product price. The customer cannot edit this amount.
Product purchase
Enable customers to purchase a product or variant directly through a link. These pages are great for selling single items.
Configuring payment page settings
Basic settings
At this stage, you'll define the basic settings for your payment page and configure options specific to the page type you selected.
Step 1: Configure your basic settings
Complete the following fields:
Name your page: Enter a descriptive name for your payment page.
Keep active/disable: Choose whether to keep the page active and accessible or disable it.
Confirm page type: Verify that the selected page type from above is correct.
Step 2: Configure the settings for your chosen page type
What you see here will vary depending on the type of page you selected.
Customer registration: there are no specific settings, move onto Step 3.
Invoice payment: set default, minimum, or maximum amounts the customer can pay towards an invoice, and optional presets for an invoice or customer ID.
Editable amount: set default, minimum or maximum amounts the customer can pay.
Fixed amount: enter one amount the customer is required to pay.
Product purchase: select a product or product variant from your catalogue, or add a custom product for your customer to pay for.
Step 3: Configure your transaction settings
Complete the following fields:
Enable Fee Saver: Helcim Fee Saver allows you to pass processing fees on to your customer when they choose to pay with a credit card.
Enabling Fee Saver will lock the payment page to accept both Credit Card or ACH, and set the transaction type to Purchase.
Payment method: Choose to accept credit cards, ACH bank payments, or both.
Credit card transaction type: Select Purchase or Pre-auth (pre-authorizations).
Currency: Canadian merchants can accept payments in both CAD and USD. For more information, contact our support team.
Terminal: If you have multiple terminals, select the terminal to be used for processing card transactions.
Step 4: More Settings (Optional)
Select the More Settings (Optional) dropdown for more options:
Customer settings: Choose to allow or force customers to log into the Customer Portal to view the payment page. Forcing login allows transactions from returning customers to be linked under a single customer profile in Helcim.
Product settings: These settings are only visible if the Page Type is set to "Product Purchase." Customize how products and totals are displayed and what actions customers can take to edit their purchase.
Page forwarding: Enter a URL to redirect customers to after a successful transaction or if a transaction is cancelled.
Developer Settings: These are specialized settings for integrating Helcim Payment Pages with other systems. Because Payment Pages are designed to be a no-code solution, most users won't need to adjust these settings. However, they offer advanced functionality for developers who require more complex integrations.
Approval Send POST: This setting allows the Helcim system to send a notification to another system when a payment is processed. For detailed information, please refer to our dedicated article on using Approval Send POST.
Enforce Hashing: This setting, available for Fixed Amount pages, adds an extra layer of security by preventing tampering with the payment amount.
| If you're not a developer or comfortable with technical integrations, you can safely skip these settings. |
Select Next to continue building your payment page, or Save to save it and come back later.
Field settings
Select the fields you want displayed to customers.
Set fields to Show, Edit, or Require to control what information you collect.
The minimum required fields are already pre-selected for each Page Type.
Under Custom Field Settings, you can create custom fields to collect specific information by clicking Edit.
| More information on custom fields is available in our article on Customizing Payment Pages. |
Select Next to move onto customizing your page theme, or Save to save it and come back later.
Customizing your payment page
The Theme Settings tab allows you to customize the look and feel of your payment page.
| For an in-depth guide to customizing your payment page, check out our article on Customizing Payment Pages. |
Saving and sharing your payment page
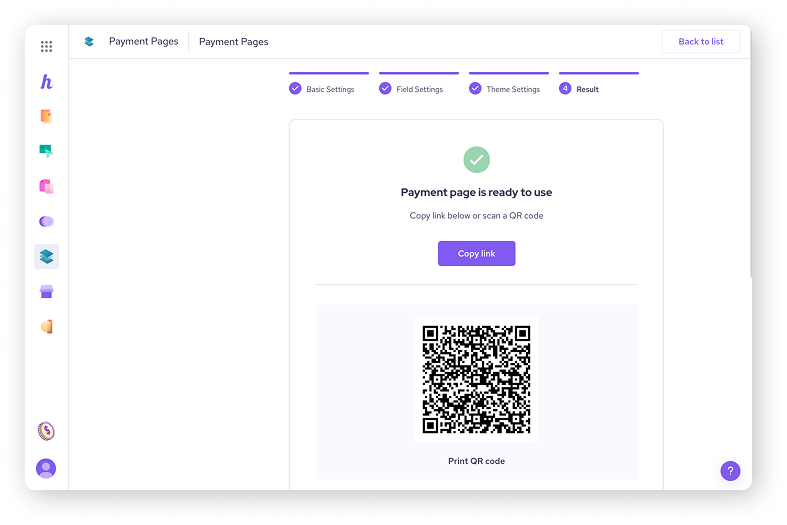
Once you're satisfied with your payment page, click Next to save it and choose how you want to share it with your customers.
There are a few ways you can share your page.
Copy the link: Share the link via email, website, invoices, newsletters, etc.
Print QR code: Generate a QR code for customers to scan.
Copy HTML links: Add the payment page directly to your website.
| Any changes to your Payment Page settings will be reflected in your saved QR codes and links. However, the QR code/URL will be regenerated each time you return to the Results page. |
Next steps
Now that you've created your payment page, these resources will help you get the most out of it:
Customize its appearance: Learn how to tailor the look and feel of your payment page in our article on customizing your payment page.
Understand payment processing: Get to know how transactions are processed with Payment Pages in our article on accepting payment with a payment page.
FAQ
Can I customize the fields that appear on my payment page?
Yes, you have granular control over the fields displayed on your payment page.
For each field, you can choose to Show it, allow customers to Edit the information, or Require them to fill it out. This allows you to collect the precise information you need from your customers.
You can also create Custom fields to gather specific details not included in the standard fields.
How do I share my payment page with customers?
Helcim provides several convenient ways to share your payment page:
You can Copy the link and share it via email, add it to invoices, or include it in newsletters.
You can Print a QR code that customers can scan with their smartphones to access the page.
For website integration, you can Copy HTML links to add the payment page directly into your site.
Can I edit a payment page after it's been created?
Yes, you can edit your payment pages at any time. To do this, go to your list of payment pages, and click on the name of the page you want to edit. From there, you can adjust the Page Information and Payment Page Settings as needed.
Remember to click Save to apply your changes.