Want to give your customers more control and save yourself some admin time? The Customer Portal is a secure website linked to your Helcim account where your customers can log in anytime to manage their own information, view their history with your business, and even pay outstanding invoices.
Enabling the portal empowers your customers and frees you up from chasing down payments or billing information.
In this article
What can customers do in the Customer Portal?
Once enabled, your customers can log into their portal to:
View their order and invoice history.
Pay outstanding invoices.
Update their contact details, billing address, and shipping addresses.
Add new credit cards or delete existing saved cards.
Add new bank accounts (they cannot delete saved bank accounts).
Use the Quick Order button to jump to your Online Checkout (if applicable) while staying logged in.
.png)
Example: editing payment methods in the Customer Portal.
Setting up the Customer Portal
This section covers enabling the portal and adjusting its settings to fit your business needs.
Enabling the portal
Getting the portal running is simple:
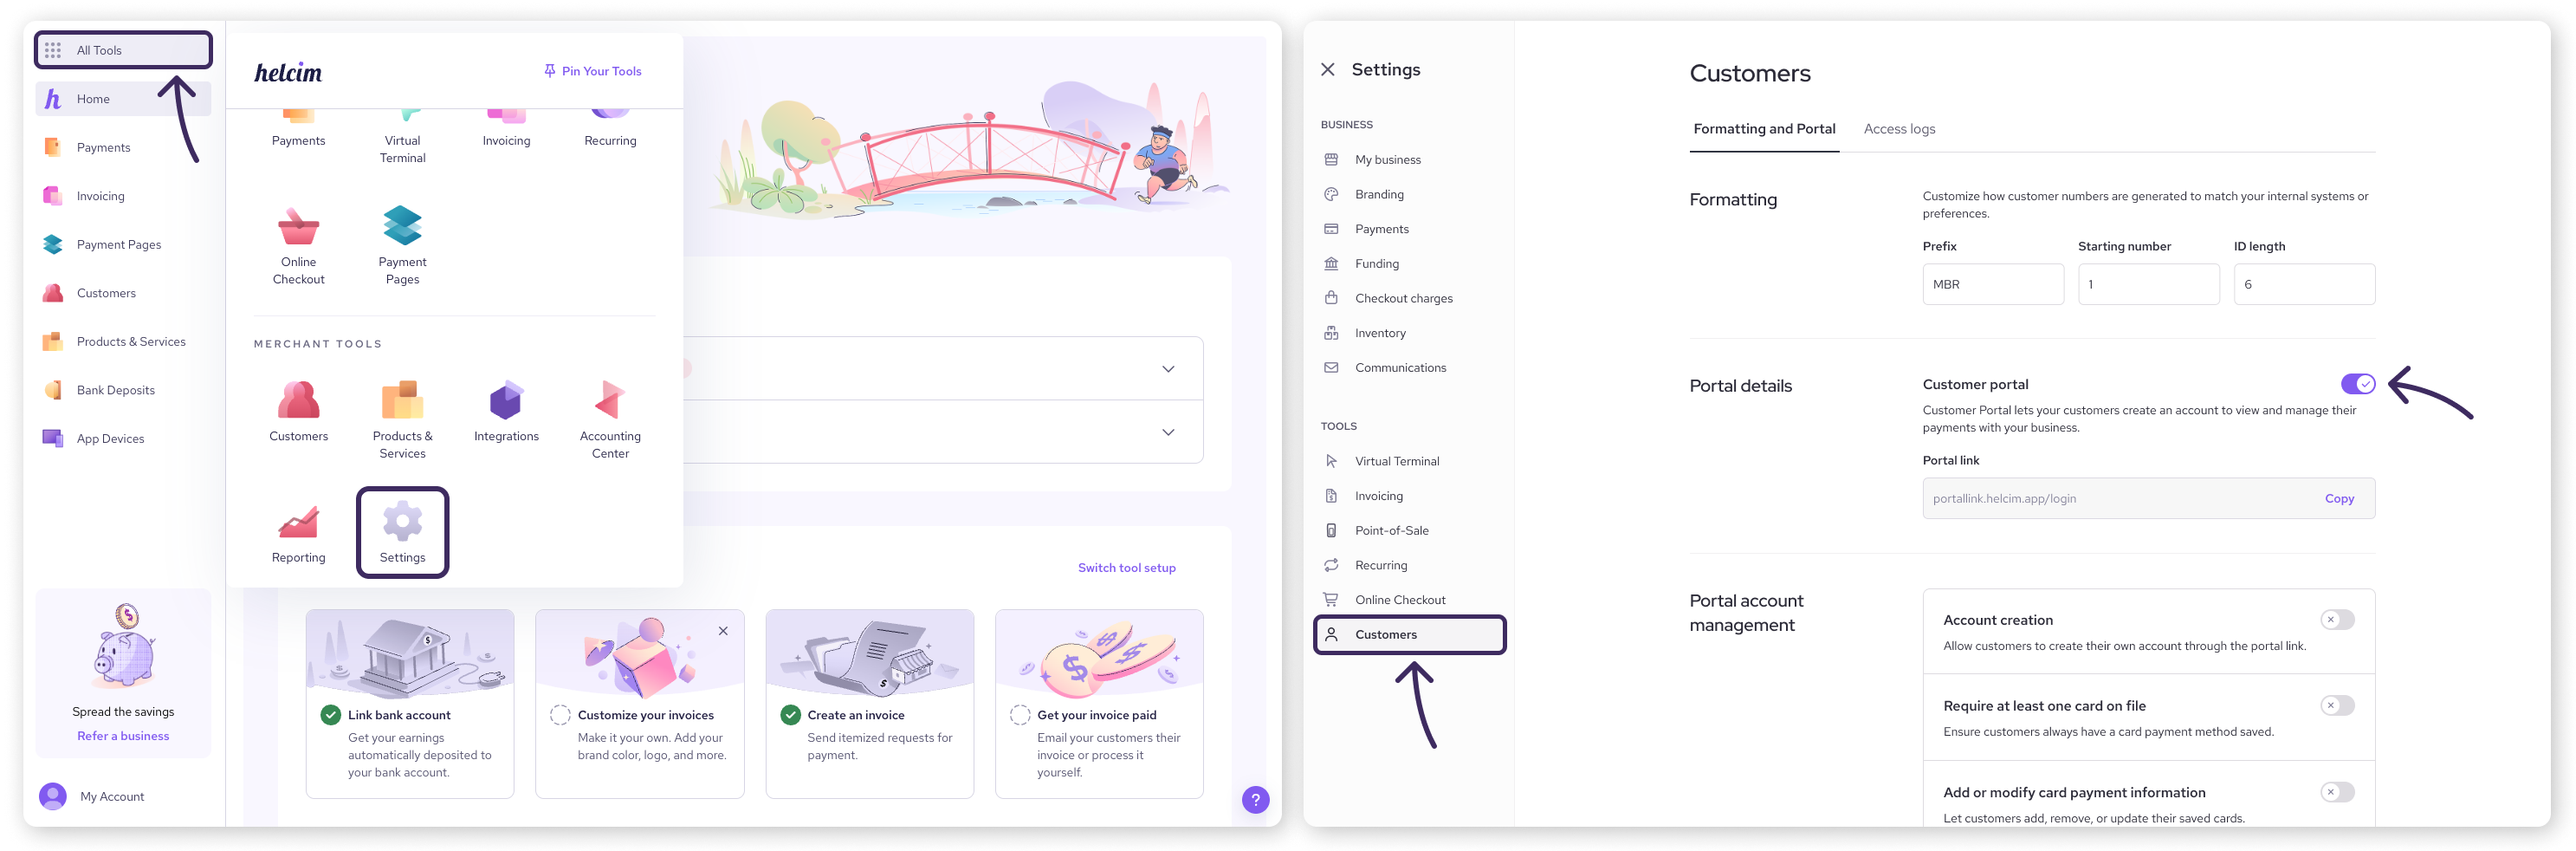
Open the All Tools menu, and then select Settings.
Select Customers from the left-side menu.
Under Portal details, toggle the switch for Customer portal on.
Viewing your portal link
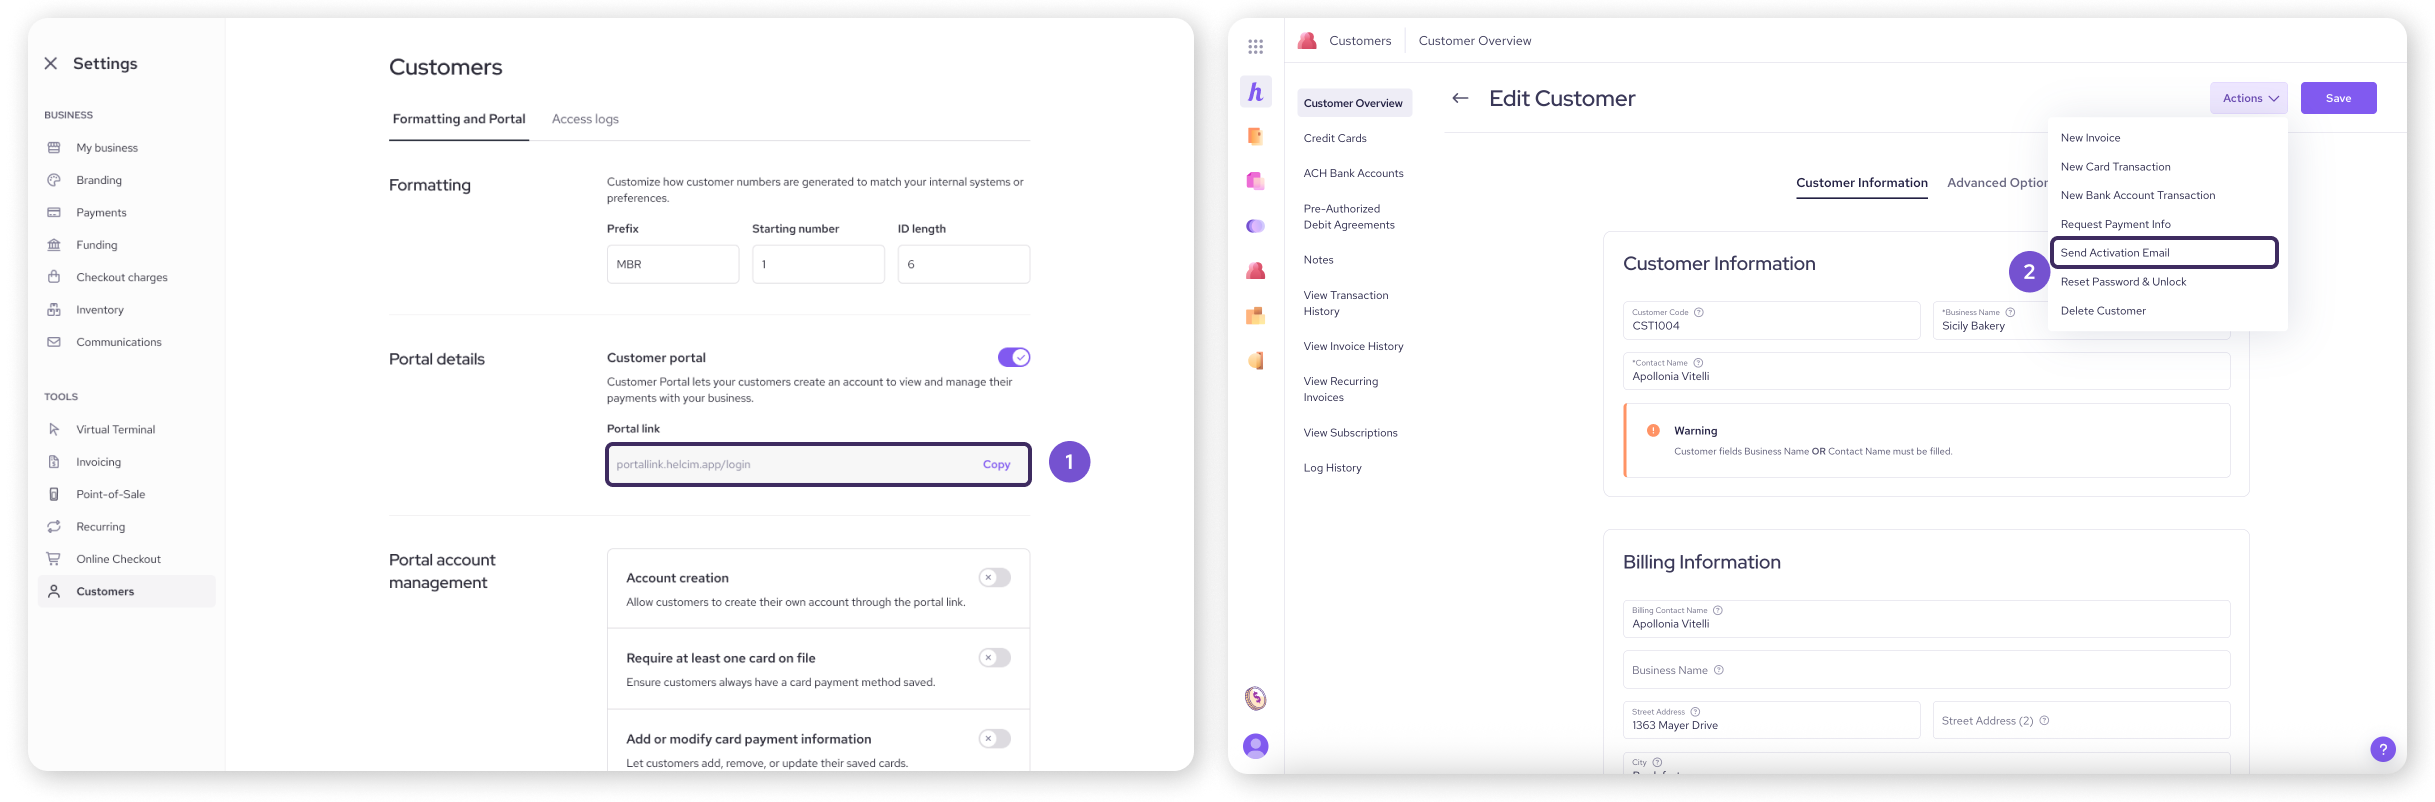
The link to your customer portal can also be found under Portal Details. Click on Copy next to the link to share it with your customers.
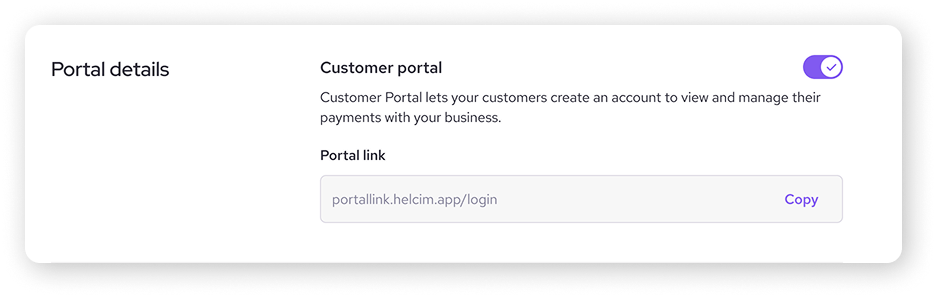
| If you’d like to update this domain name, please contact our Support team. |
Manage portal settings
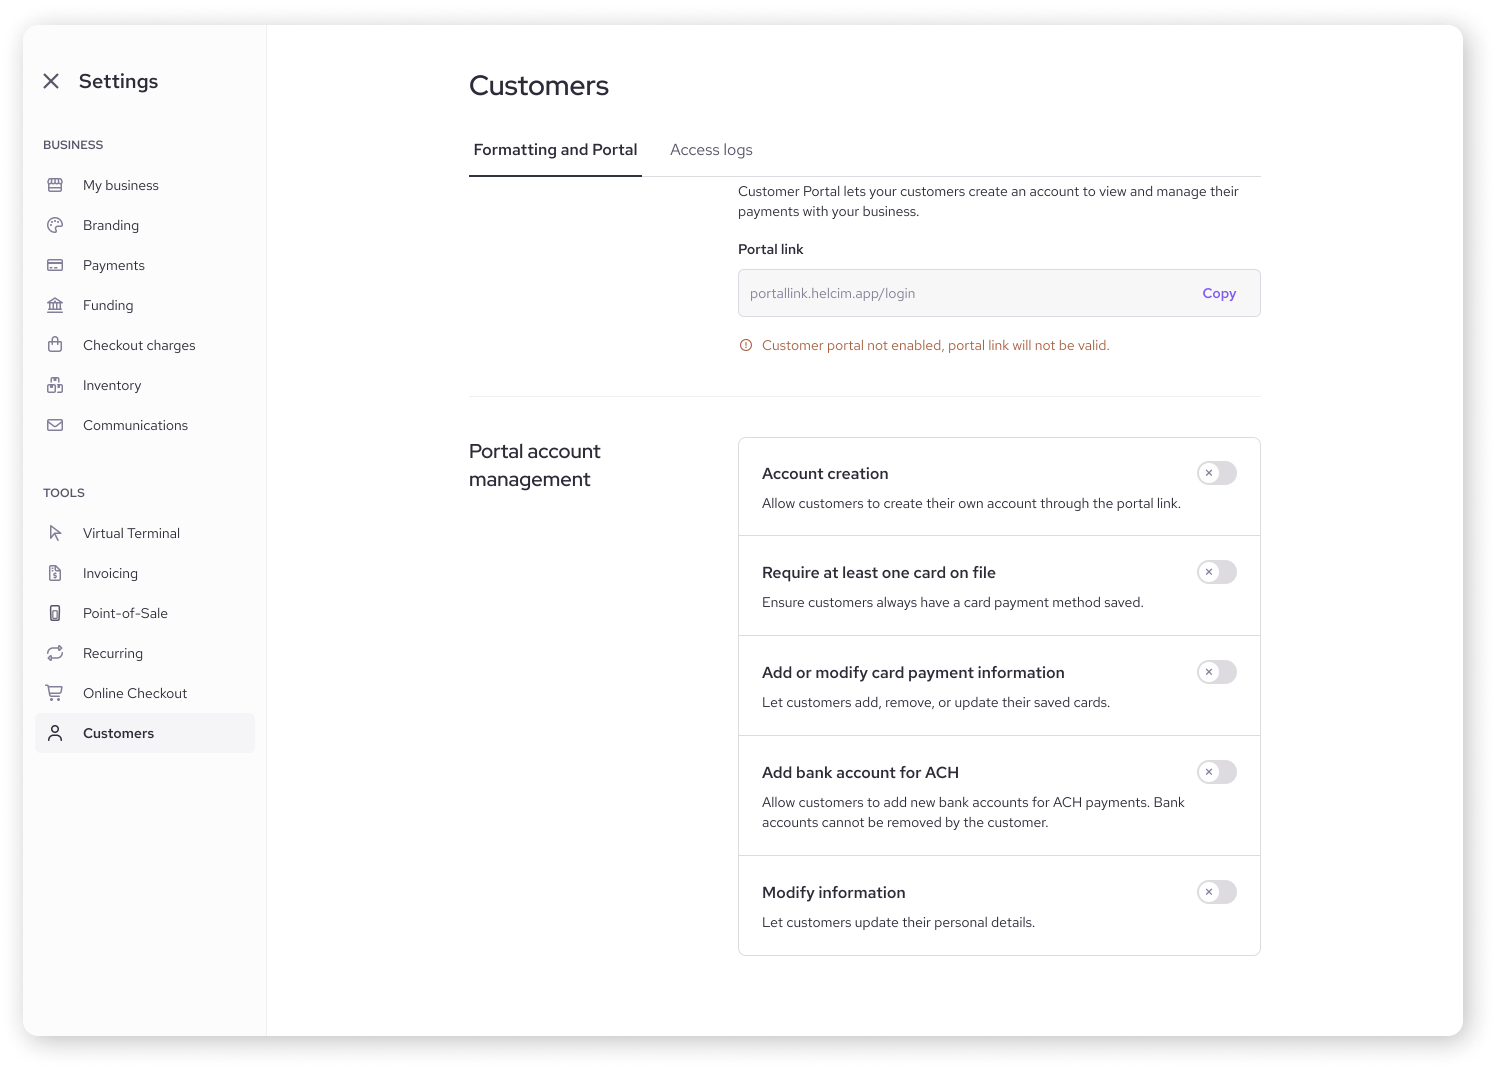
Under the Portal account management section, you can control how customers interact with their profiles:
Account creation: allows customers to sign up for portal access themselves directly from the portal login page. If turned off, only customers you invite can log in.
Required information: this field appears when account creation is enabled. Check the boxes for mandatory details you want customers to provide when they create an account.
Require at least one card on file: require customers to have at least one card saved to proceed through certain checkouts.
Add or modify card payment information: allows customers to add new cards and remove existing ones.
Add bank account for ACH: allows customers to add new bank accounts for ACH payments.
Modify information: allows customers to modify their personal information after creating an account.
| Reminder: customers won’t be able to modify any saved credit card information, as per PCI rules. However, they will have the ability to add new credit cards if you’ve allowed modification. |
Customizing your Customer Portal theme
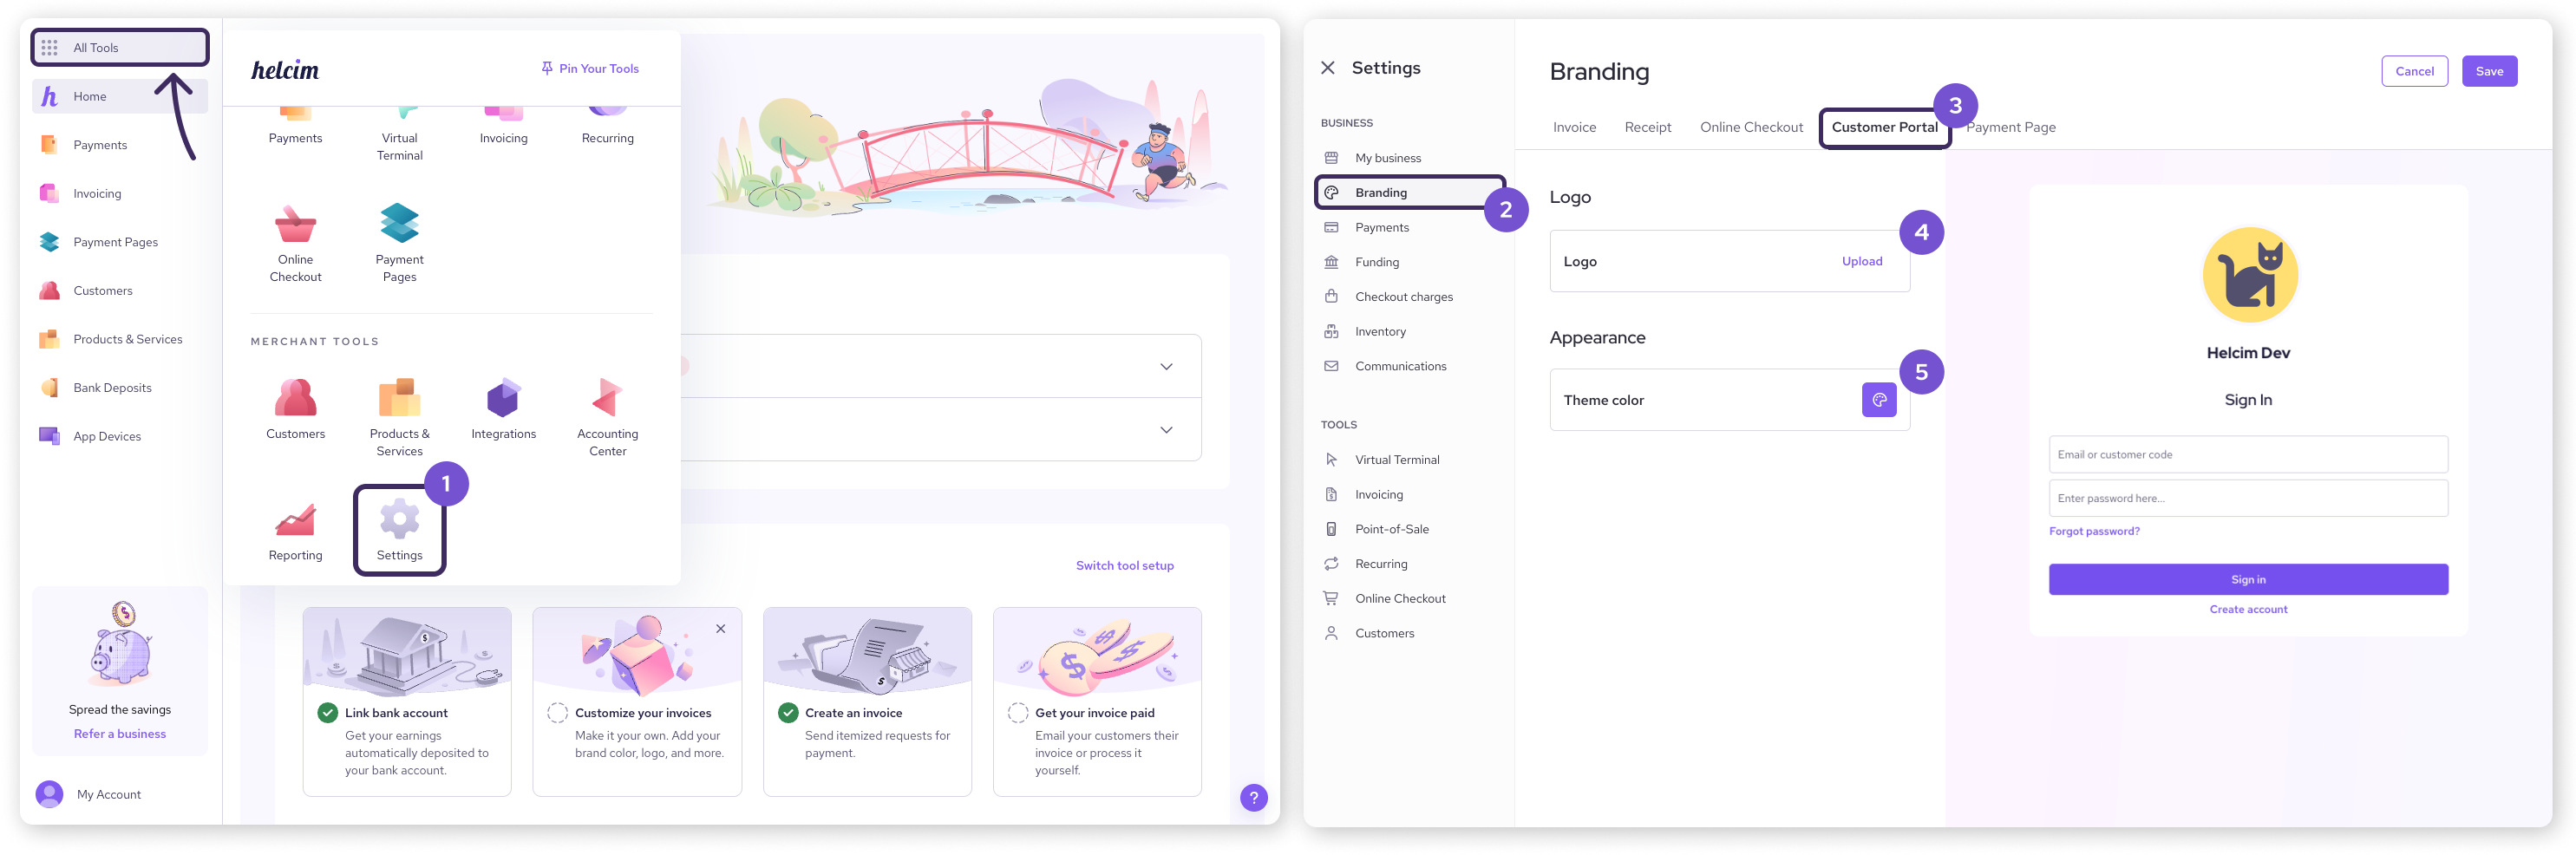
Want the portal to match your branding? Use the ‘Branding’ tab in your Settings page to customize your portal interface.
Open the All Tools menu and select Settings.
Select Branding from the left-side menu.
Select Customer Portal tab along the top of the page.
Select Upload to upload a logo for the portal (JPG or PNG accepted, max 2 MB).
Use the palette icon to change its theme color.
Managing access to the Customer Portal
Control who can access the portal and how.
Sharing the portal and inviting customers
There are two main ways to give customers access:
Share the URL: If you have Account creation enabled in your portal settings, you can simply share the portal URL and customers can sign up themselves.
Send an Activation Email: Invite specific customers (new or existing).
Go to the customer's profile (Customers > Customer List).
Click the Actions button in the top right.
Select Send Activation Email.
Confirm the action. This sends the customer an email with a link and a temporary password, prompting them to log in and set their own password.
Locking or unlocking customer portal access
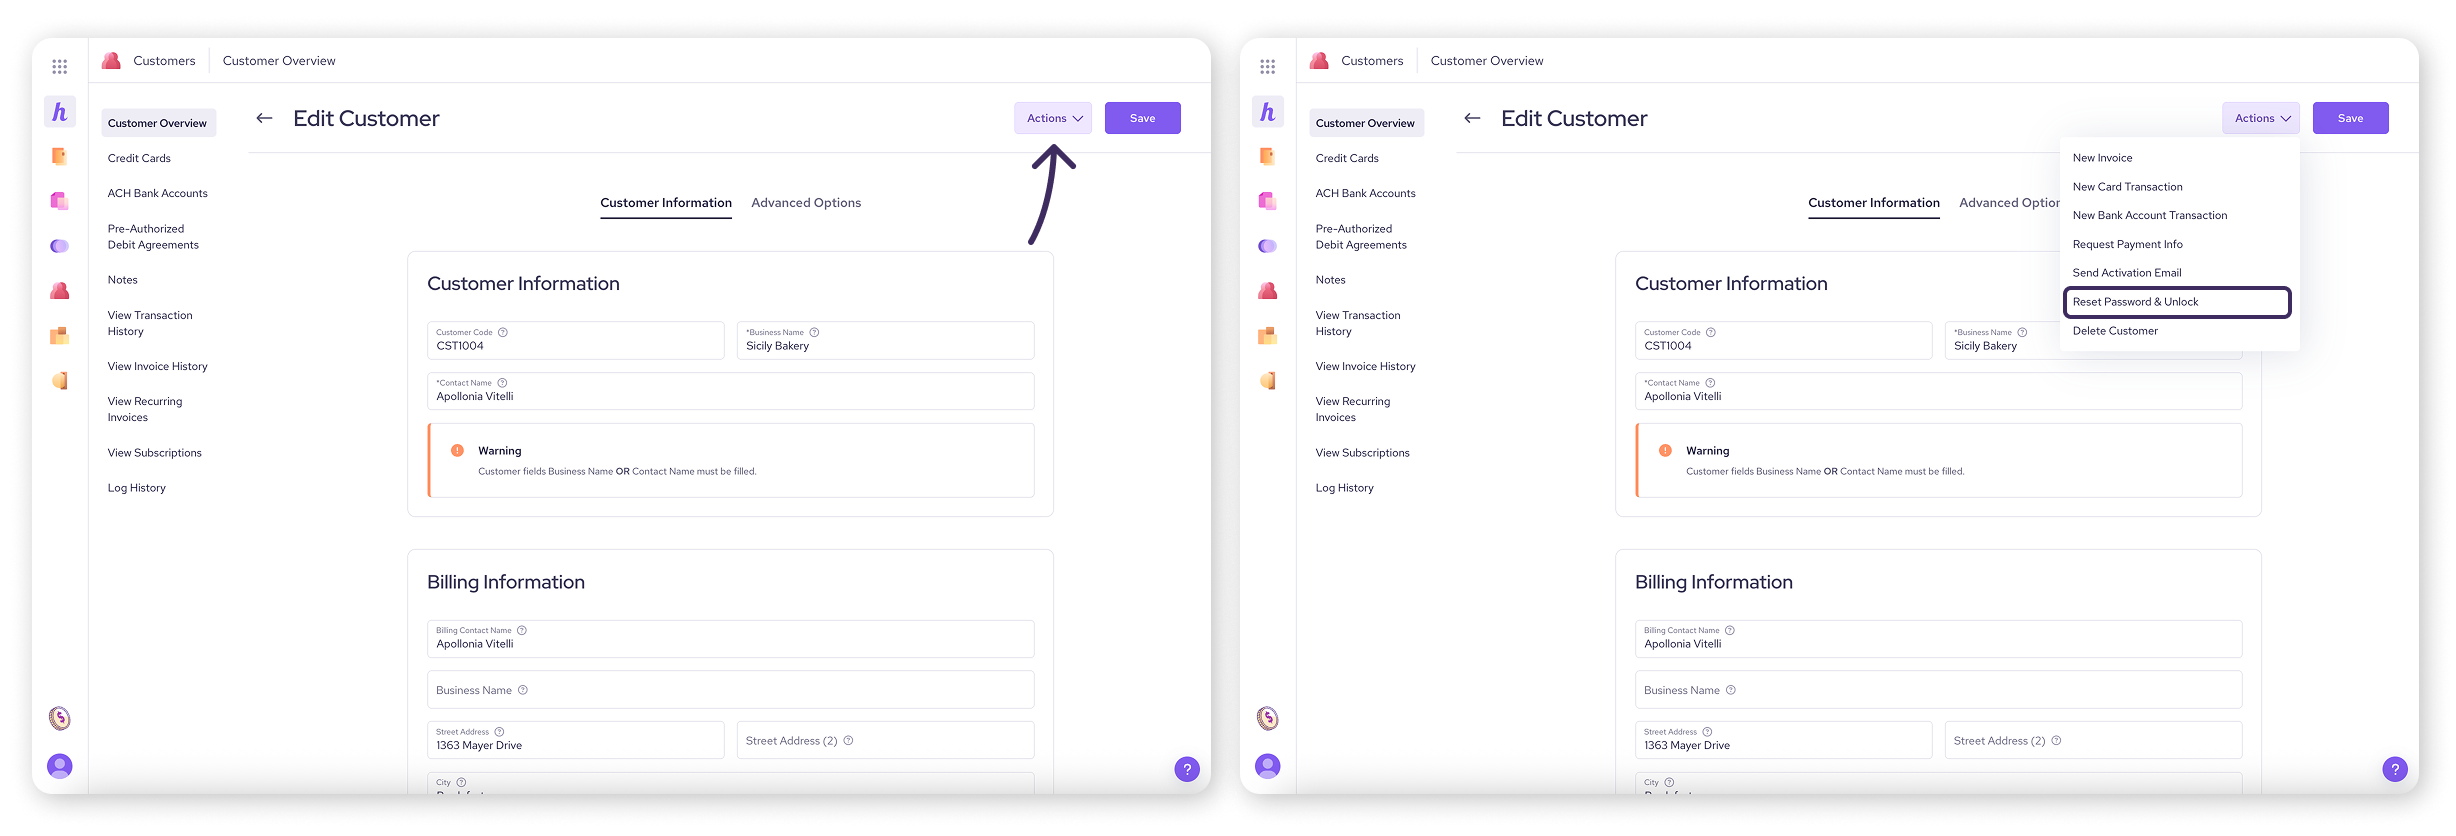
Need to control a specific customer's access? Use the Actions menu on their individual customer profile:
Lock Account: Prevents the customer from logging into the portal.
Reset Password and Unlock: Unlocks a locked account and sends the customer a password reset email, allowing them to regain access.
Viewing Customer Portal access logs
Curious about who's logging into your portal? You can find basic login activity under the ‘Access logs’ page.
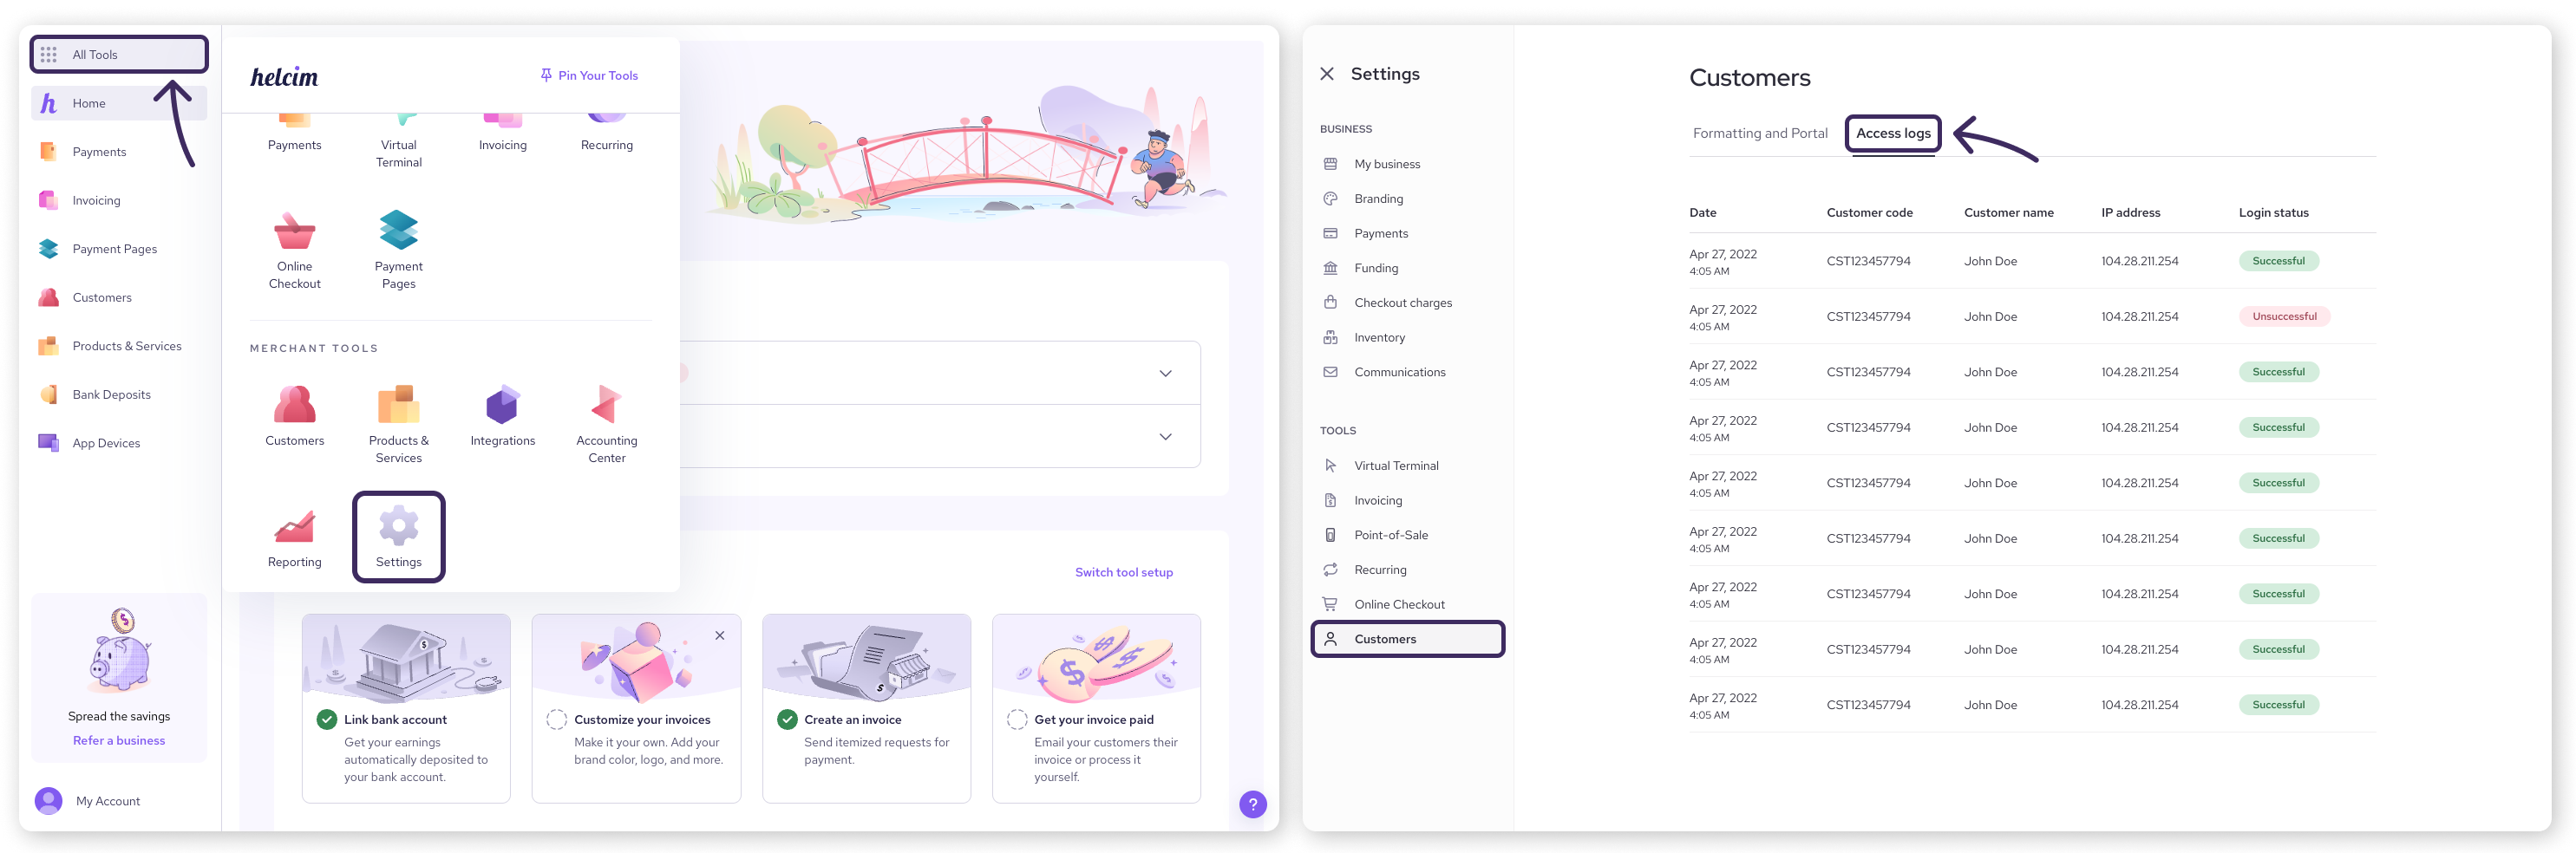
Open the All Tools menu, and then select Settings.
Select Customers from the left-side menu.
Select Access logs from the top of the page.
Here you can view recent login attempts, including success/failure status, IP address, date, and customer code.
Next steps
Learn how to manage your customer’s payment details from your Helcim account: Manage customer credit cards (Card Vault) or Manage customer bank accounts (ACH/PAD).
Go back to the main overview of customer management: Managing your customers.
FAQs
Can I customize the Customer Portal more than just the color?
Currently, the main customization options are the theme color and your business logo in the Branding tab of your Helcim settings page. Other layout and functional elements are standardized.
What if a customer forgets their password?
You can use the Reset Password and Unlock action on their customer profile to send them a reset link. The portal login page also has a "Forgot Password?" link for customers to initiate the reset themselves.
Do I have to let customers create their own accounts?
No. If you prefer to only invite specific customers, keep the Account creation toggle turned off in the Customer Portal settings.