So, you've placed a hold on a customer's credit card, and now you're ready to complete the transaction and collect the payment. Capturing a pre-authorization is the final step that moves the funds from a temporary hold to a completed charge, whether it’s a full or partial amount.
This article will guide you through capturing pre-authorized transactions using both the Helcim POS app and your Helcim dashboard, including how to manage and capture multiple pre-authorizations.
Capture a pre-authorization in the Helcim POS app
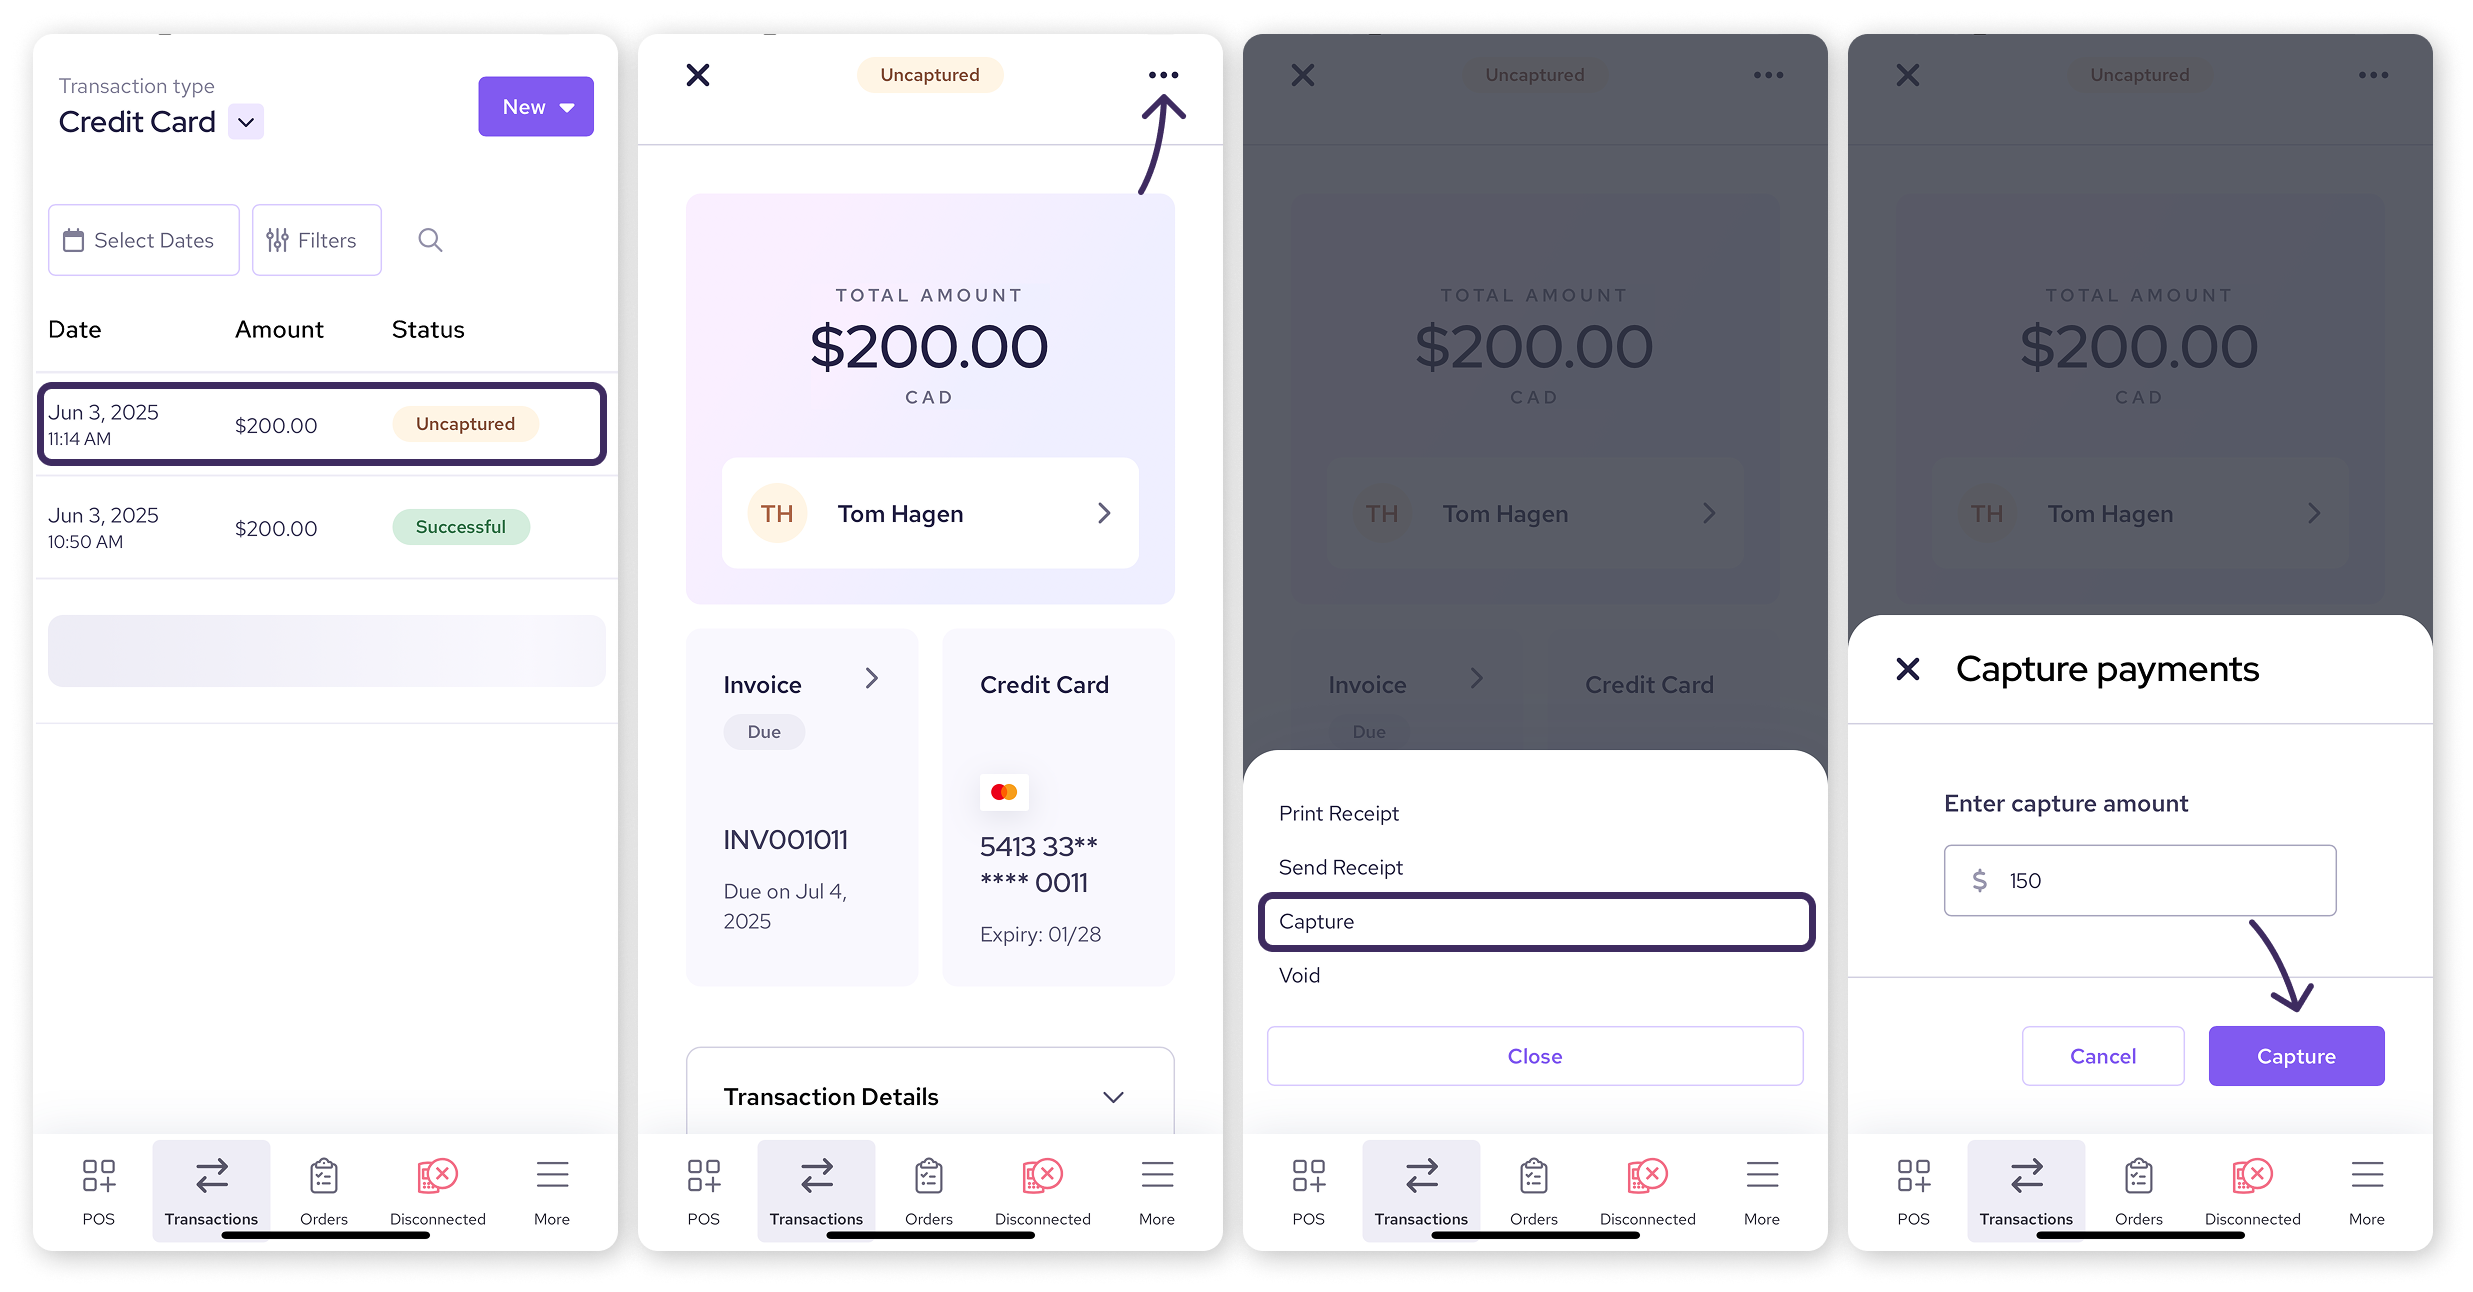
Once you've processed a pre-authorization using the Helcim POS app, you can capture the funds directly from your transaction list.
Open the Helcim POS app and log in.
Select Transactions from the bottom navigation.
Select the specific pre-authorization transaction you want to capture. You should see Uncaptured as the transaction status.
Once the transaction details are open, click on the three dots in the top right-hand corner.
Select Capture from the dropdown menu.
Confirm the amount you want to capture.
Select Capture to complete the transaction.
The transaction will now show as a ‘Capture’ in your transaction list. You will also still be able to see the original pre-authorization. If you captured a partial amount, selecting the original transaction will display the remaining amount under the invoice tile.
Capture a pre-authorization in your Helcim dashboard
You can capture pre-authorized transactions from your Helcim dashboard, which offers more robust transaction management features.
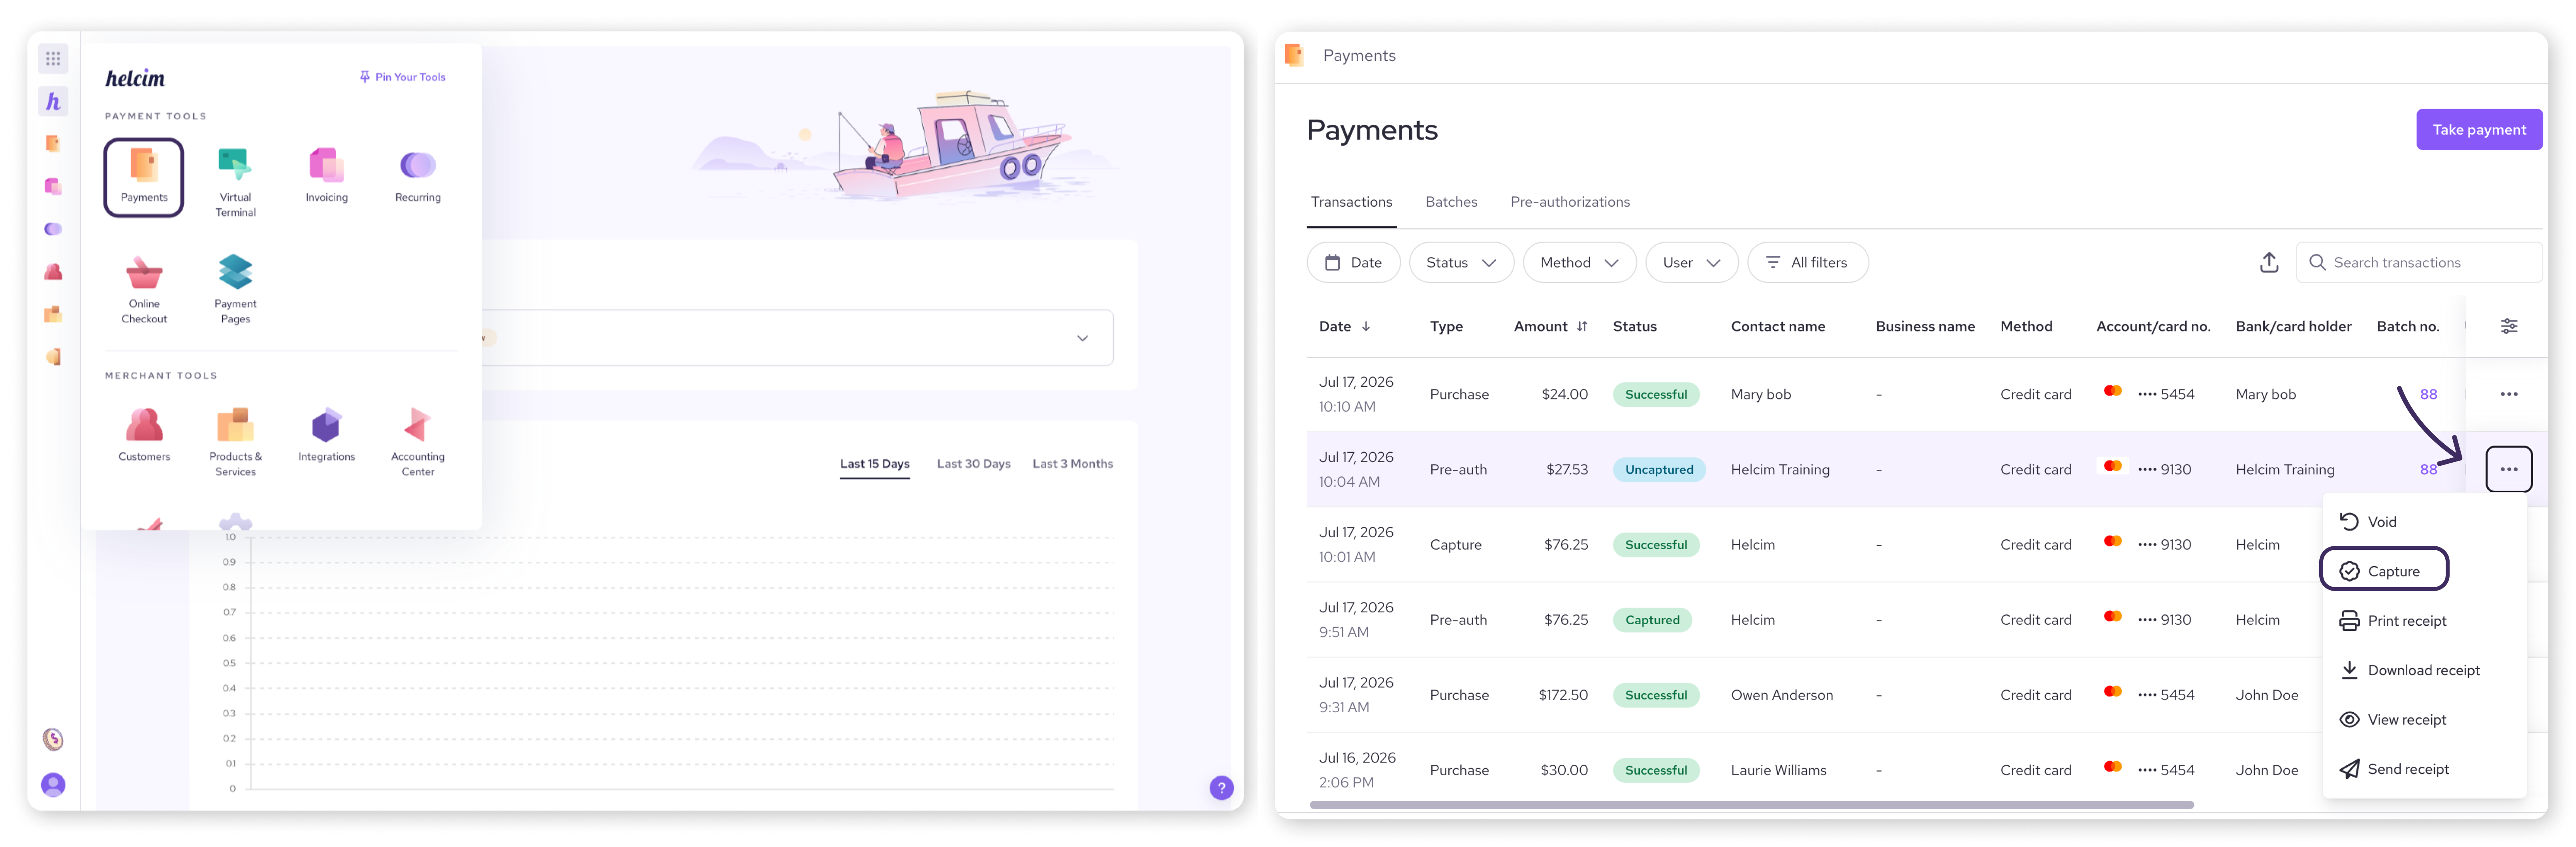
Log in to your Helcim account.
Select Payments (from the All Tools menu).
Find the original pre-authorization transaction you wish to capture. You can also filter with, All filters → Type click Pre-authorization for easier searching.
Click on the three dots to the right of the transaction and select Capture from the dropdown menu.
Tip: You can also select Void from this menu to cancel the original pre-authorization. If you void a pre-authorization, you would need to create a new one if you still wished to capture funds.
Confirm the amount to capture. The text box will auto-populate with the original transaction amount, but you can change it if you need to process a partial amount.
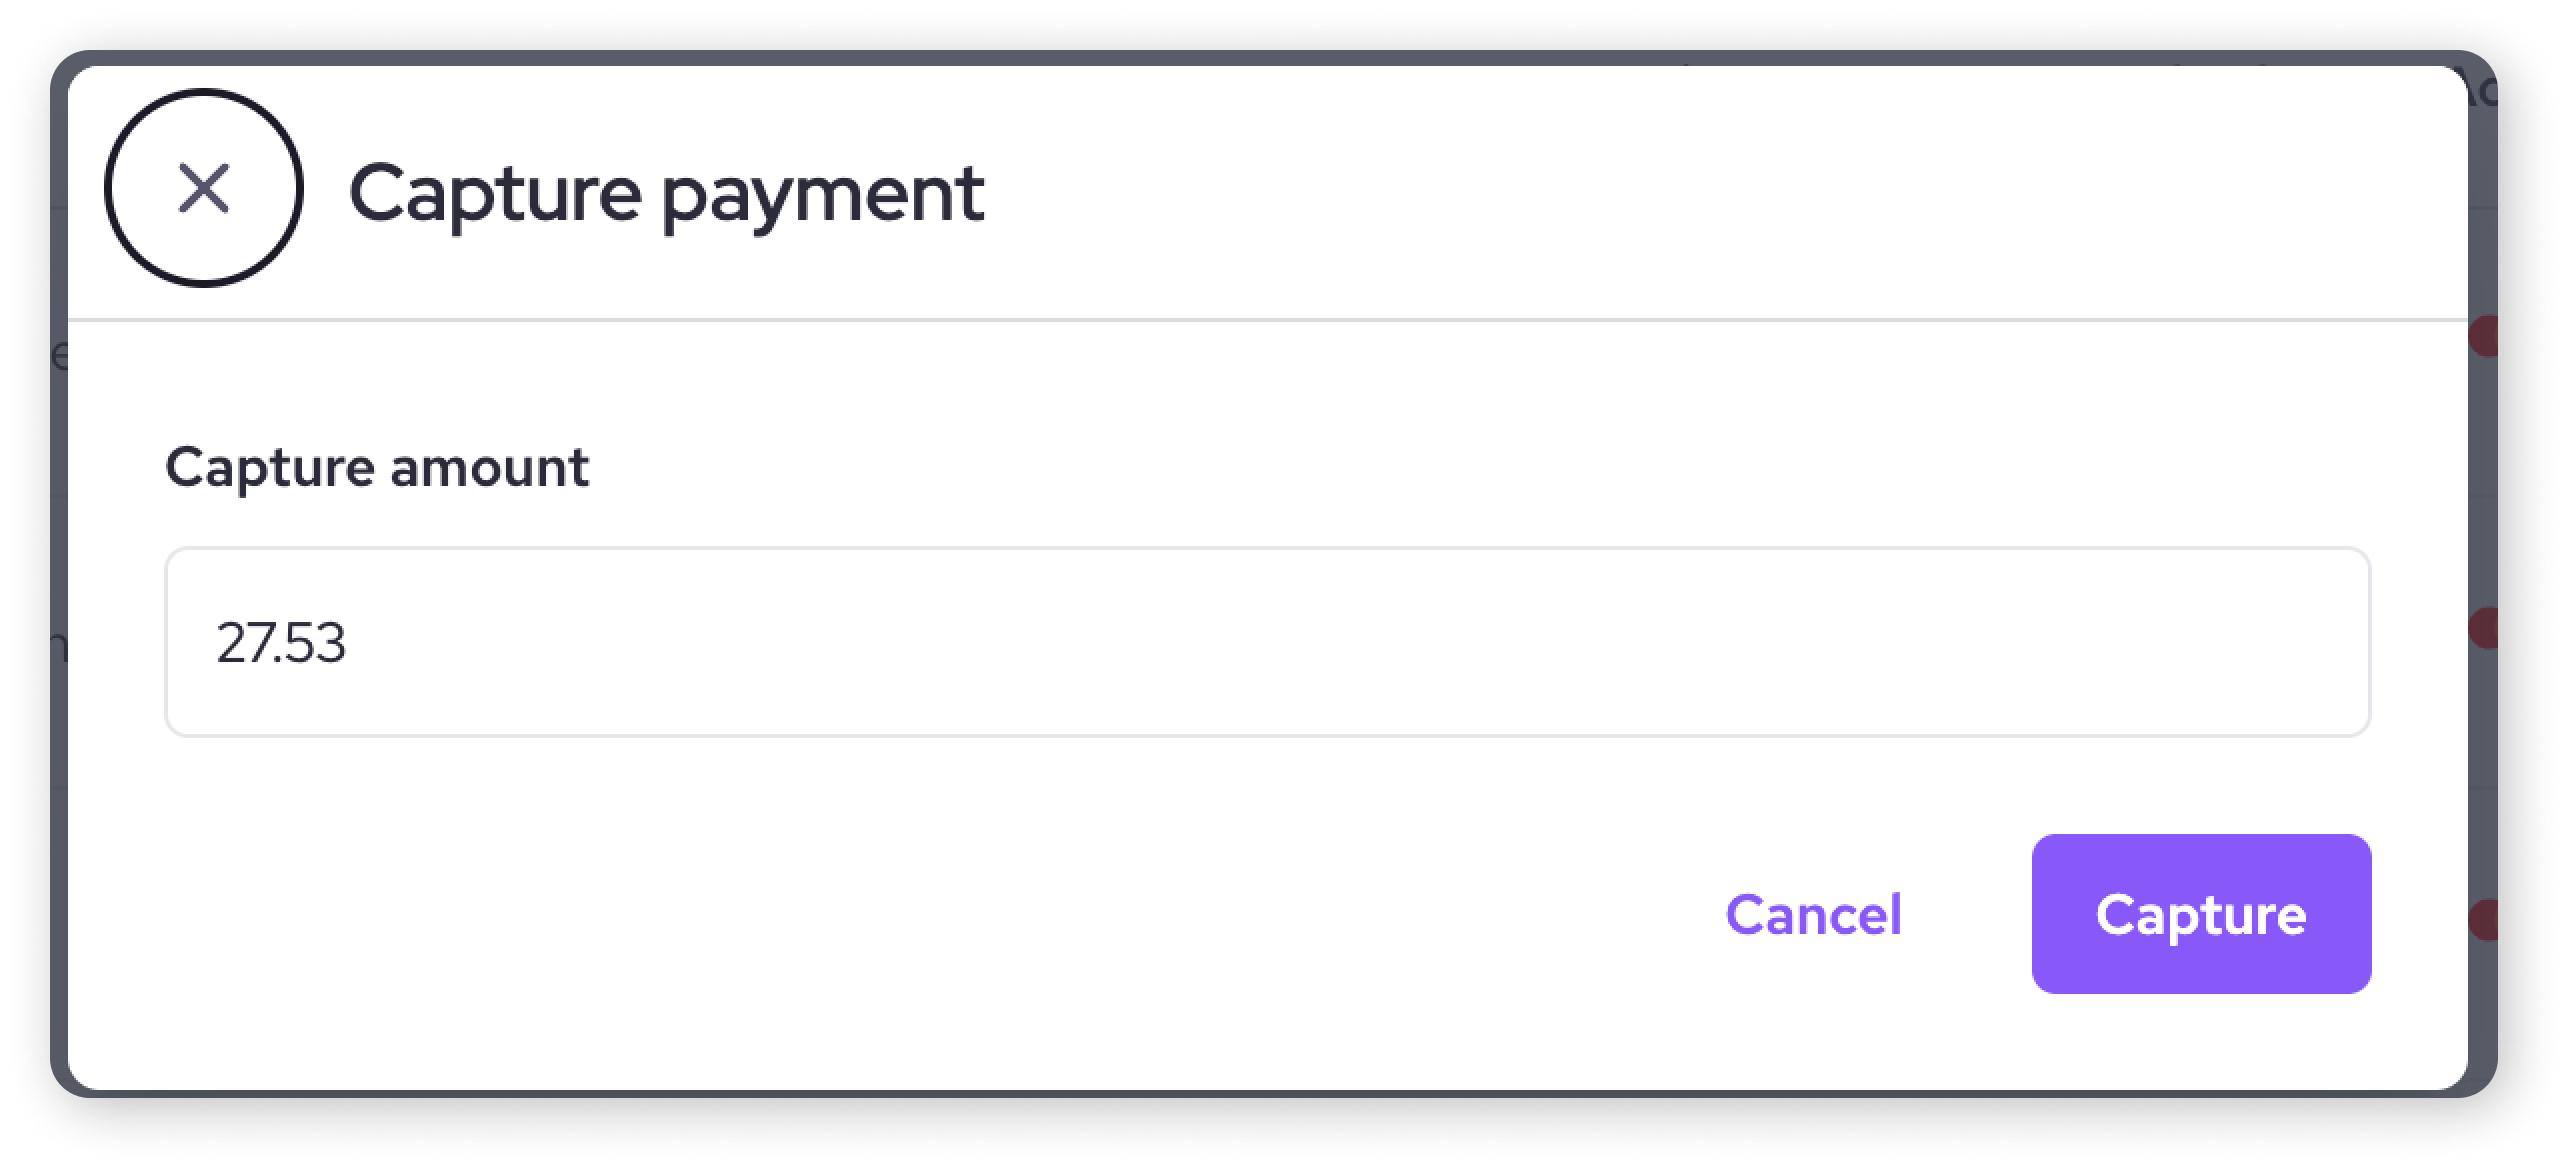
Click Capture.
Once captured, you will see a ‘Capture successful’ pop-up, and a new transaction will be added to your transaction list showing the capture.
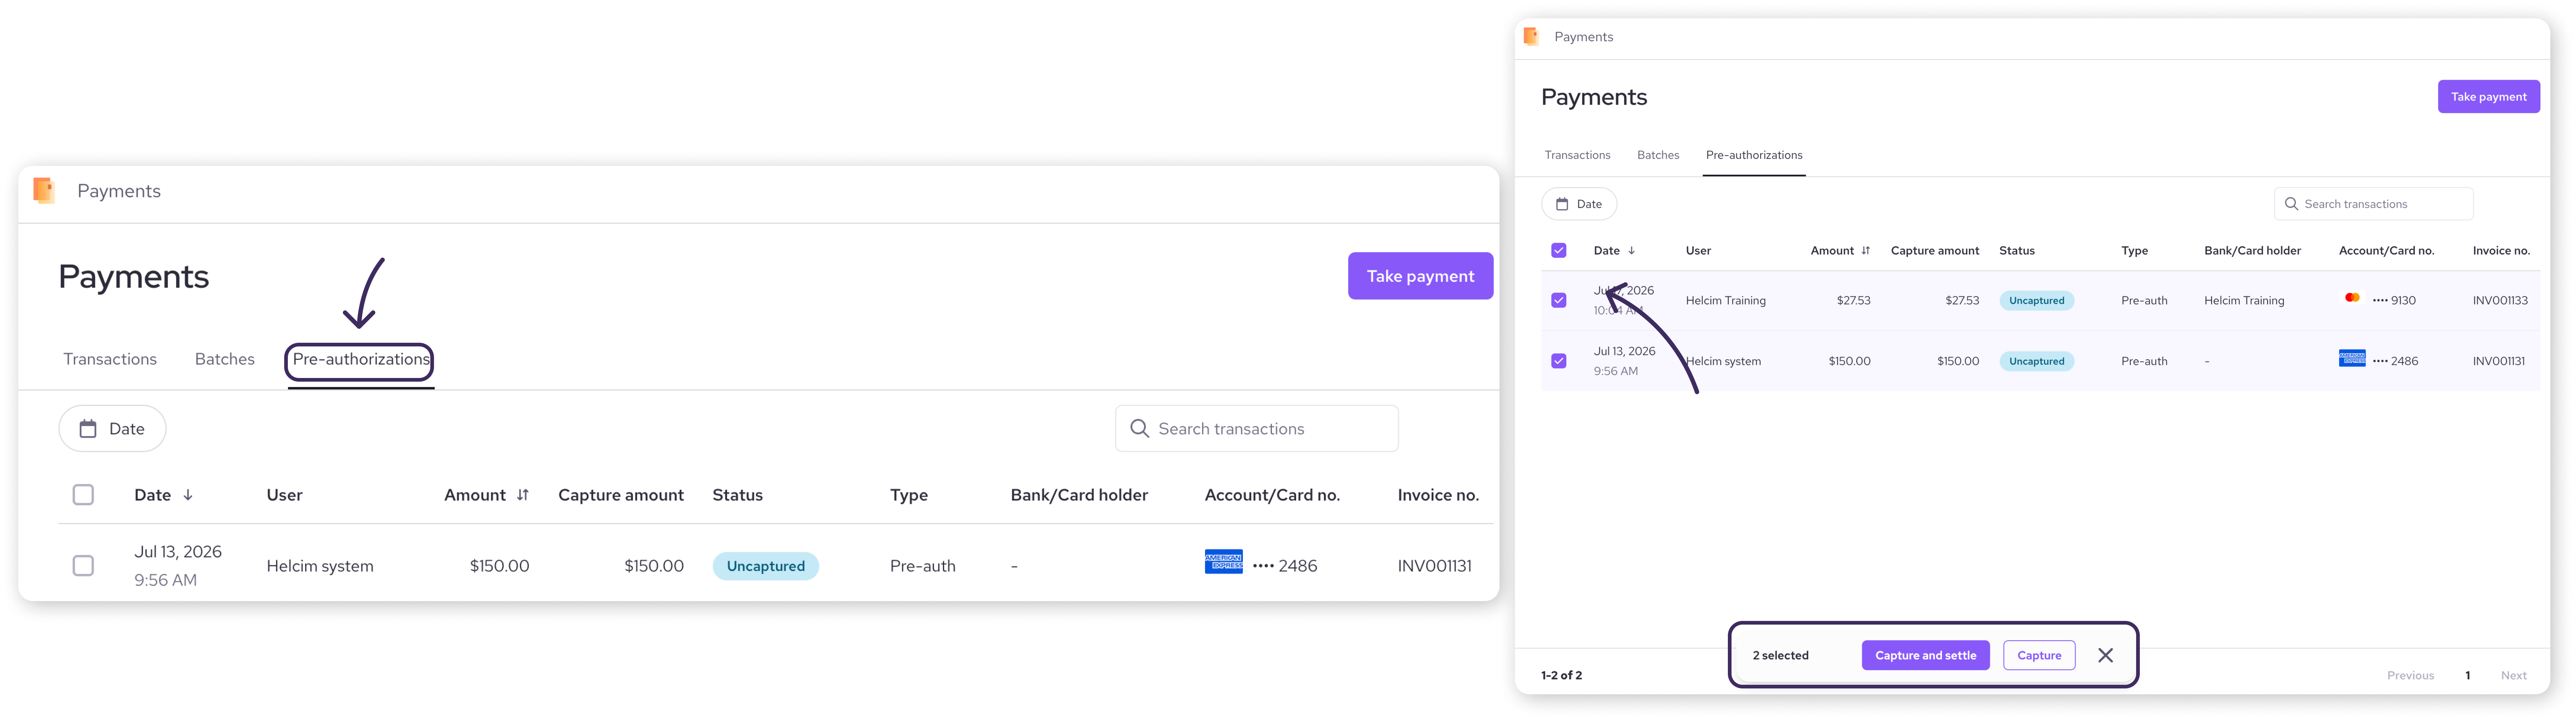
Bulk capture pre-authorizations
If you have multiple pre-authorizations to capture, you can do so efficiently from your Helcim Dashboard. Please note that when bulk capturing, you can only capture the full amounts. If you need to capture partial amounts, you will need to capture each individual transaction.
Log in to your Helcim account.
Select Payments (from the All Tools menu).
Select Pre-authorizations tab at the top. This will display all your current pre-authorizations.
Use the checkboxes to select the transactions you wish to capture. Selecting the top checkbox on the left will select all transactions in the list.
Once selected, you will see a pop up at the bottom of the screen with either Capture & Settle or Capture your transactions.
Capture & Settle: This will capture all your outstanding pre-authorizations and manually settle them as a batch immediately.
Capture: This will capture all your selected pre-authorizations. These transactions will be settled as normal when your batches close daily.
Once you have captured your transactions, you will see a confirmation message. The captured transactions will now show as their own transactions in your transactions list.
Important notes about capturing pre-authorizations
Expiry: Pre-authorized transactions are only valid for 7 days. If it has been more than 7 days from when you processed a pre-authorization, the Capture option will no longer appear in the action menu.
Partial amounts: You can capture a partial amount of a pre-authorization when capturing individual transactions. However, bulk capturing only allows for full amounts.
Voids: If a pre-authorization is voided, it cancels the original transaction. You would need to create a new pre-authorization if you still wished to capture funds.
Next steps
You've successfully mastered the process of capturing pre-authorizations! You're now equipped to manage these transactions effectively.
Learn more about managing your transaction history with Helcim
FAQs
What happens if a pre-authorization expires before I capture it?
If a pre-authorization expires (typically after 7 days), the option to capture it will no longer be available. You would need to create a new pre-authorization if you still need to charge the customer.
Can I capture less than the pre-authorized amount?
Yes, when capturing an individual pre-authorization, you can specify a partial amount to capture, as long as it does not exceed the original pre-authorized amount.
Why can't I capture partial amounts when using bulk capture?
Bulk capturing is designed for efficiency when the full pre-authorized amount is being collected. If you need to capture partial amounts, you'll need to process each pre-authorization individually.