Helcim Fee Saver can be a valuable tool to help you reduce your processing costs by passing credit card processing fees onto your customer. This article will provide a step-by-step guide on how to enable Helcim Fee Saver across the various Helcim tools.
In this article
Understanding how Fee Saver settings work
Helcim Fee Saver can be enabled in a few different ways, and it's important to understand how these settings work together:
Account-Level setting: When you enable Fee Saver in your general account settings, it becomes the default setting for all compatible Helcim tools.
Tool-Specific override: For online tools like Invoices and Payment Requests, you have the flexibility to override the default setting and turn Fee Saver on or off for individual transactions. This allows you to choose when to apply the fee on a case-by-case basis.
Smart Terminal behavior: Once Fee Saver is enabled on the Smart Terminal, it will apply to all subsequent transactions until you disable it in your account settings. This difference in behavior is due to the specific rules surrounding surcharging for in-person transactions.
The sections below will guide you through enabling Fee Saver both in your general account settings and within specific Helcim tools.
Enabling Helcim Fee Saver
Fee Saver in your account-level settings
Make Fee Saver enabled by default using the following steps:
Go to All Tools and select Settings.
Select Payments from the left-side menu.
Under Fee Saver, toggle the Fee Saver options you want to enable to the "on" position.
Online Fee Saver: charge your customers a convenience fee when using Invoicing, Payment Pages, Payment Requests, or HelcimPay.js
In-person Fee Saver: charge your customers a surcharge when paying with a Smart Terminal
| If you enable Online Helcim Fee Saver, you'll also be enabling ACH payments. |
.png)
Fee Saver on your Smart Terminal
To enable Fee Saver on your Helcim Smart Terminal:
Tap More on the bottom right of the Smart Terminal menu, and then tap Settings.
Select Merchant Account Settings.
Select Helcim Fee Saver.
Toggle the Fee Saver settings you want to enable to the "on" position.
.png)
Fee Saver on an invoice
You can choose to apply Fee Saver to individual invoices:
Go to the Invoicing tool from the All Tools section or the left navigation bar.
Select New Invoice.
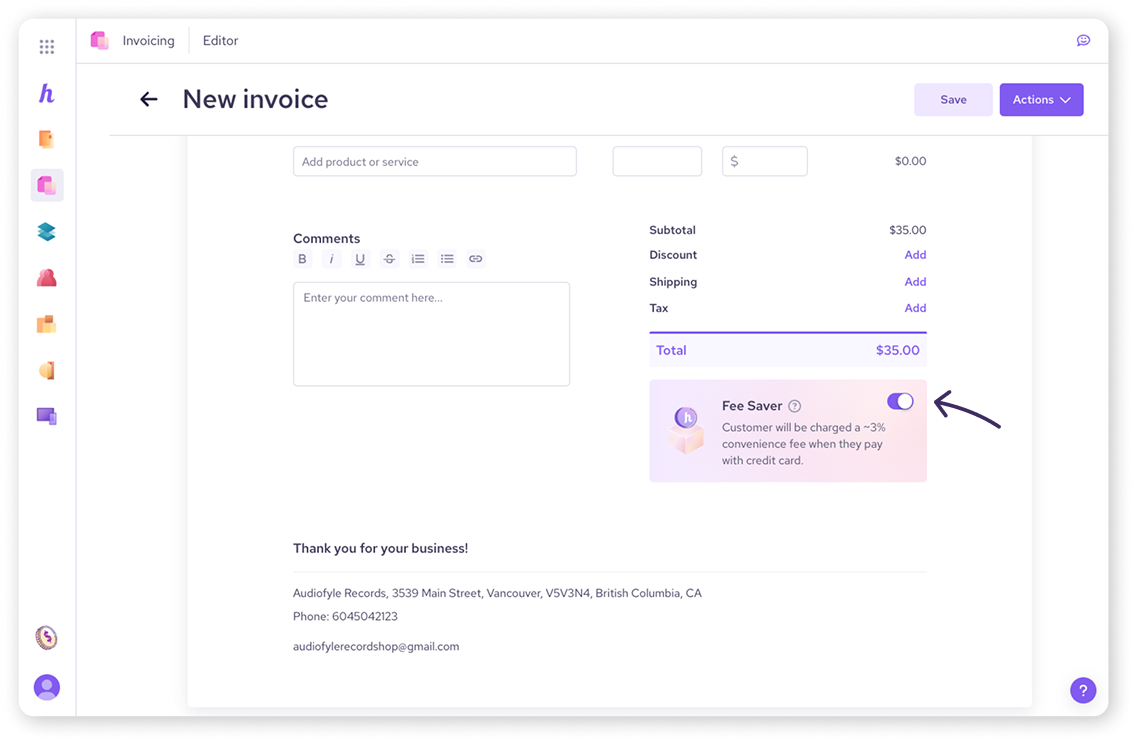
In the invoice editor, ensure the Helcim Fee Saver toggle is turned on. You can turn it off for specific invoices if needed.
When your invoice is ready, select Actions and then Send Pay Now Email.
When your customer receives the invoice and clicks the Pay Now button, a payment pop-up will appear.
They'll then have the option to pay a "convenience fee" if they choose to pay via credit card. If they prefer to avoid the fee, they can pay with ACH bank payments.
| For full steps on how to create and send an invoice, visit our Create an Invoice article. |
Fee Saver for a payment request
You can also add Fee Saver to your Payment Requests:
Go to the Payments tool from the All Tools section or the left navigation bar.
Select Payment Requests from the tab options.
Click on New Payment Request.
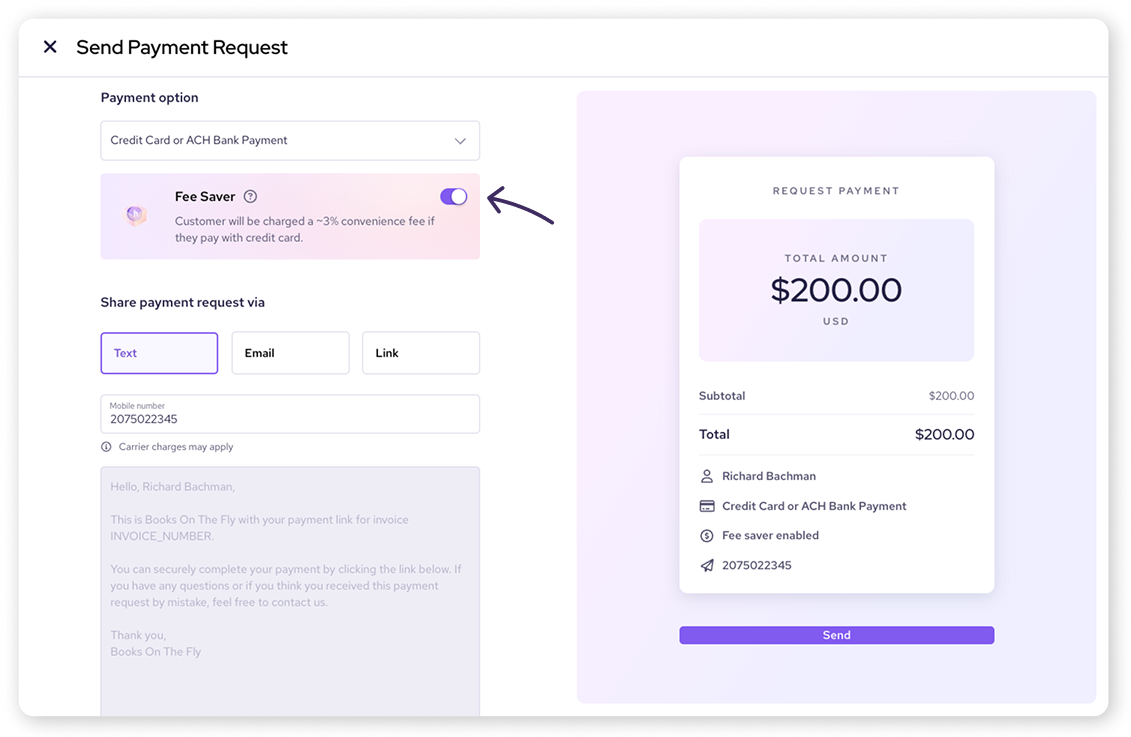
In the payment request editor, ensure the Helcim Fee Saver toggle is on.
The toggle will only be visible if ‘Credit Card or ACH Bank Payment’ are both offered as a payment option.
This can be turned on or off per payment request. Then, click Request Payment.
When your customer receives the payment request and clicks the Pay Now button, a pop-up will appear. They can choose to pay a "convenience fee" to use a credit card or pay with ACH bank payments to avoid the fee.
| For full steps on creating and sending a payment request, visit Getting started with Payment Requests. |
Fee Saver on a payment page
To enable Fee Saver on Helcim Payment Pages:
Go to Payment Pages within All Tools.
Select New Payment Page, or an existing payment page from the list.
Under Transaction Settings, flip the Fee Saver toggle on.
When the toggle is ON, the payment methods and transaction types will be locked to require both Credit Card and ACH, as these are necessary for Fee Saver.
Click Save.
| For full steps on creating a custom payment page, visit Create a Payment Page. |

Fee Saver with HelcimPay.js
If you use HelcimPay.js to integrate payments on your website, platform, or software, you can enable Helcim Fee Saver for online payments, provided your business accepts ACH payments.
| See our DevDocs for detailed instructions on enabling Fee Saver for a HelcimPay.js checkout. |
Next steps
Now that you know how to enable Helcim Fee Saver across different Helcim tools, we recommend enabling it on the tools you regularly use.
| At this point, you might be wondering how to communicate Fee Saver to your customers. We’ve got you covered in our next article: Talking to Customers about Helcim Fee Saver. |
FAQ
Can I enable Fee Saver separately for online and in-person payments?
Yes, you can enable Fee Saver independently for online and in-person transactions, provided your business meets the eligibility requirements.
For Online Fee Saver, you must be eligible to accept ACH payments.
For In-Person Fee Saver, you must be using a Helcim Smart Terminal and be located in an eligible region (Fee Saver is not available in Connecticut, Colorado, Maine, Massachusetts, Oklahoma, and Quebec).
Can I disable Fee Saver for a specific transaction if it's generally enabled?
Yes, for online tools like invoices and payment requests, you can toggle Fee Saver on or off for individual transactions. On the Smart Terminal, the setting applies to all transactions once enabled.
Is Helcim Fee Saver available for all Helcim payment tools?
It is available for:
The Helcim Smart Terminal
Pay Now Invoicing
Payment Requests
Payment Pages
Integrations with HelcimPay.js
It is not available for:
Manual entry payments through the Helcim POS
Recurring Invoicing
Recurring Payments
Virtual Terminal
Integrations with WooCommerce, Xero, or Quickbooks Online
Are there any legal requirements I should know about before enabling Fee Saver?
Yes, it's super important to make sure you're following all the rules! That means checking out any state or provincial laws that apply to your business, as well as the card brand rules and Helcim’s Fee Saver Terms and Conditions.
Also, if you plan on using Fee Saver with Mastercard, there's one extra step. You'll need to give Mastercard a heads-up 30 days before turning on the feature. You can do that through these online forms: