Selling physical goods means keeping track of stock! Accurate inventory management is key to running your business smoothly – preventing overselling and being out-of-stock of popular items.
This guide will show you how to check current stock, make adjustments to individual products, perform bulk updates, and view your inventory history.
In this article
Checking inventory levels
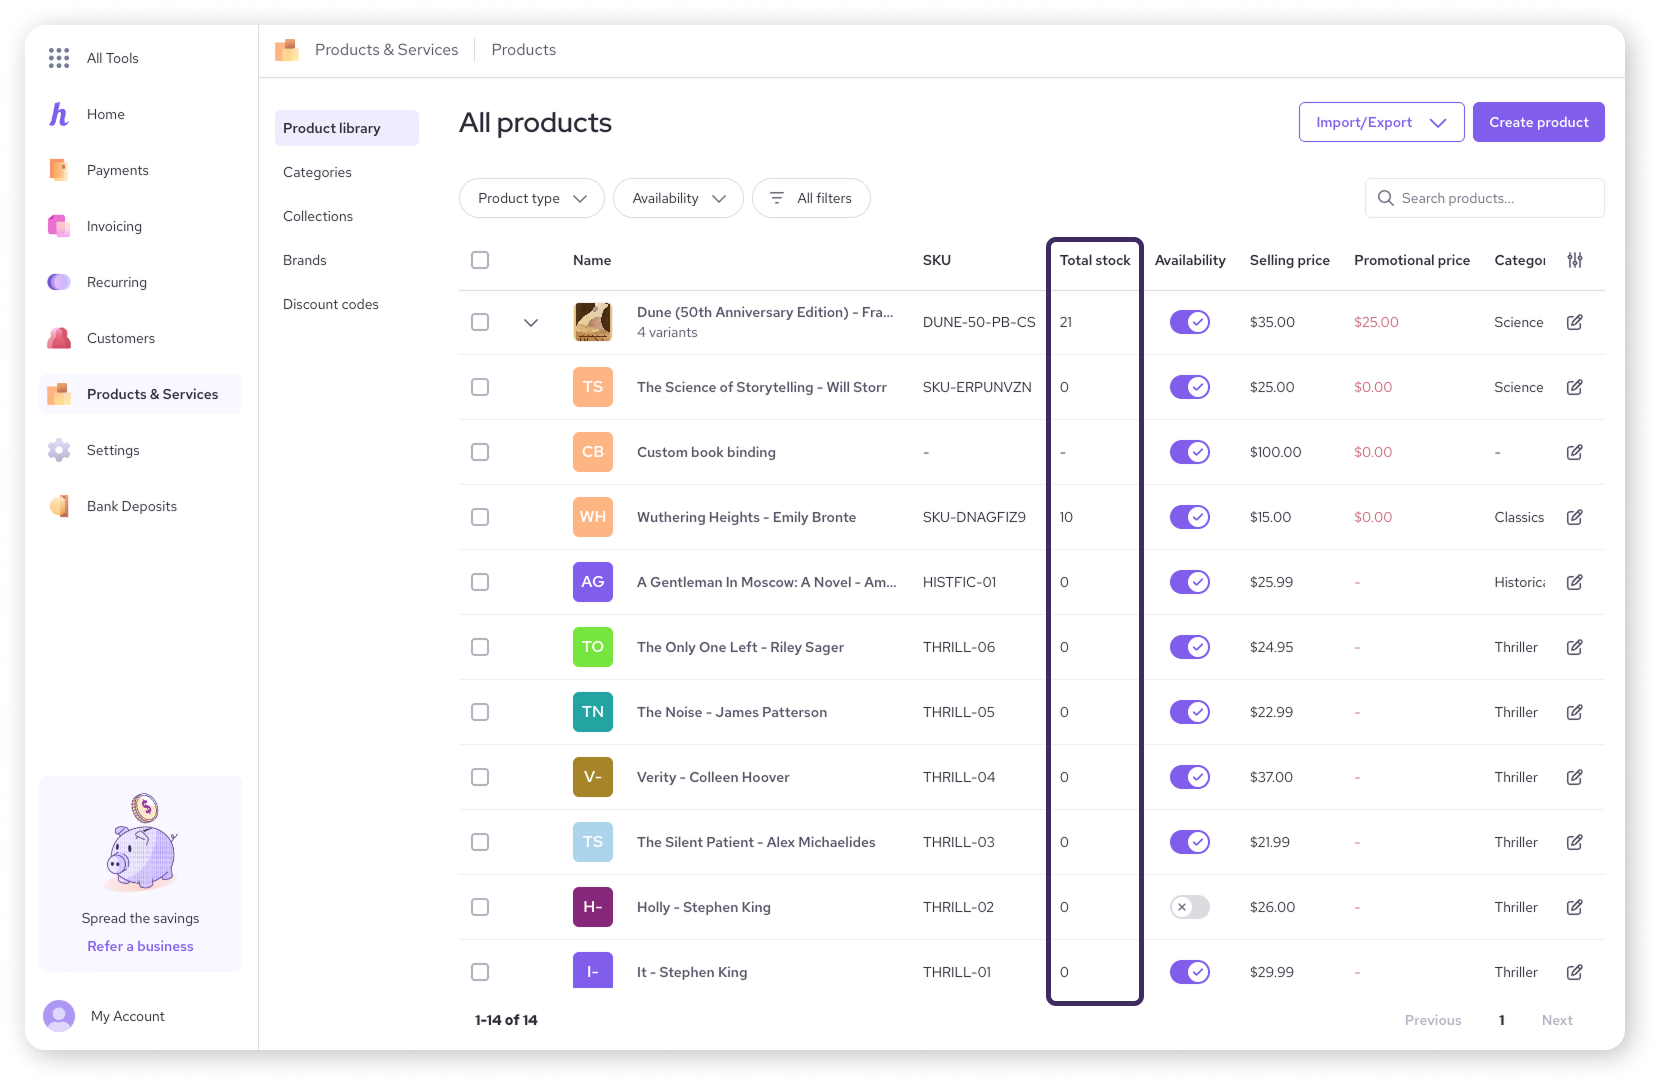
You can quickly see the stock for your items directly from your main product list:
Navigate to Products & Services (via the All Tools menu).
On the main Products page, you will see a list of your products.
Locate the Stock column. This column displays the current inventory on hand for each product.
Editing inventory for a single product
Use this method when you're updating the count for one specific product or its variants.
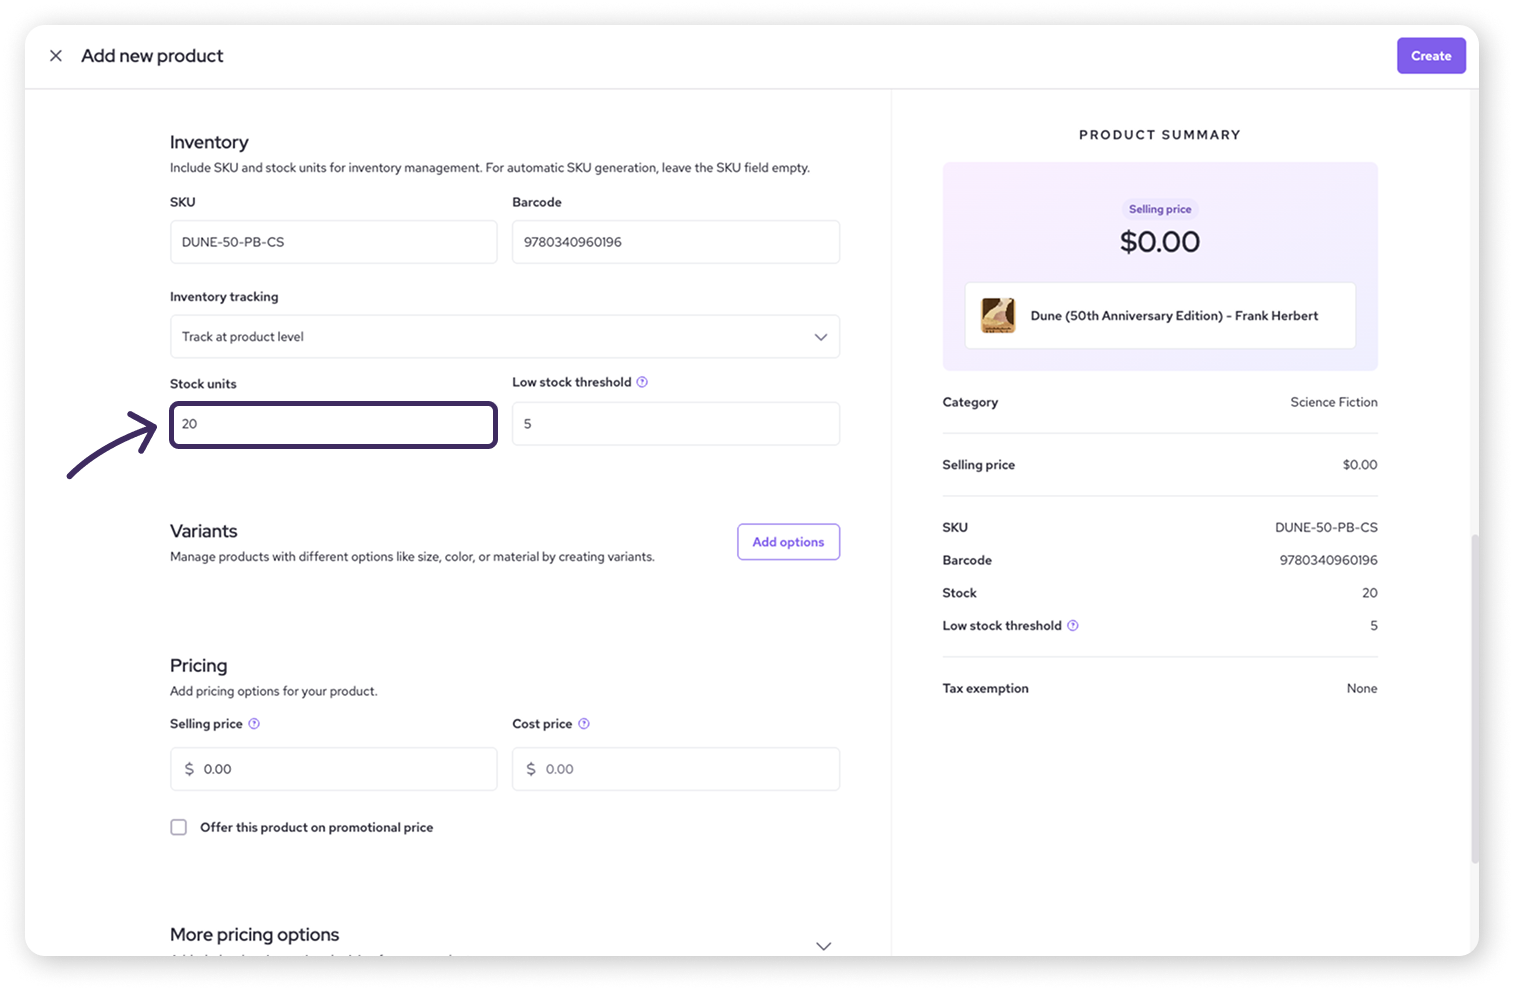
From the main Products list, click on the
 icon for the product you want to update.
On edit page that opens, scroll down to Inventory.
Enter the new stock level in the Stock units field.
If you want to adjust your Low stock threshold to receive an alert once you hit a certain stock number, you can do so here.
Once you’re finished, click Save in the top-right corner.
For products with variants
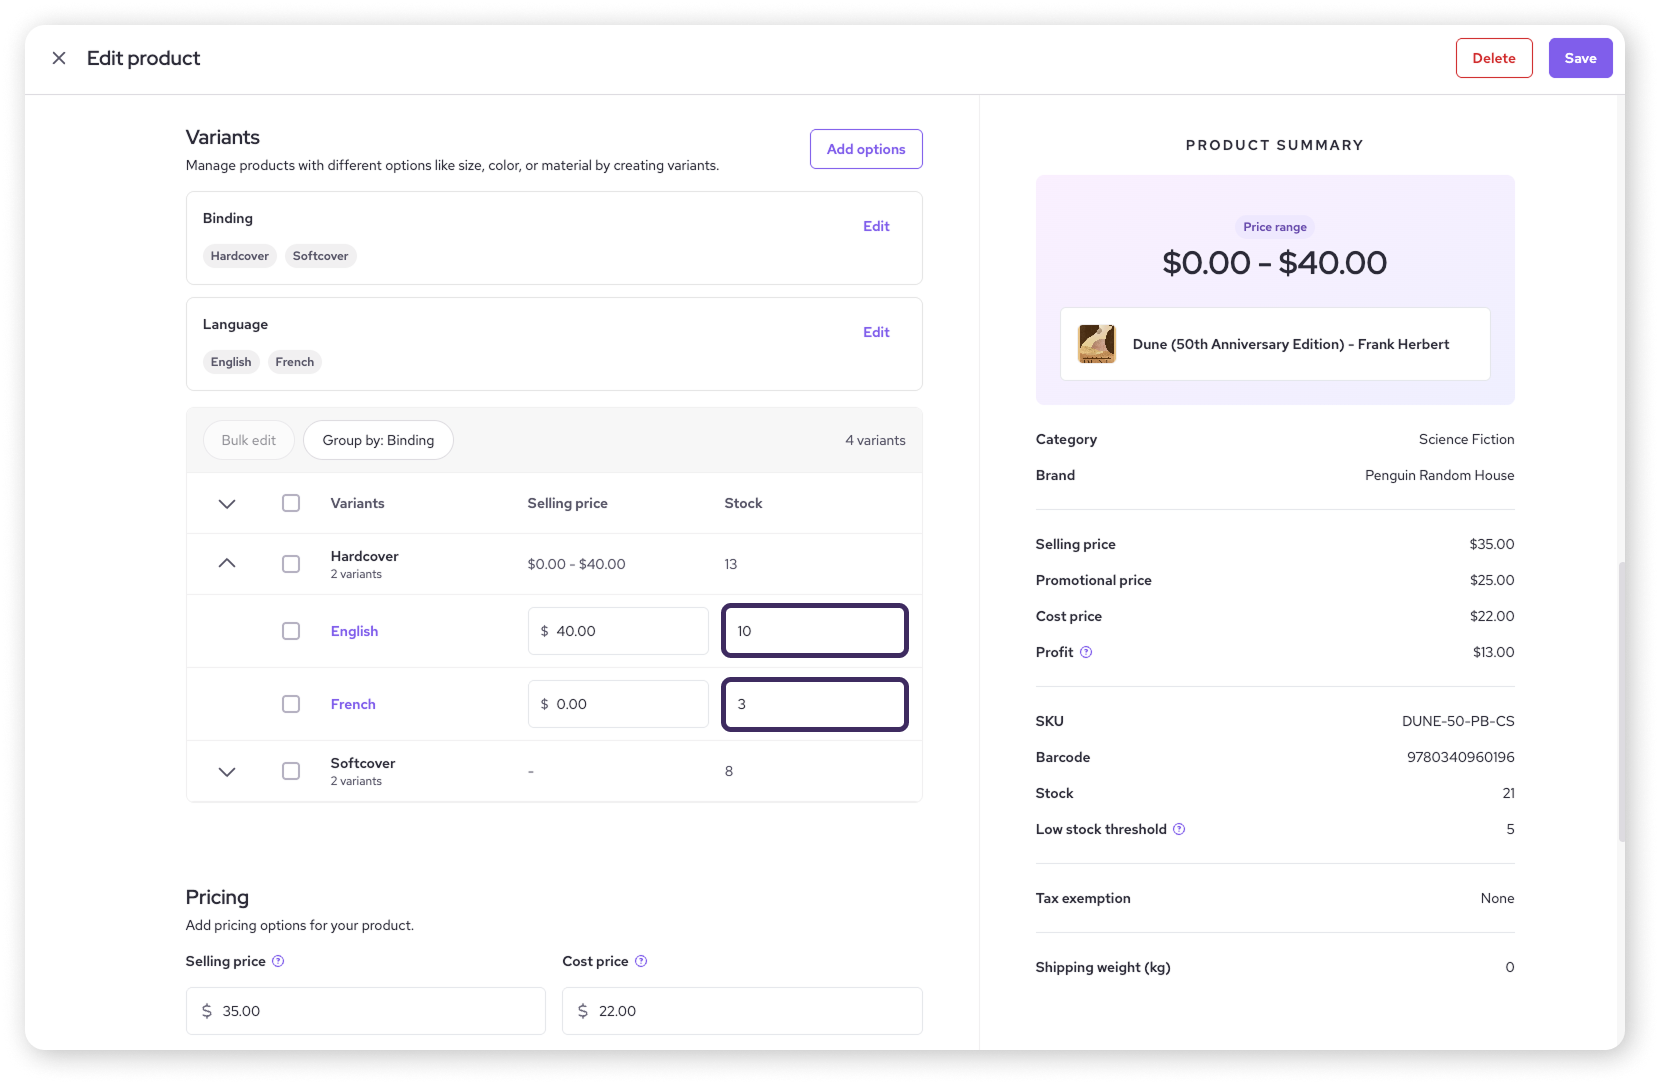
If you’ve created variants for your product, then you have the choice to track inventory either at the variant level or at the product level.
You can use the Inventory tracking dropdown to state your preference.
![]()
If you’ve selected Track at variant level, then you’ll adjust stock levels for each variant individually, rather than for a product as a whole.
Scroll down to the Variants section of the product’s edit page.
Enter the new stock level in the Stock field for each variant.
Once you’re finished, Click Save to apply the changes.
| If the Stock fields for your variants are greyed out, that likely means you’re still tracking inventory at a product level. Change this to the variant level to make these fields editable. |
Updating inventory in bulk
When you need to update stock counts for many products at once (like after a big delivery or a full stock take), the bulk import tool is your best friend. This process uses a CSV file to update stock quantities for your existing products.
Step 1: Export your current inventory
First, you'll download a file of your existing inventory levels.
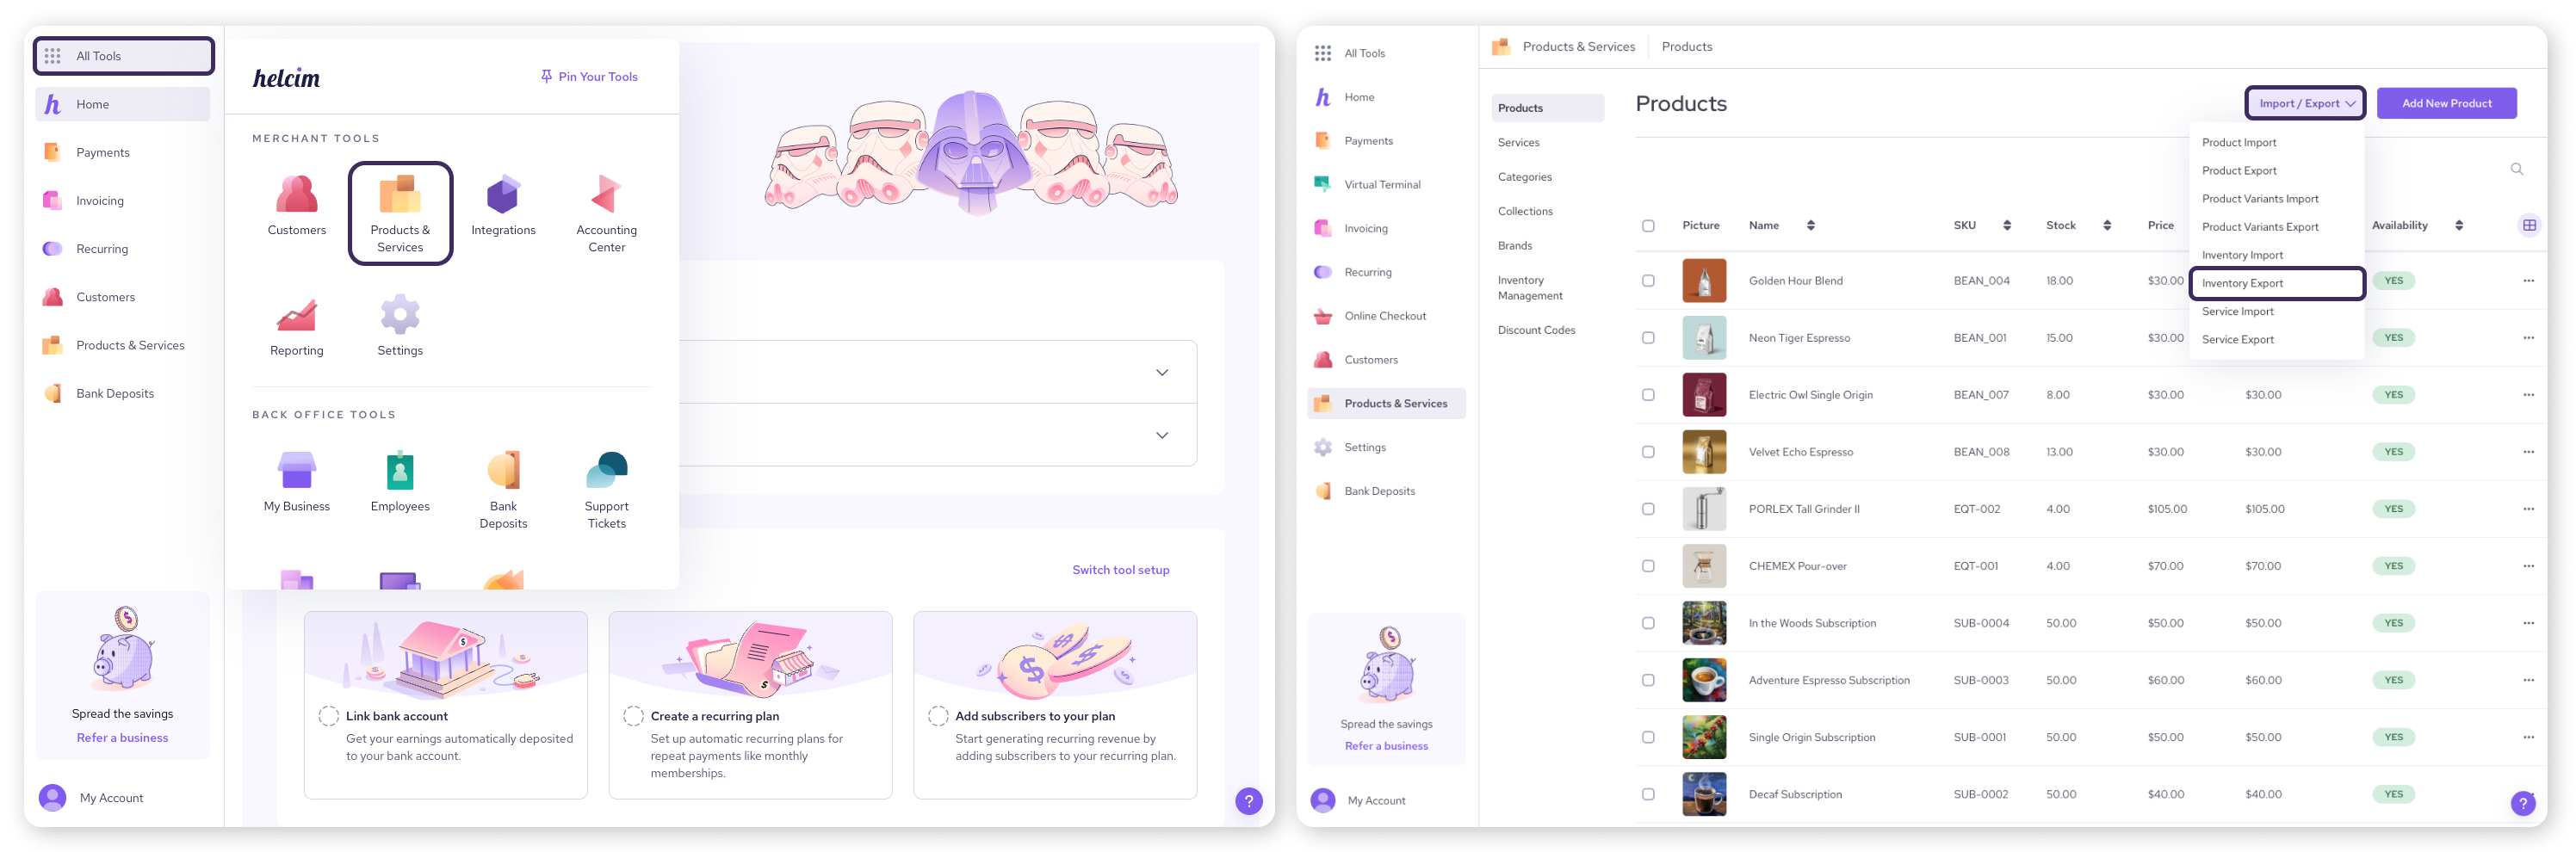
Navigate to Products & Services (via All Tools).
Click the Import/Export button and select Inventory Export.
Choose CSV File as the export type.
Select a date range for the inventory report.
Ensure your correct email is entered and click Export. A CSV file will be emailed to you.
Step 2: Prepare your inventory update file
Next, you'll edit the file to tell the system what to change.
Open the emailed CSV file in a spreadsheet program (like Excel or Google Sheets).
Find the column named Stock Change. This is the only column you need to edit.
For each item you want to update, enter the quantity you are adding (e.g., 10) or subtracting (e.g. -5).
If an item's stock hasn't changed, leave the Stock Change cell blank or enter 0.
Save the edited file, making sure to keep it in CSV format.
| Do not edit the column that shows the current stock count directly. The system uses the Stock Change column to calculate the new total. |
Step 3: Import your updated file
Finally, you'll upload your prepared file back into Helcim.
Return to the Products & Services page and click Import/Export.
Select Inventory Import.
Choose CSV File as the import type.
Drag and drop your edited CSV file into the upload area, or browse to select it from your computer.
Review the preview screen carefully to ensure the changes are correct.
Click Import to confirm and complete the update. Your inventory levels will now be adjusted.
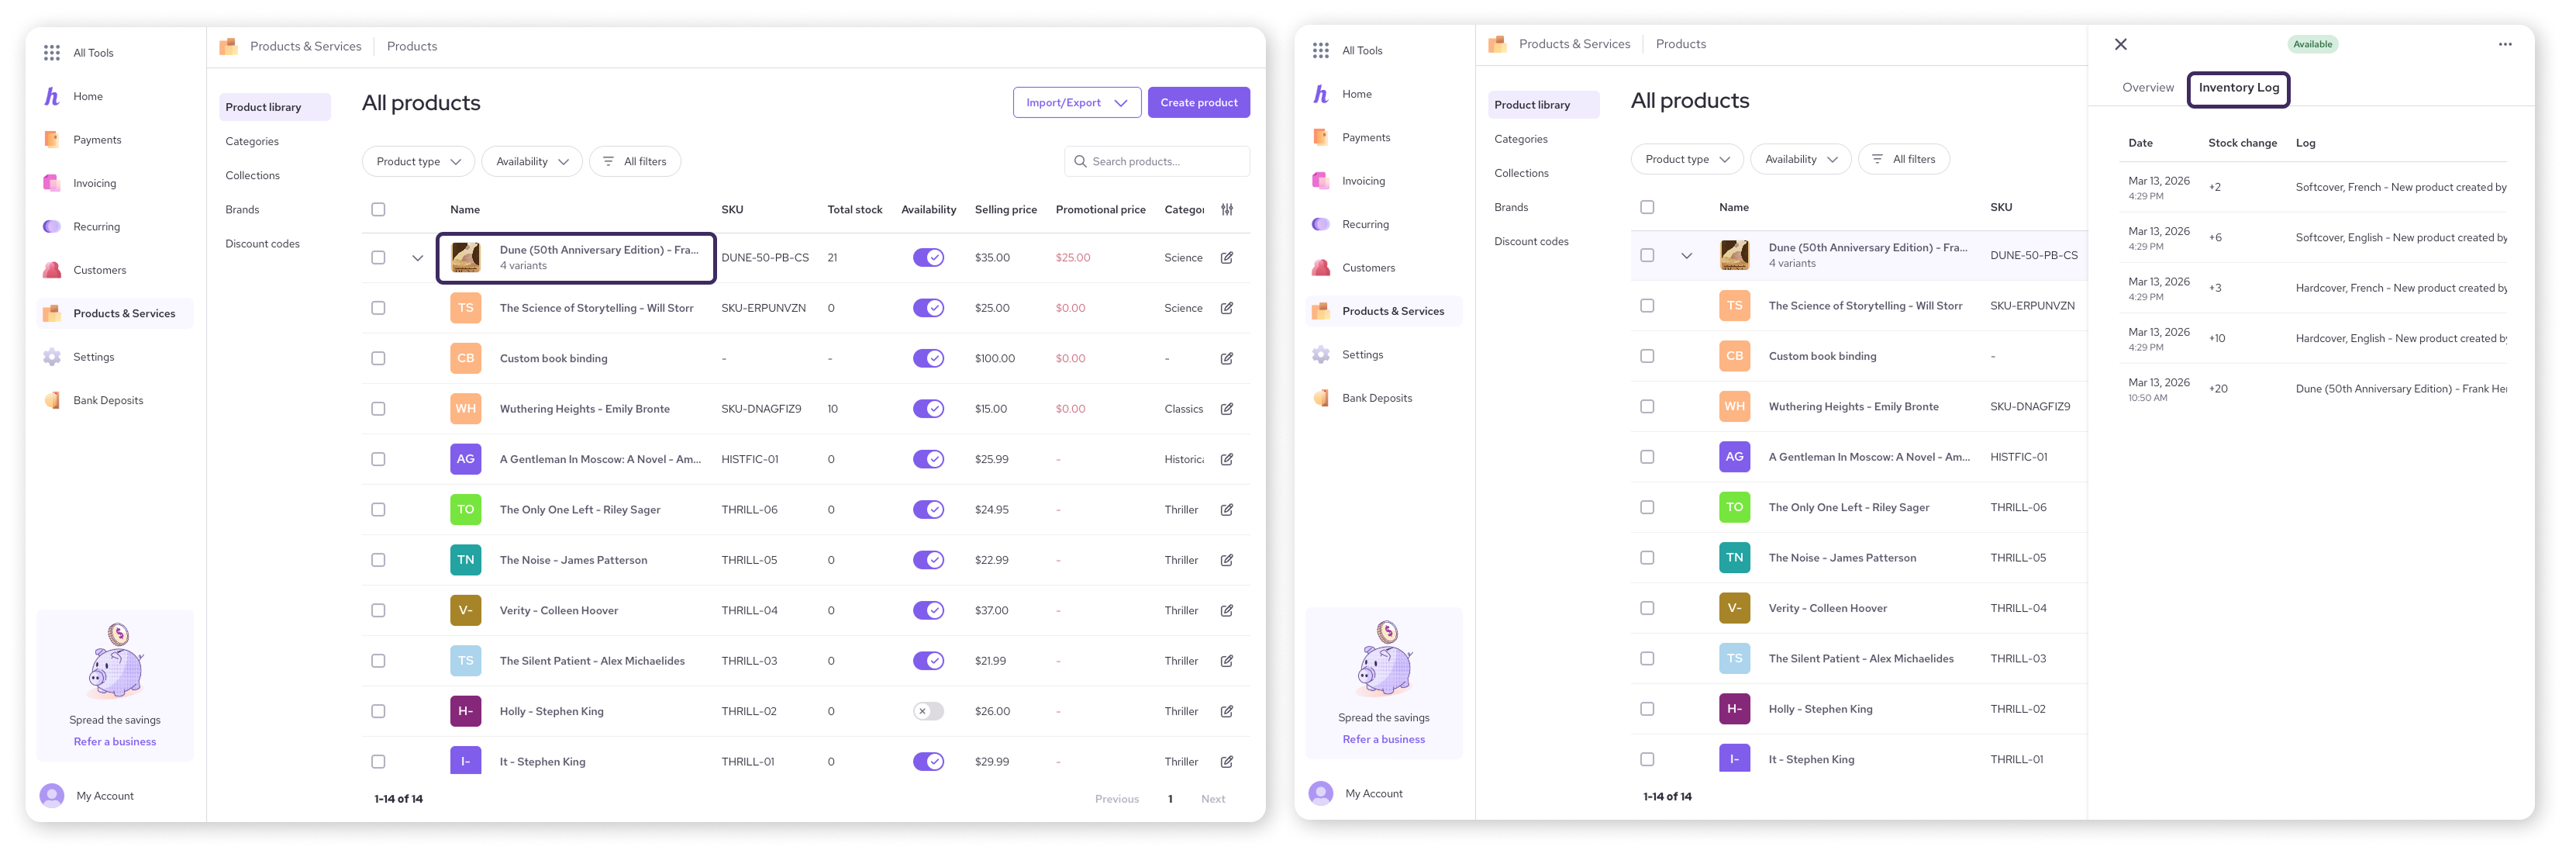
Viewing the inventory log
To see a detailed history of all stock changes for a specific product (sales, manual adjustments, receiving):
Click on a product’s name from the Products list.
This will open a drawer for the product from the right-hand side.
Select Inventory Log. This will display a chronological record of inventory movements.
Next steps
Learn how to configure your inventory settings.
Learn how to enable tracking for a specific item during product creation.
Adding brand new products in bulk? Use the import products tool instead.
FAQs
Does inventory tracking work for services?
No, the inventory tracking features (stock counts, low-stock alerts) are designed for goods only.
How often should I update inventory levels?
This depends on your business. Besides automatic deductions from sales (if enabled), you should update counts whenever you receive new stock. Many businesses also perform regular physical counts (cycle counts or full stock takes) and use the Inventory Import tool to reconcile their Helcim counts with reality.
My inventory import failed. What went wrong?
Ensure you only edited the 'Stock Change' column in the exported file and saved it as a CSV. Importing a file with changes in other columns or the wrong format can cause errors. Also, ensure the SKUs in the file match existing products in your account.
What's the difference between the two 'Inventory Management' links?
The Inventory Management link on the main Products & Services side menu takes you to a list of low inventory items. The Inventory Management link on an individual product's page menu allows you to adjust the stock and view the log for that specific product.