So, you're ready to set up recurring billing for your business? That's great! Creating recurring payment plans in Helcim is essential for automating your billing and offering subscription options to your customers.
This article will walk you through each step of the process, from the basics to the advanced settings, to ensure you get your plans up and running smoothly.
In this article
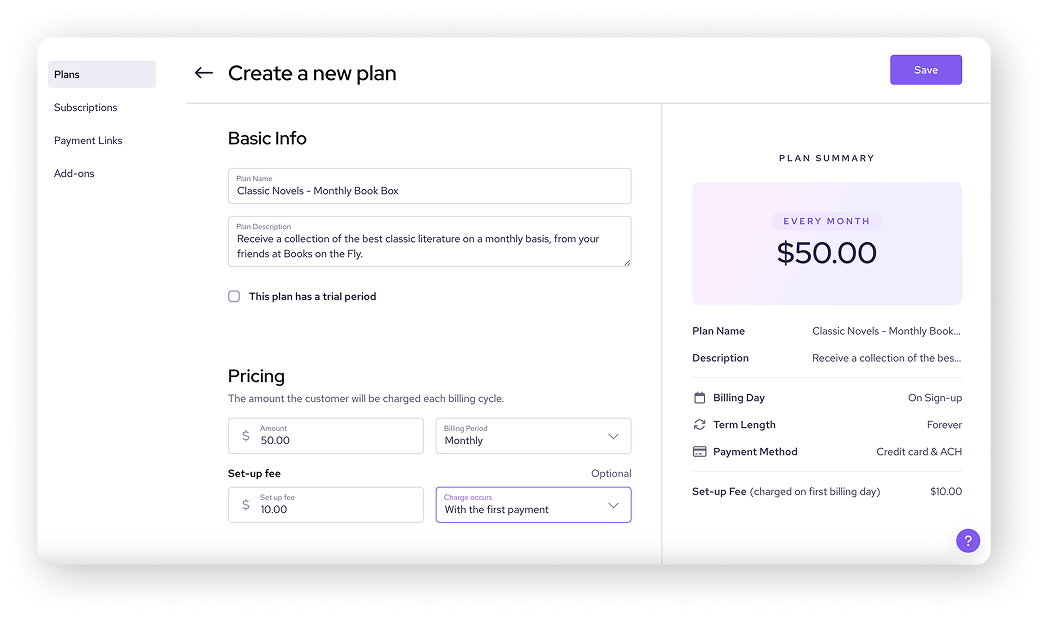
Creating a basic plan
The first step is to set up the basic details of your recurring payment plan. This includes naming your plan, setting the price, and deciding if you want to offer a free trial.
To create a plan, on your Helcim dashboard start by navigating to All Tools > Recurring > Create New Plan. Then, fill out the following fields
Plan Name: Enter a descriptive name for your plan. This will be visible to your customers.
Description: Add a brief description of the plan. This will also be visible to your customers.
Price: Set the recurring price for the plan.
Free trial: Optionally, check the This plan has a trial period box to specify a free trial period (in days or weeks).
| You can also set a one-time setup fee that will be charged to the customer in their first billing cycle or upon sign-up. |
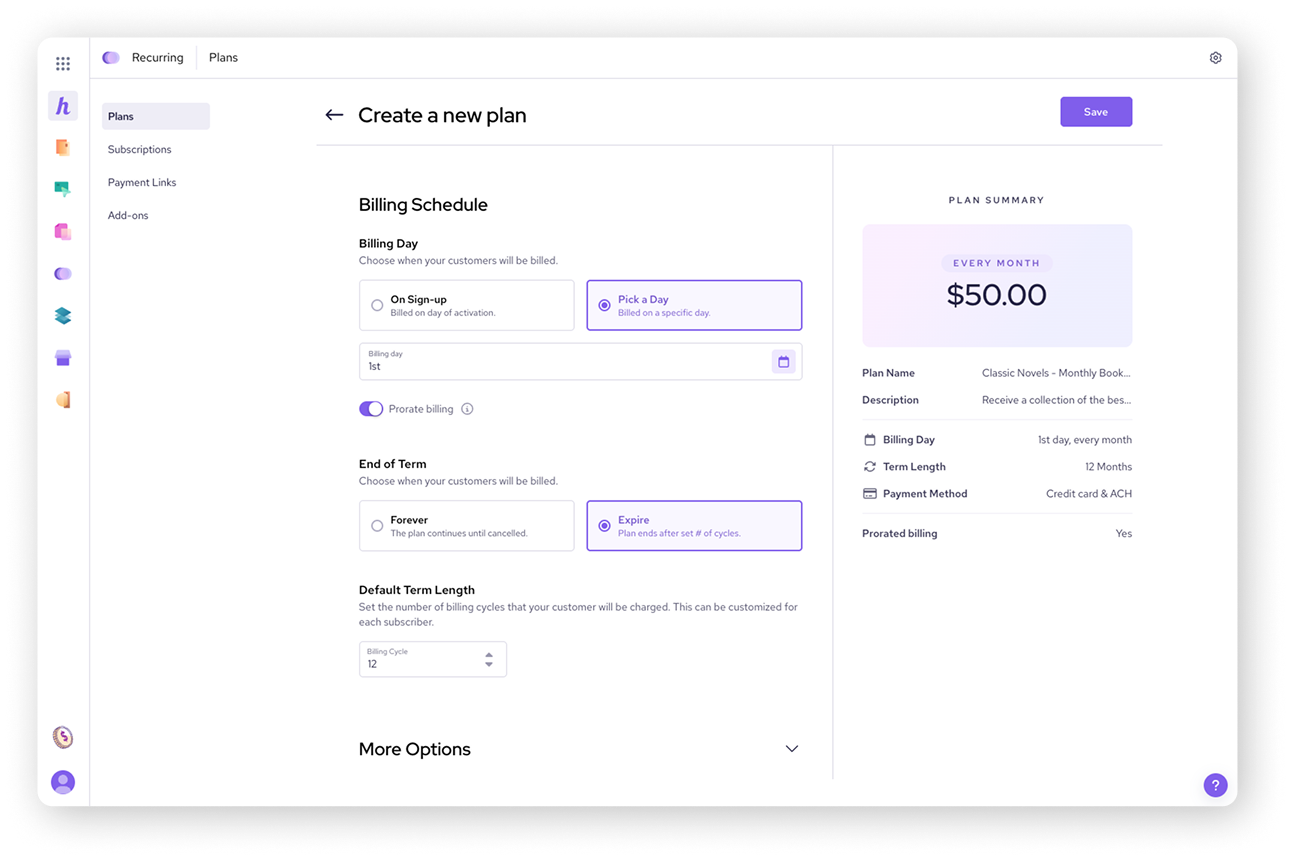
Setting the billing schedule and duration
Next, you'll define how often customers are billed and how long the plan will last.
Billing schedule
Select one of the following:
On sign-up: Customers are billed immediately when they subscribe to the plan.
Pick a day: Choose a specific day of the month for billing (for example, the 1st of the month).
| Toggle Prorate billing on to partially bill the customer for the days between their activation and their first official billing date. |
Duration
Select one of the following:
Forever: The plan continues until the customer cancels their subscription.
Expire: Set a specific number of billing cycles for the plan to run.
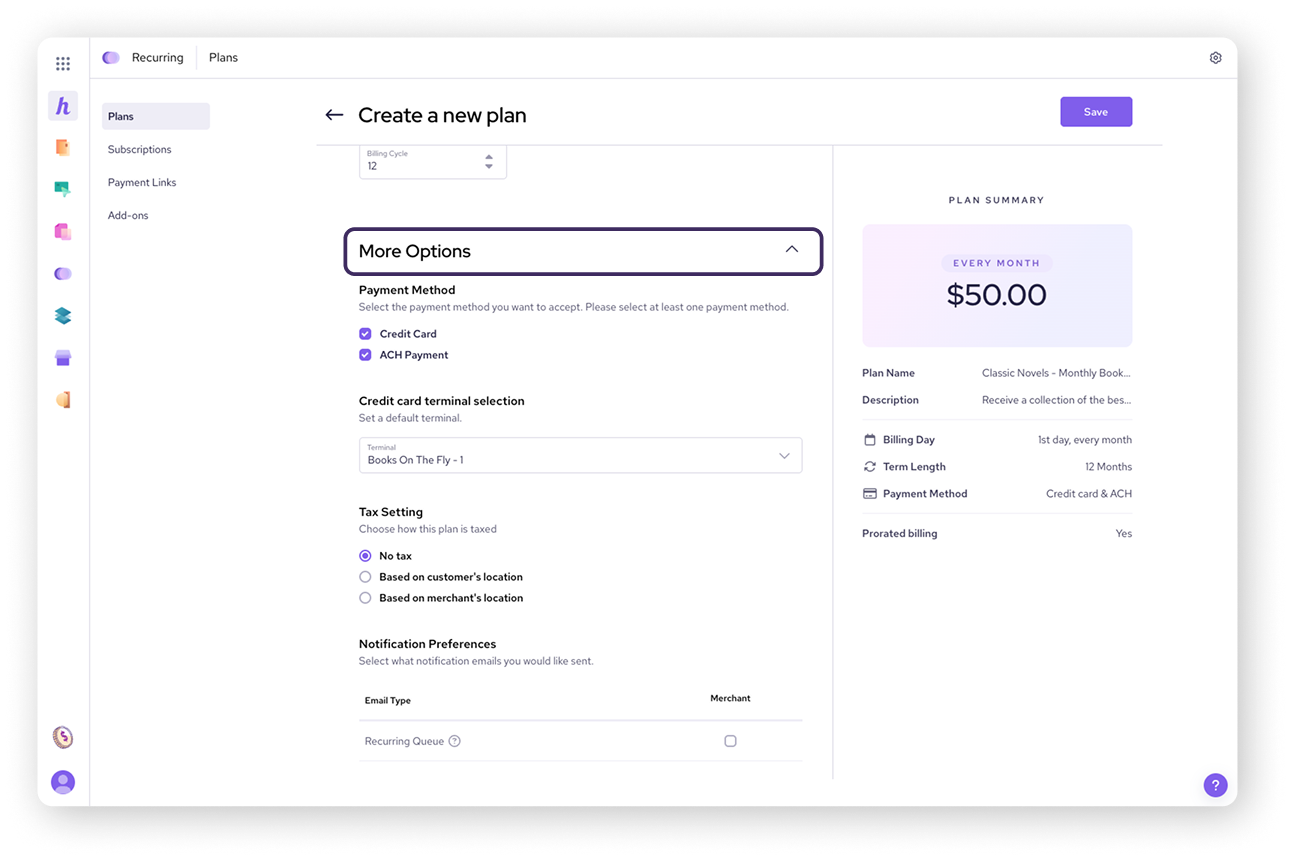
Configuring payment and tax settings
Finally, you can customize additional settings related to payment methods, taxes, and notifications.
To access these options, click on More Options.
Payment method: Choose which payment methods to accept: credit cards, ACH payments (bank accounts), or both.
Tax settings: Specify how taxes should be applied: based on the customer's location, your business's location, or indicate that the plan is tax-free.
Terminal selection: Select the terminal you want the plan to be processed on.
Notification Settings: Choose whether to receive transaction receipts and recurring payment logs via email.
Next steps
After configuring all the settings, take a moment to review the summary on the right side of the screen. If everything looks correct, click Save to finalize the plan.
Once you've saved the plan, you're ready to start adding subscribers.
| Visit our next article on adding subscribers to a recurring plan to learn more. |
FAQ
Is it possible to offer a free trial to customers?
Yes, you can easily set up a free trial period when creating your plan. When setting up your plan, you can specify the free trial duration in days or weeks. Remember that customers will not be charged until the trial period ends.
Can I charge a one-time setup fee in addition to the recurring price?
Absolutely. You have the option to add a one-time setup fee that will be included in the customer's initial payment. This is useful for covering onboarding costs, setup time, or any other initial expenses associated with starting a subscription.
You can set the amount of this fee when creating your plan.
What choices do I have for billing schedules?
You can choose to bill customers when they initially sign up or on a specific day of the month.
Can I choose which payment methods my customers can use?
Yes, you have the flexibility to accept credit cards, ACH payments, or both on a recurring payment plan.