You can use the Import/Export option under invoicing to move invoice details in bulk either into or out of your Helcim account.
To import or export your invoice information, click on the three dots on the top right hand side of the screen, beside the New Invoice button.

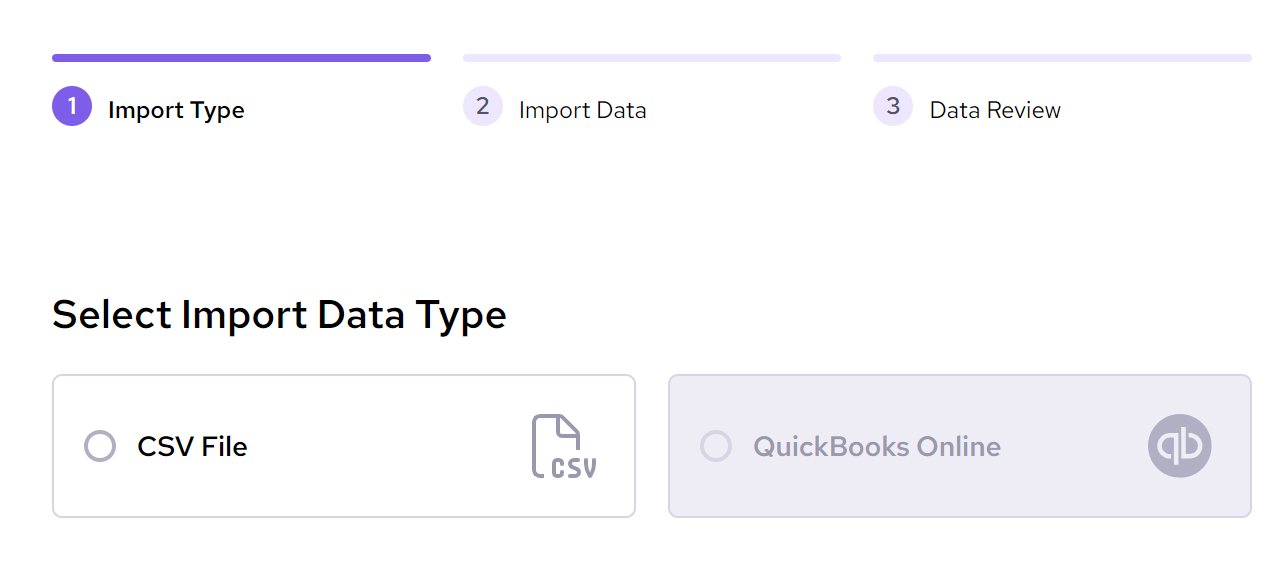
Data Import
If you want to import data to your account, you can do so using a CSV File. Click on the CSV File to confirm the import type, then click Next.
Use the drop-down menu to select the date format that matches your formatting, then select the file you want to upload by clicking on the Browse button.
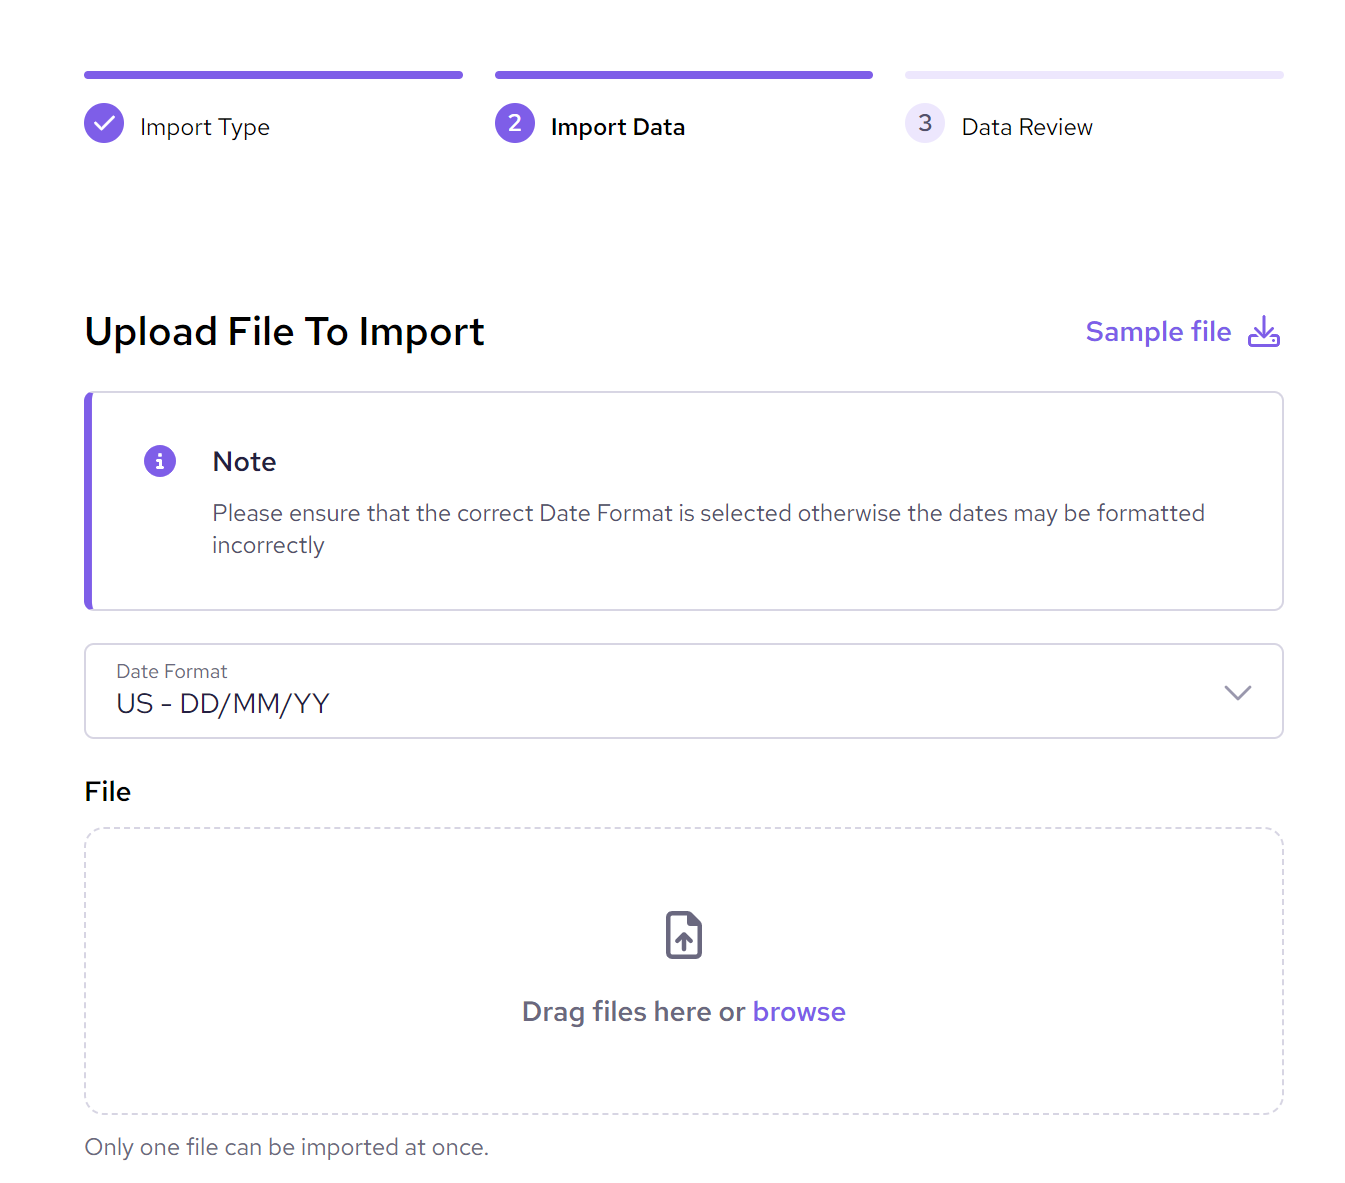
To ensure your data is formatted correctly, download the Sample File that is included in the Upload File screen to view an example of how the data needs to be formatted.
You will get a notification once the file is successfully uploaded and if there are any errors with the document.
Once the file has been added click on Next.
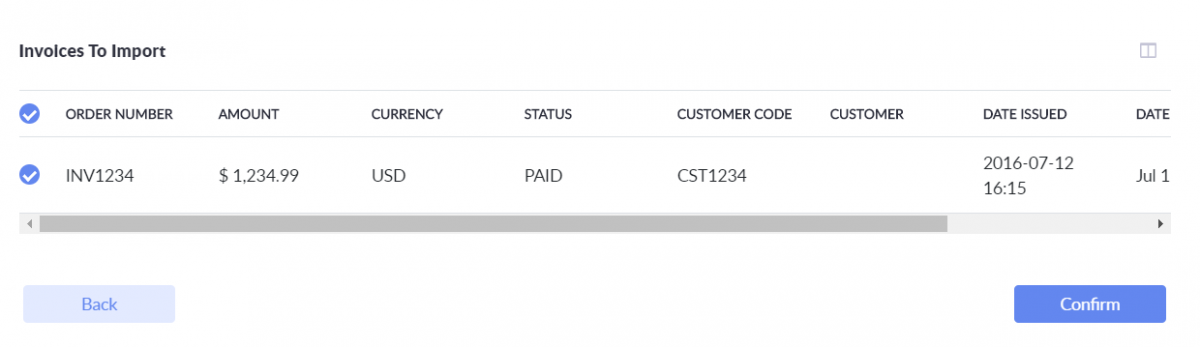
Review the data that will be uploaded before clicking Confirm to upload the information. If you need to make any changes, you can click Back to return to the previous screen. If everything is correct, click Confirm to upload the information.
If the system detects an error in the data, the information will be displayed below the Invoices to Import for your review.
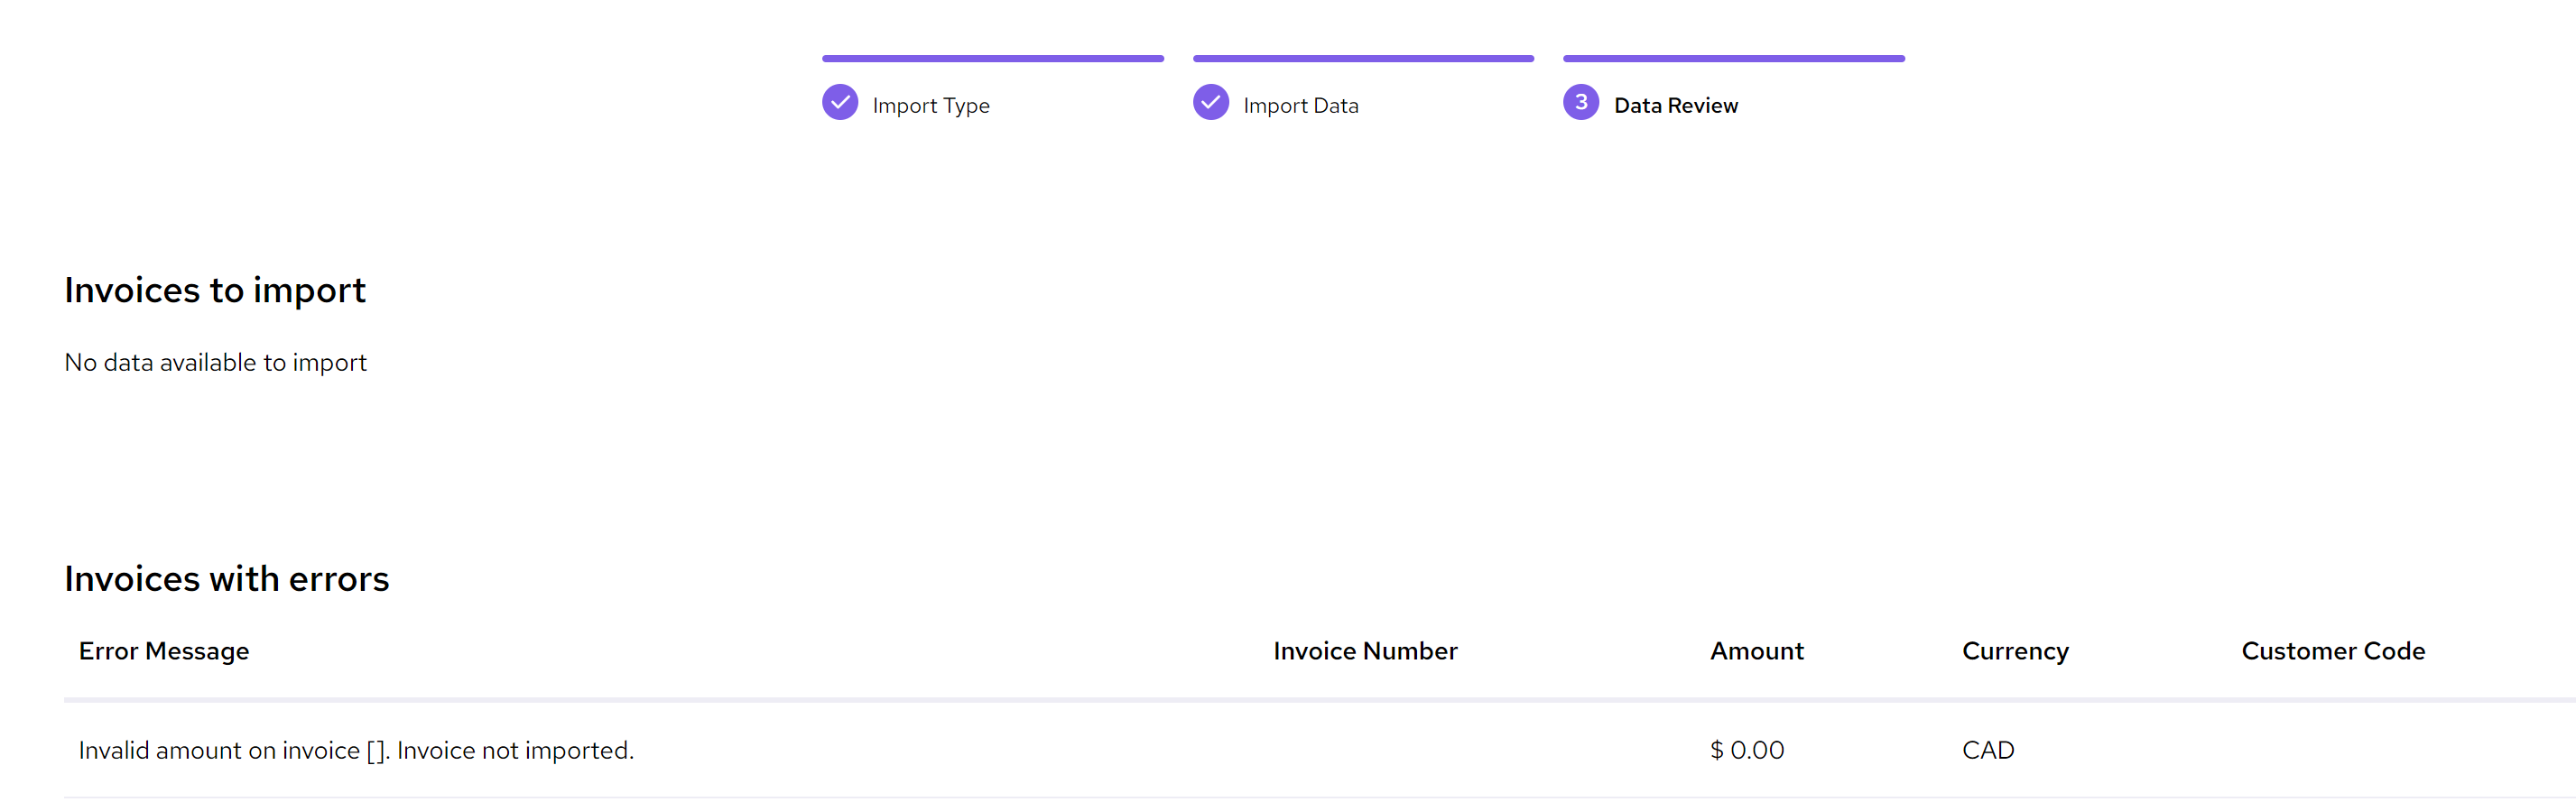
Once you click Confirm, the information will upload, and you will see a confirmation message for the information that was added.

Data Export
If you want to export your invoice information, click on the three dots on the top right hand side of your screen, beside the New Invoice button.

You can choose to export your data as a CSV File, or to QuickBooks Desktop.
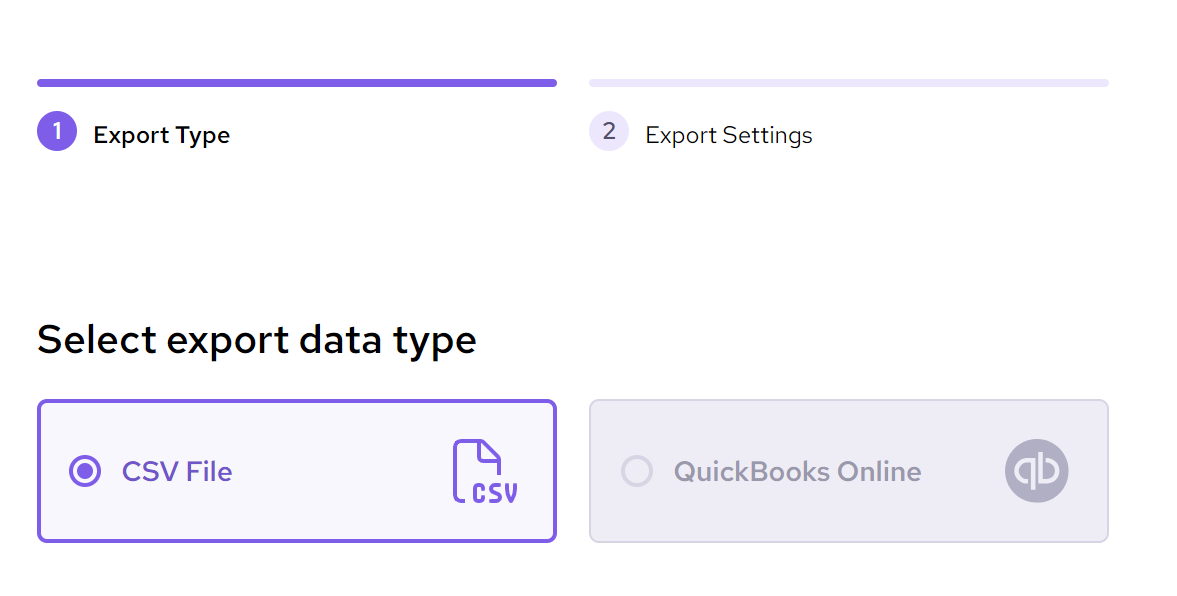
After you have selected the format you would like, click ˜Next'.
You can customize how you want the information exported, including:
- Currency
- Customers
- Date Format
- Invoice Status
- Date Range
- Email address you want the report sent to
- If you want to include Invoice Items Yes or No
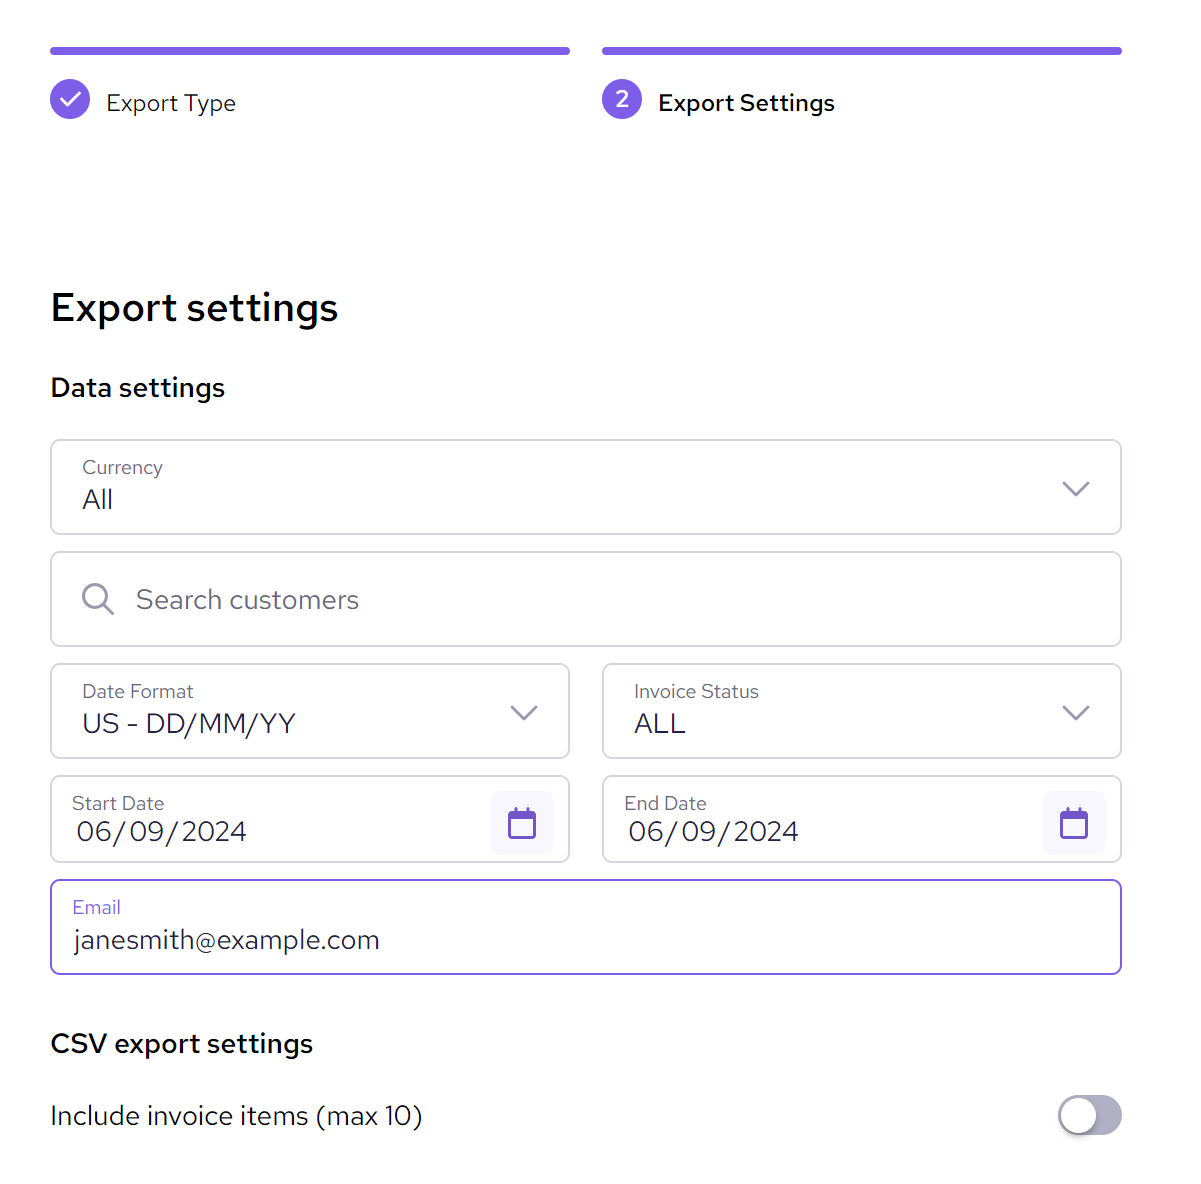
After you've confirmed the export settings, click on Export. A pop-up message will confirm if the export was successful.