The Helcim platform provides tools to help you manage chargebacks efficiently.
This article will guide you through the Chargebacks section of your dashboard, showing you how to view chargeback details, respond to disputes, and track their progress.
In this article
Accessing the Chargebacks section
You can find all the information and tools you need to manage chargebacks in one place on your Helcim dashboard.
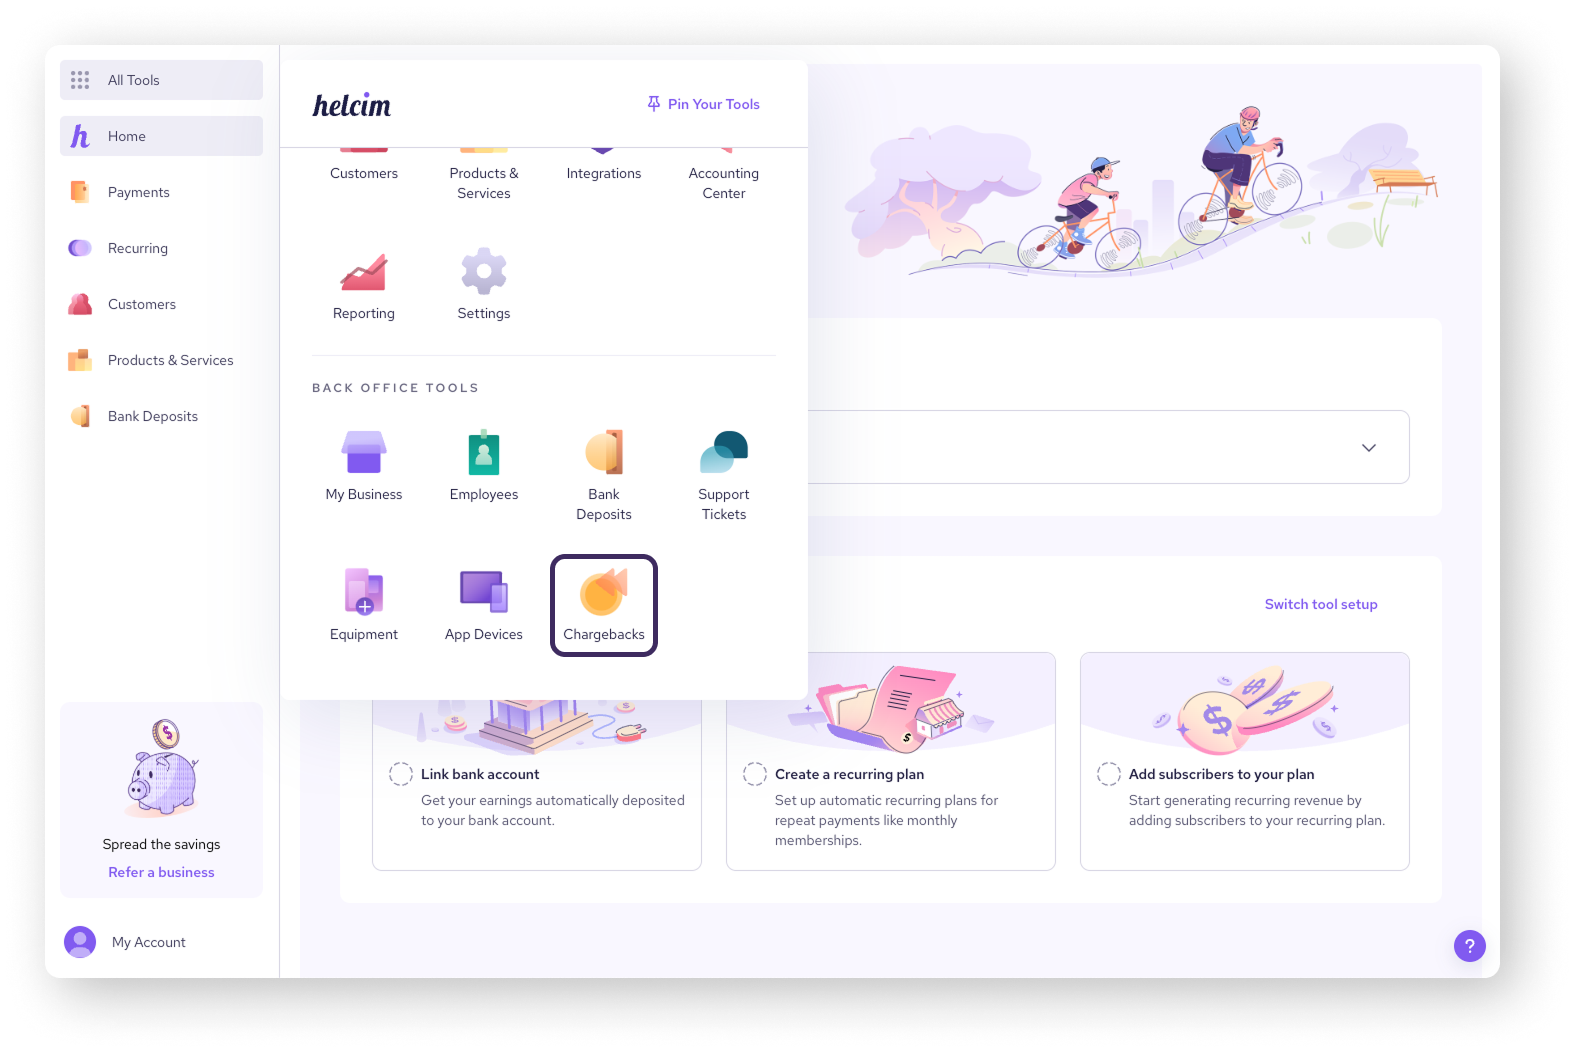
Go to All Tools.
Scroll to Back Office Tools.
Click on Chargebacks.
This will take you to your Chargebacks List, where any incoming chargebacks will be shown.
Viewing the chargeback list
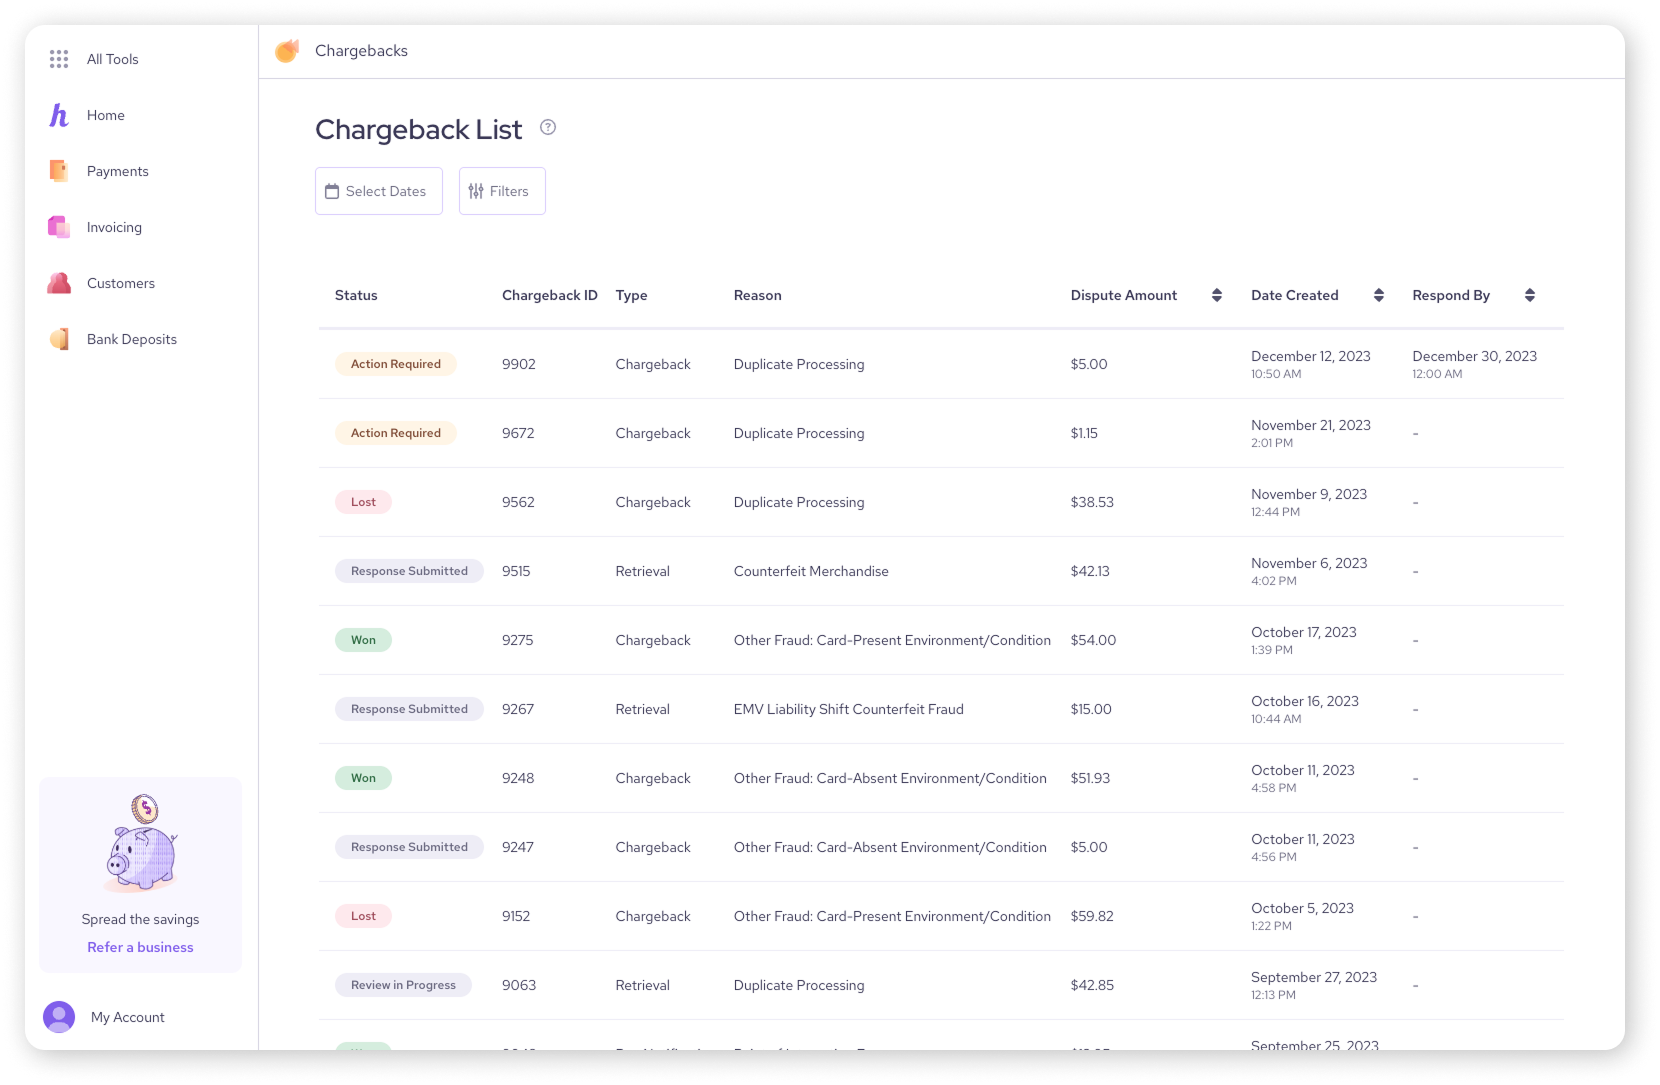
The Chargebacks page displays a list of all chargebacks filed against your account.
Here's the key information you'll see for each chargeback:
Status: The current status of the chargeback (e.g., Action Required, Accepted, Won).
Chargeback ID: A unique identification number for the chargeback.
Reason: The reason code provided by the customer's bank for the chargeback (e.g., Fraud, Error).
Dispute Amount: The amount that is being disputed by the customer.
| The Respond By column indicates your deadline for countering the chargeback. If the date passes without a response, the chargeback will automatically be accepted and the customer will keep the disputed funds. |
Countering a chargeback
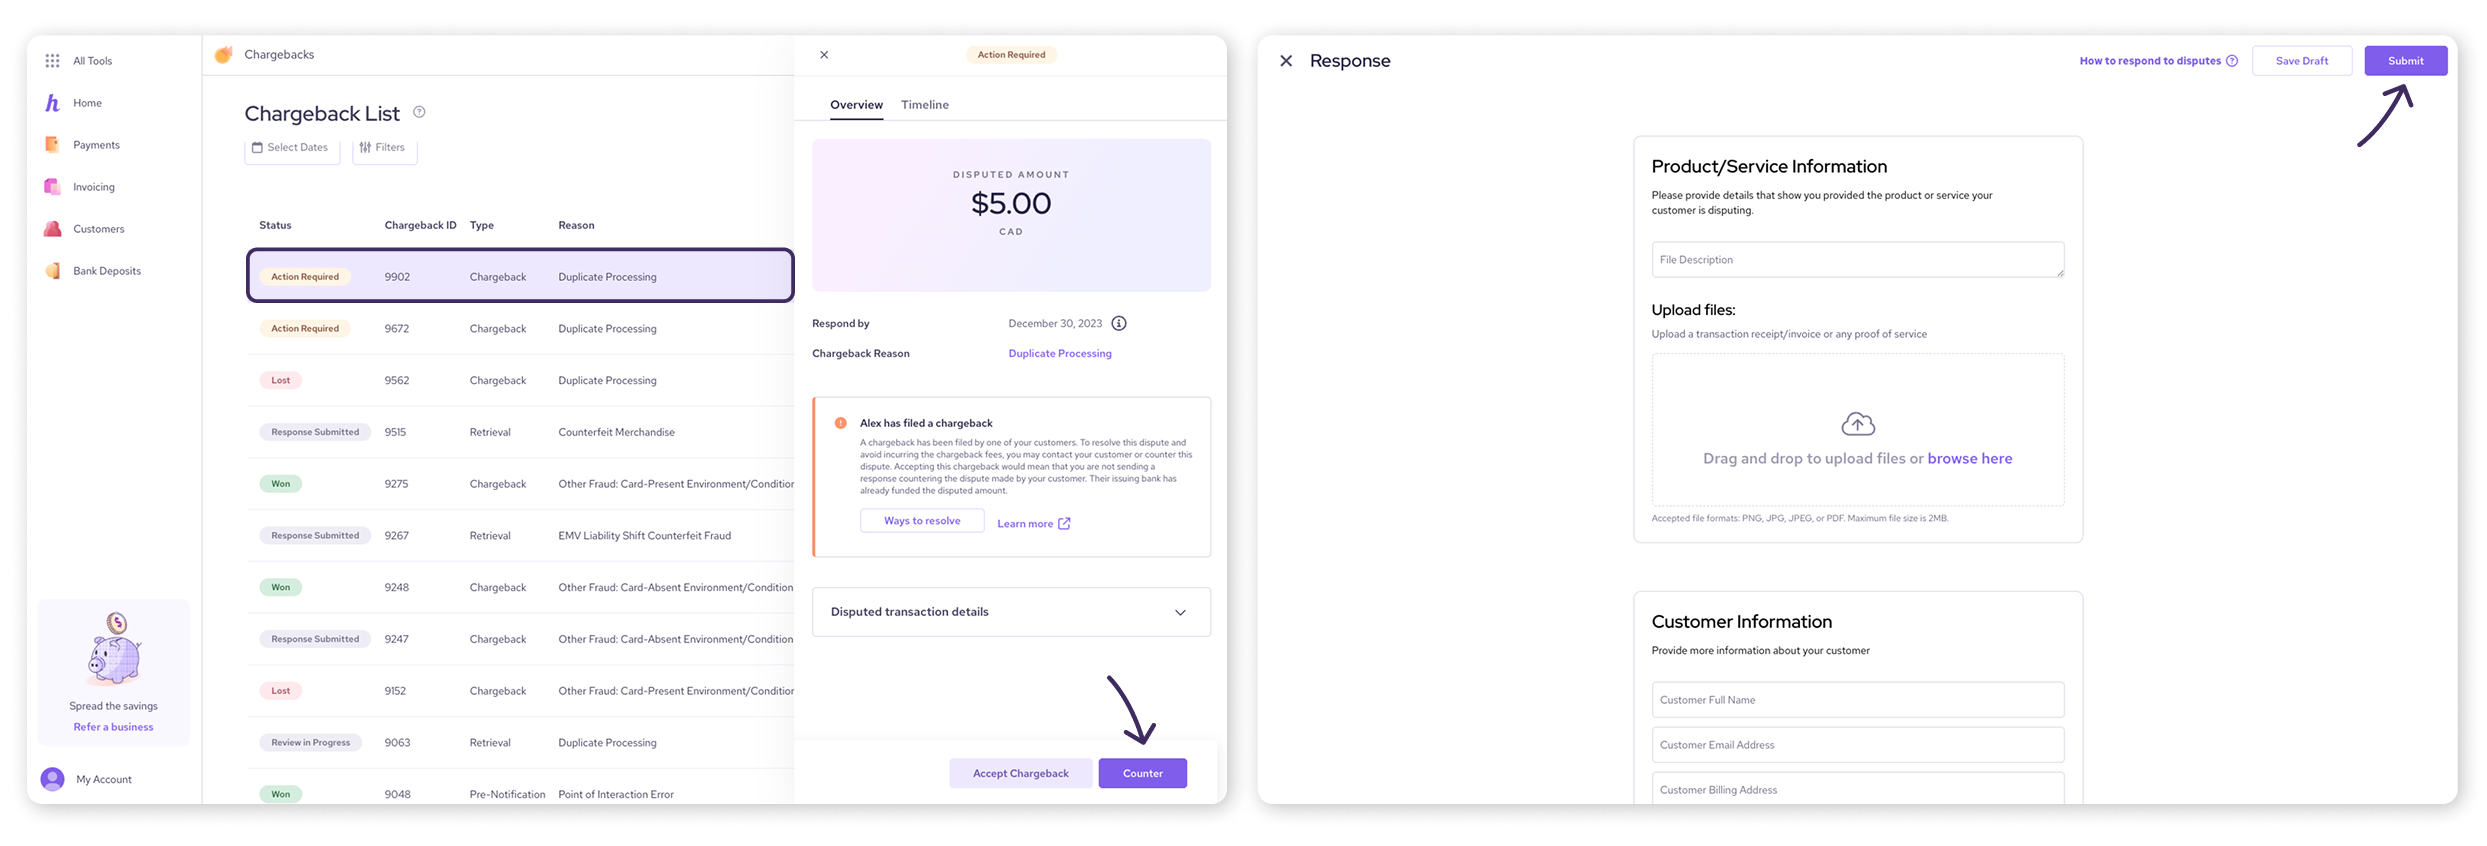
If you believe a chargeback is invalid, you can dispute it by providing evidence. This is called "countering" the chargeback.
On your chargeback list, select the chargeback you want to dispute.
A side-drawer will open with the details of the chargeback.
Select Counter.
Upload files that show you provided the product or service your customer is disputing.
Provide your customer’s information from the purchase.
Provide any additional evidence that would help your dispute. This could include:
Receipts or invoices
Shipping confirmation
Customer communication
Double-check all your information and click Submit.
If you don’t have all the information you need yet, you can select Save Draft and come back later.
| For more information on what evidence to submit, visit our article: Tips on countering chargebacks. |
What happens after I submit a chargeback counter?
So, you've submitted your evidence – what happens next? Here's a quick rundown:
First, the chargeback status in your dashboard will change to Response Submitted. This just confirms that we've received your information.
Then, we'll forward your response and evidence to the bank that issued the card. Once we do that, the status will update to Review in Progress. At this point, it's in the bank's hands.
Finally, we'll let you know the bank's decision. We'll notify you directly, so you don't have to constantly check the dashboard.
Of course, you can also keep an eye on the chargeback's progress in the Chargeback Timeline in your dashboard. It'll show you all the key updates.
Accepting a chargeback
If you agree with the chargeback, you can accept it. This acknowledges that the customer is entitled to a refund.
On your chargeback list, select the chargeback you want to accept.
A side-drawer will open with the details of the chargeback.
Select Accept Chargeback.
A pop-up will appear to confirm your decision. Click Accept to proceed.
| Accepting a chargeback cannot be undone. It also has consequences:
Click here to learn more. |

Tracking chargebacks
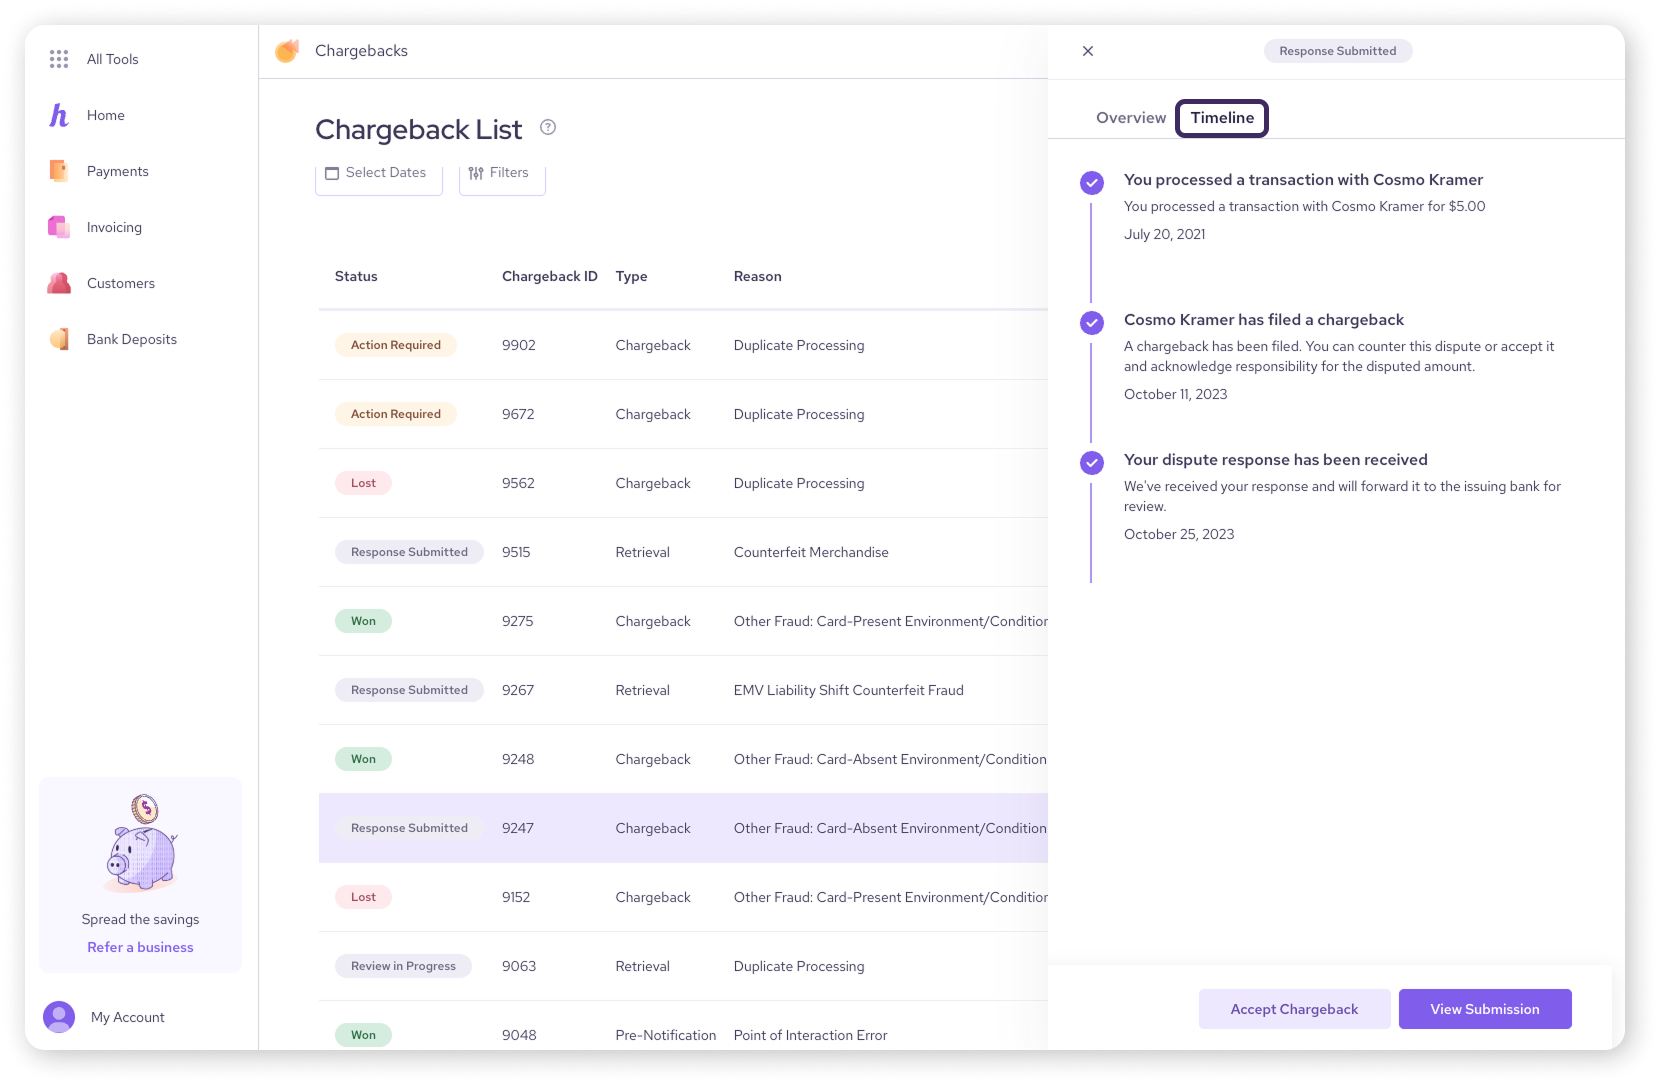
You can monitor the progress of a chargeback directly in your Helcim dashboard. The Status column in the chargeback list will keep you updated.
You can also view a detailed timeline of events by selecting a chargeback from the list, then opening the Timeline tab in the side-drawer.
Processor fees on chargebacks
When a chargeback hits, it's easy to focus just on the money you lost from the sale.
| But here's something important to know: you still pay the original processing fees for that transaction. |
These fees aren't refunded, even if you win or lose the chargeback.
Why?
Because those fees cover the cost of Helcim (or any processor) doing the work to initially process the sale.
That work still happened, even if the customer later disputed the charge.
Next steps
For tips on gathering strong evidence to dispute chargebacks, see our article Tips on Countering Chargebacks.
FAQs
What happens if I don't respond to a chargeback?
If you don't respond by the deadline, the chargeback will be automatically accepted, and you will lose the disputed amount and a $15 chargeback fee per disputed transaction.
Where can I find supporting documents for my chargeback response?
Gather any documents related to the transaction, such as receipts, shipping confirmations, and customer communication. For more information on countering chargebacks, visit this learn article.