Want to make it easy for your customers to subscribe to your recurring payment plans? Helcim's Payment Links feature allows you to create shareable links that customers can use to sign up themselves. This article will show you how to access, customize, and use Payment Links.
In this article
Accessing Payment Links
Payment Links provide a convenient way for customers to self-subscribe to your recurring plans.
To access Payment Links:
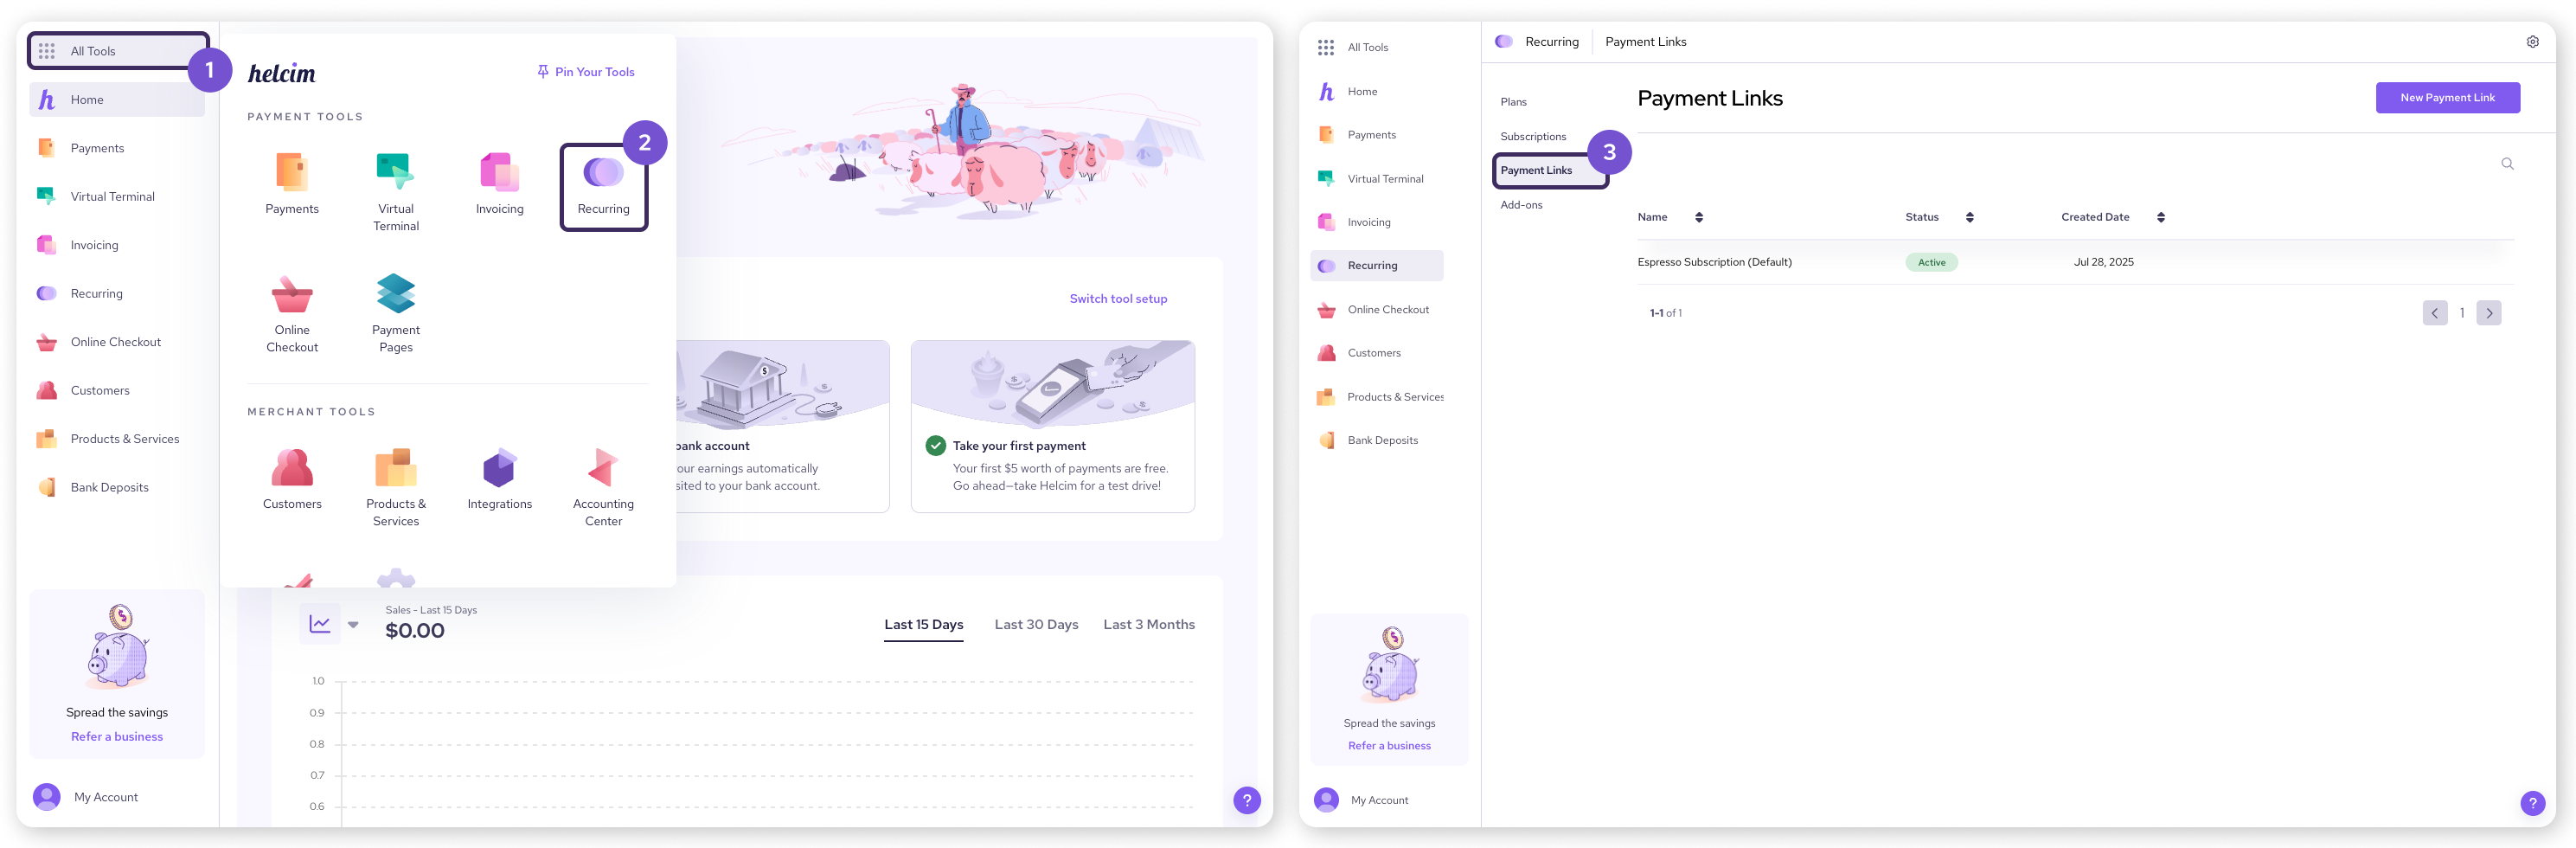
Open the All Tools menu.
Select the Recurring tool.
Navigate to Payment Links.
On the Payment Links page, you can view existing links or create new ones by clicking New Payment Link.
| A default payment link is automatically created for each plan. This default link includes basic fields like name, email, and billing address (if applicable for tax purposes). |
You can find this default link in the plan's overview or customize it under the Payment Links tab.
Customizing Payment Links
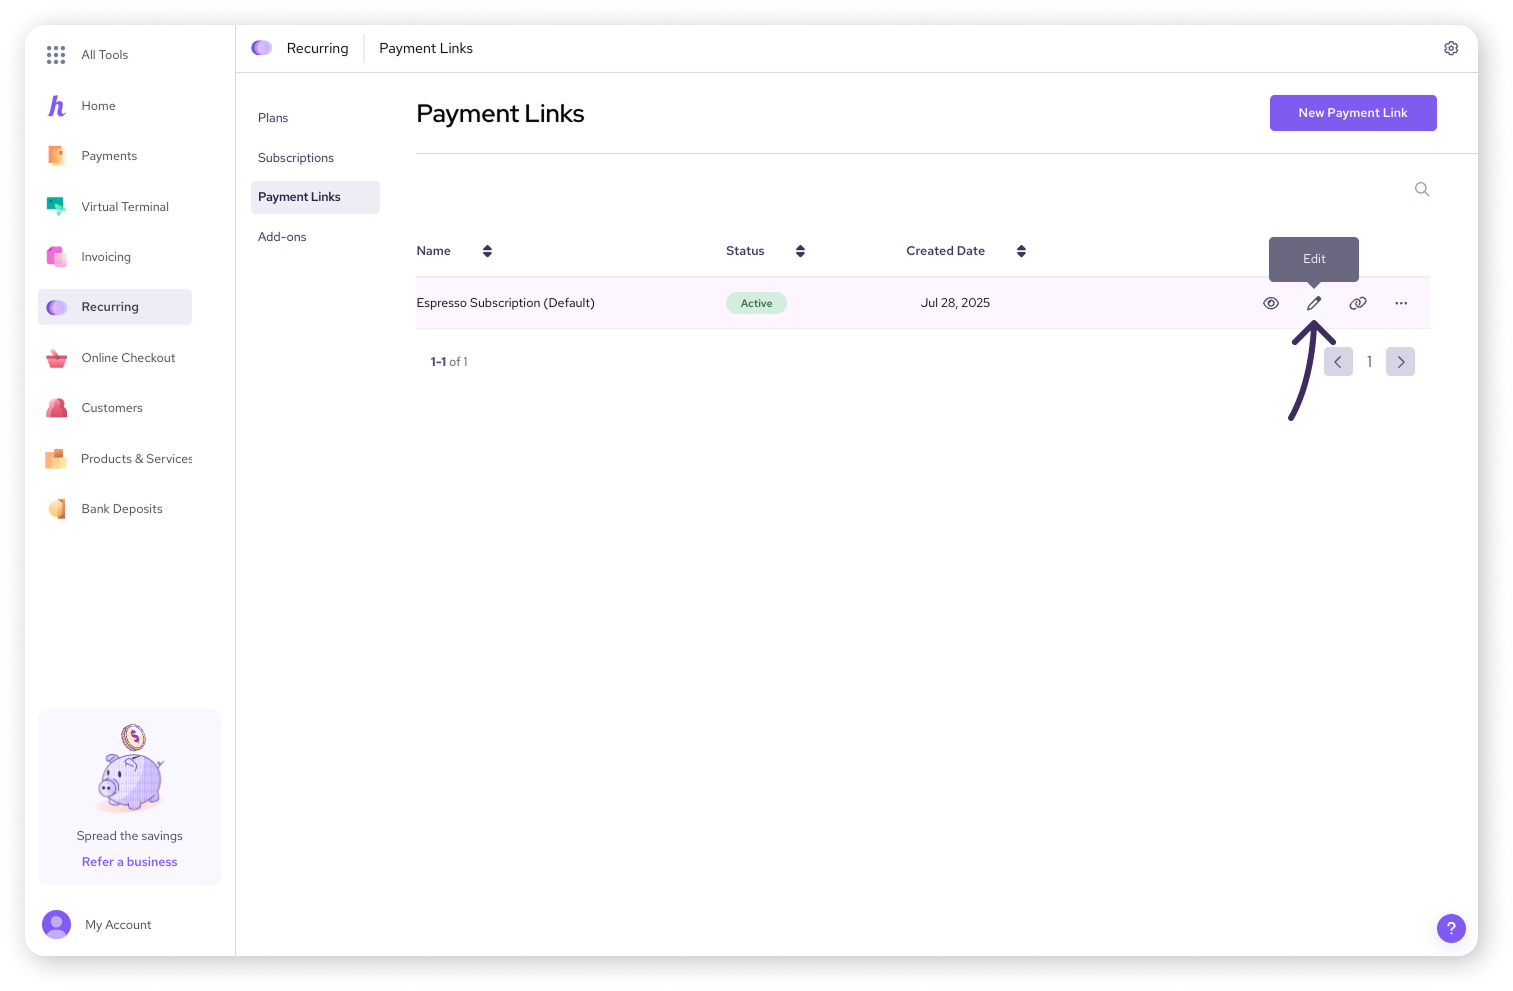
Helcim gives you the flexibility to customize the appearance and information requested on your Payment Links. Hover over the link you want to customize and click the pencil icon to enter the edit page.
You’ll see the following customization options.
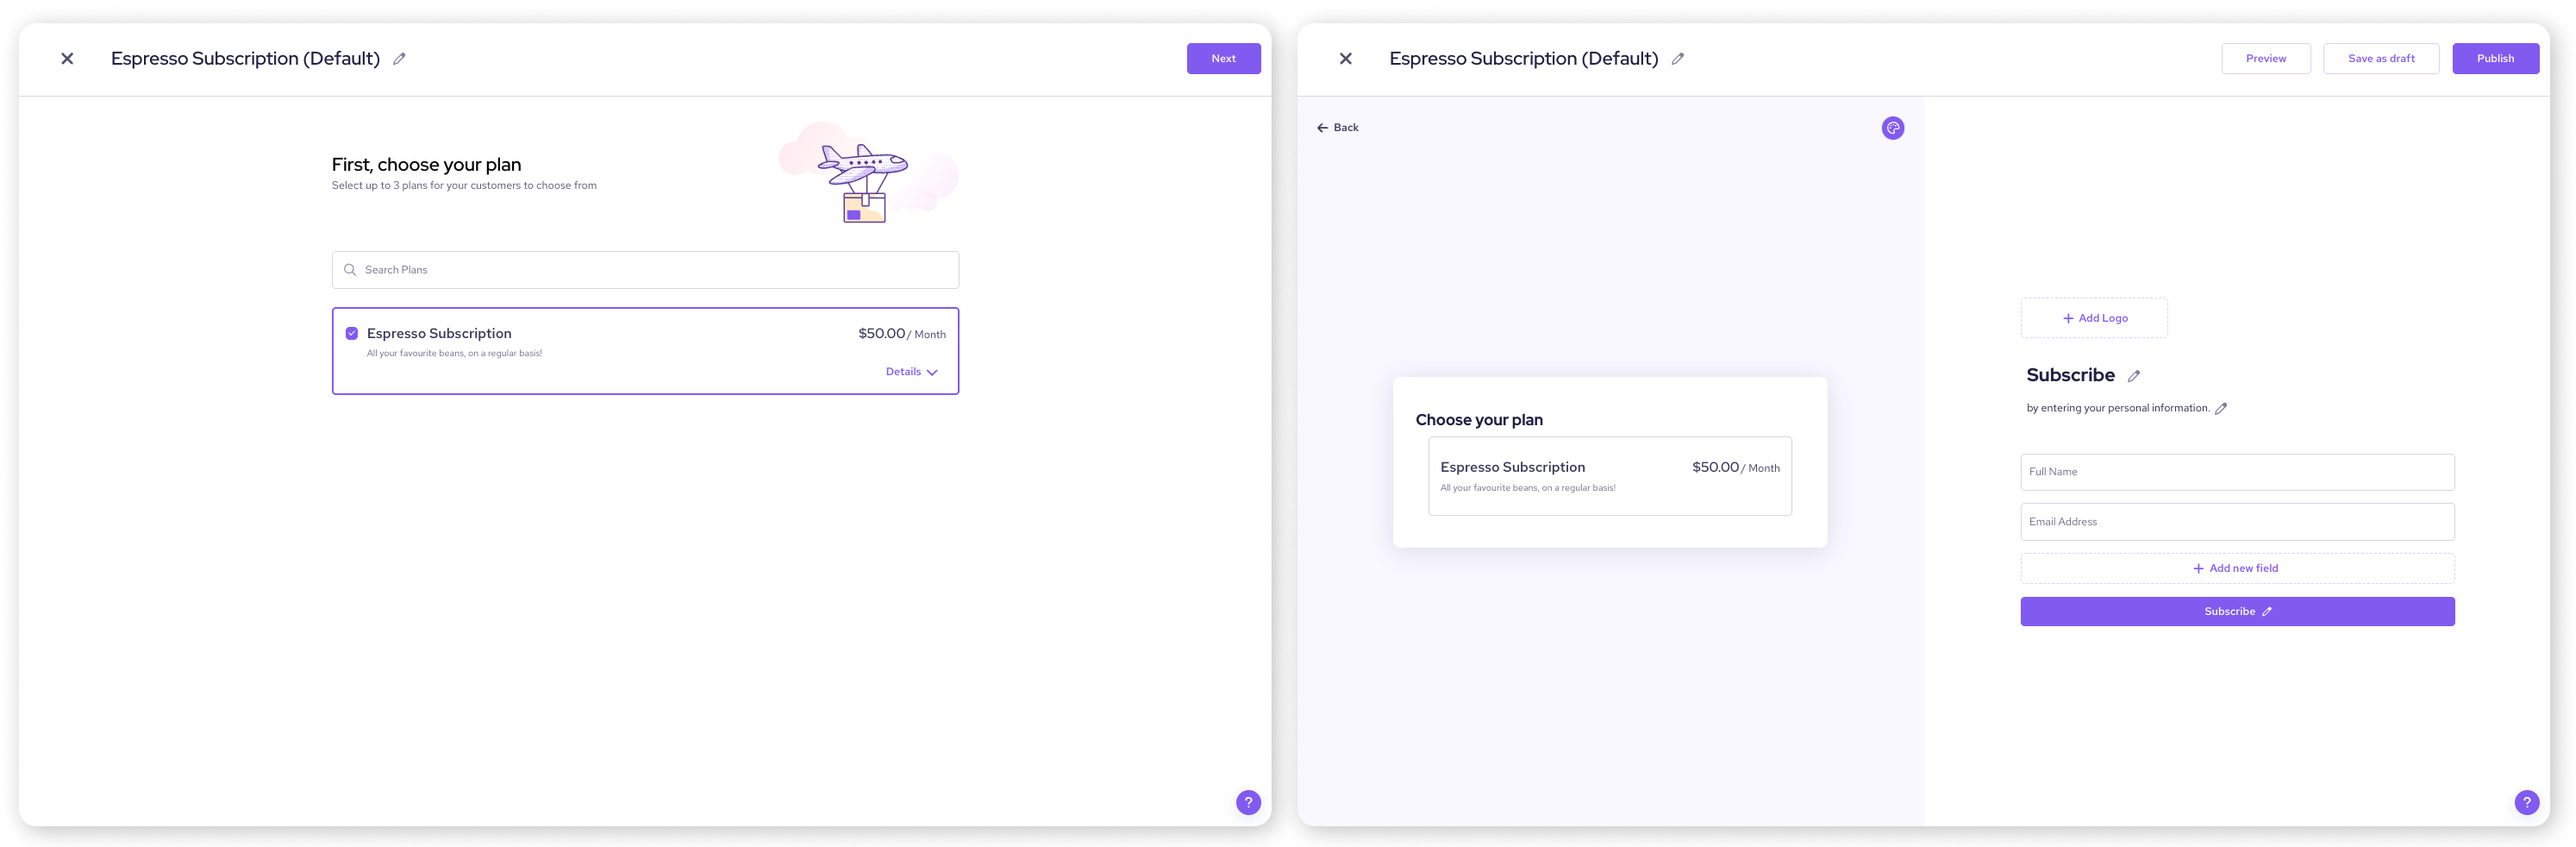
Plan choice
You can make the payment link for a single plan or allow customers to choose from up to three plans.
Appearance
Change the theme color, add your company logo, and edit the page title or description.
Information fields
Add, remove, or rearrange fields such as name, email, and address using the form builder.
Call-to-action button
Click the pencil to edit the text on the button that prompts customers to subscribe.
As you make changes, you can save your progress as a draft, preview the link, or publish it to make it live.
Adding a custom redirect after payment
After a customer uses a Payment Link to subscribe, you can direct them to a specific URL on your website. This is useful for thank-you pages, confirmation messages, or further instructions.
To set up a custom redirect:
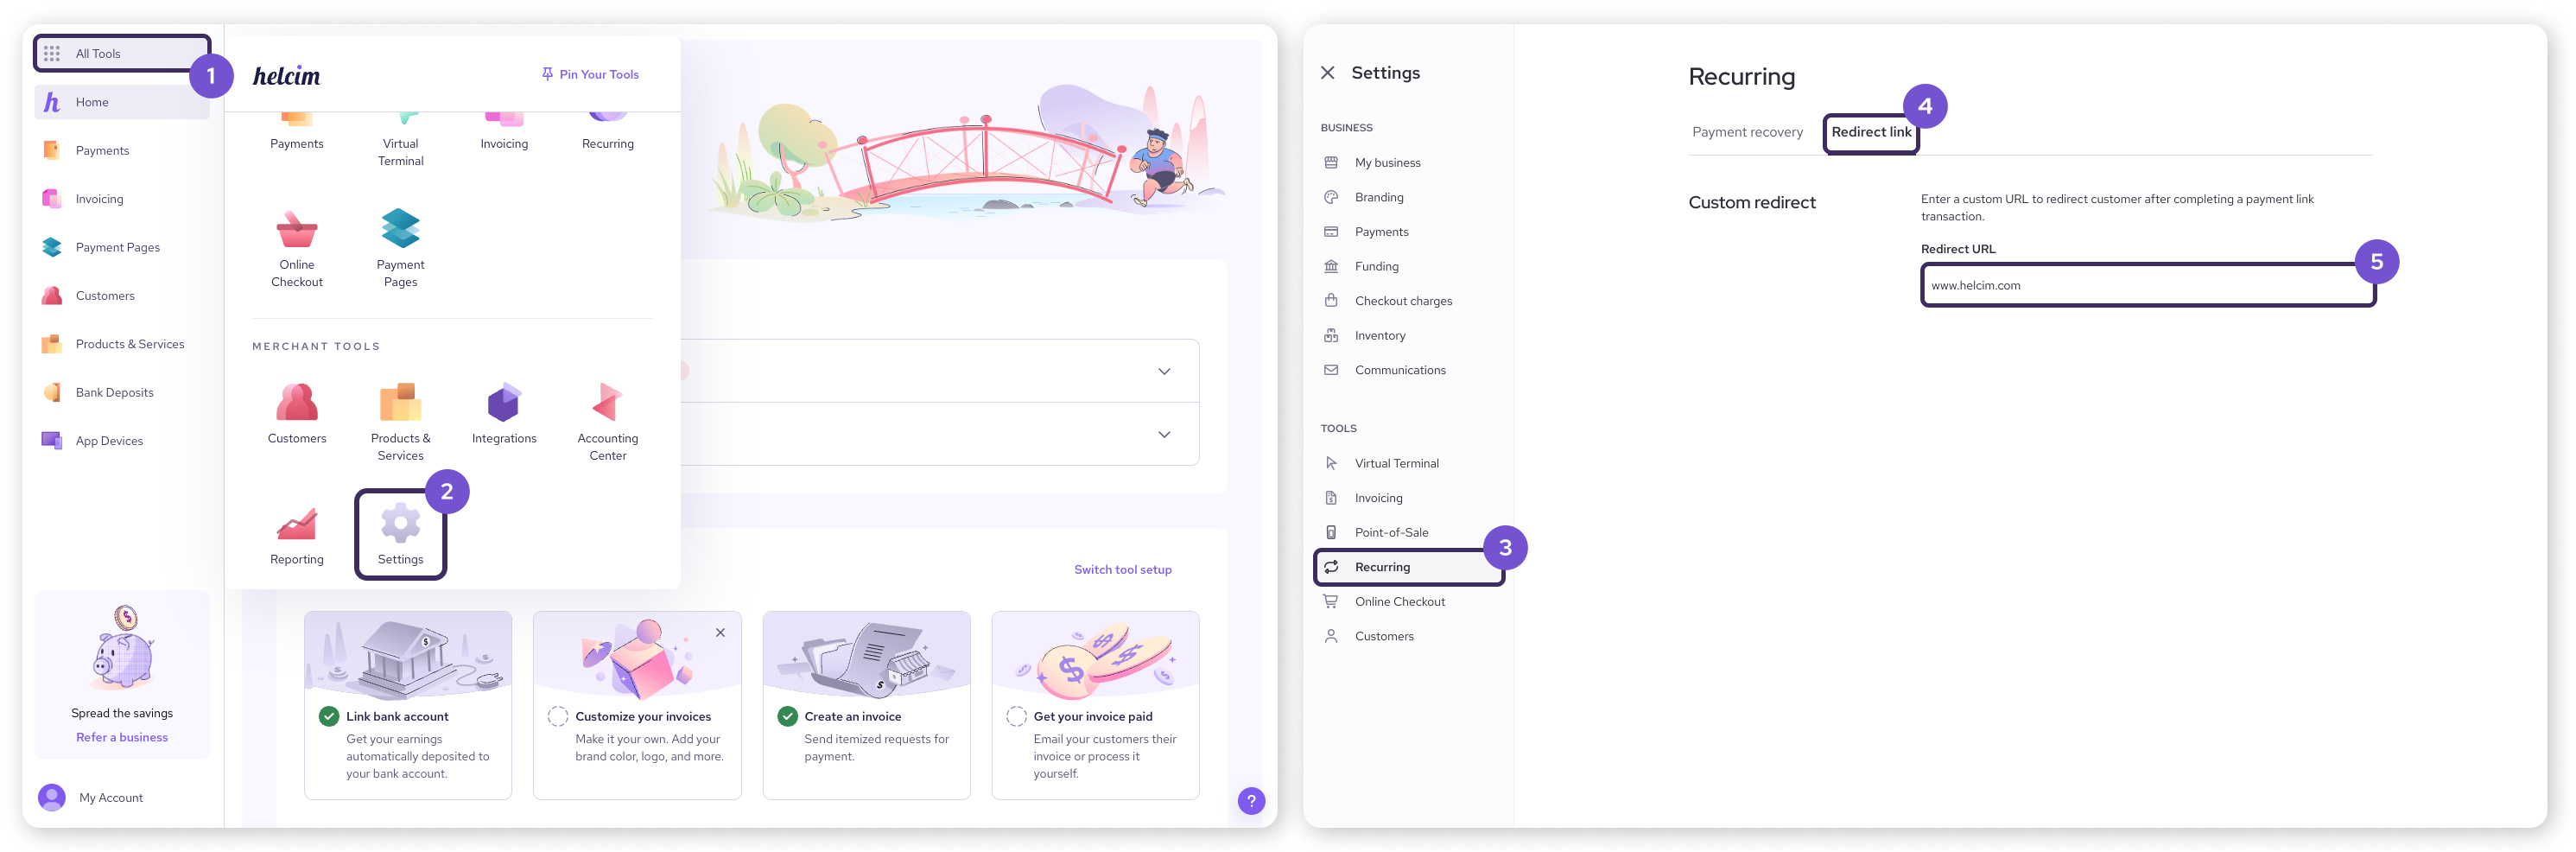
Open the All Tools menu.
Select Settings.
Select Recurring.
Select Redirect link.
Enter the URL for your desired page under the Redirect URL field.
If you don't set up a custom redirect, the customer will remain on the same page after clicking Subscribe.
Next steps
Now that you've set up your Payment Links, here are some other helpful resources for managing your recurring payments:
Add-ons and one-time charges: To learn how to offer additional products or services with subscriptions, or to charge setup fees, see Create add-ons and one-time charges.
Manage recurring plans: For information on editing plans, changing billing cycles, and other plan-level actions, refer to Manage recurring payment plans.
FAQ
Can I create multiple Payment Links for the same plan?
Yes, you can customize different links for the same plan if needed (e.g., for different promotions). Select New Payment Link and choose an existing plan to create a new link for it.
Do Payment Links automatically collect billing information?
Yes, Payment Links are designed to securely collect the necessary billing information from your customers.
After they enter the required fields in the form, a payment window will appear where they can enter their card details for a credit card payment, or their bank account information for an ACH payment.
What happens if I edit a Payment Link after sharing it with customers?
Any changes you make to a Payment Link will be reflected for anyone who uses the link.