Is collecting payments a hassle for your business? Helcim Invoicing simplifies the process and helps you get paid accurately and on time.
In this article, we'll walk you through the different ways to process customer payments, making the whole process much smoother
In this article
Sending a payment link through email
When you send an invoice to a customer, they receive an email that contains a link to view their invoice online. They can then click a ‘Pay Now’ button to easily pay online.
Go to the Invoicing tool
In the Invoices tab, select the invoice that needs to be paid
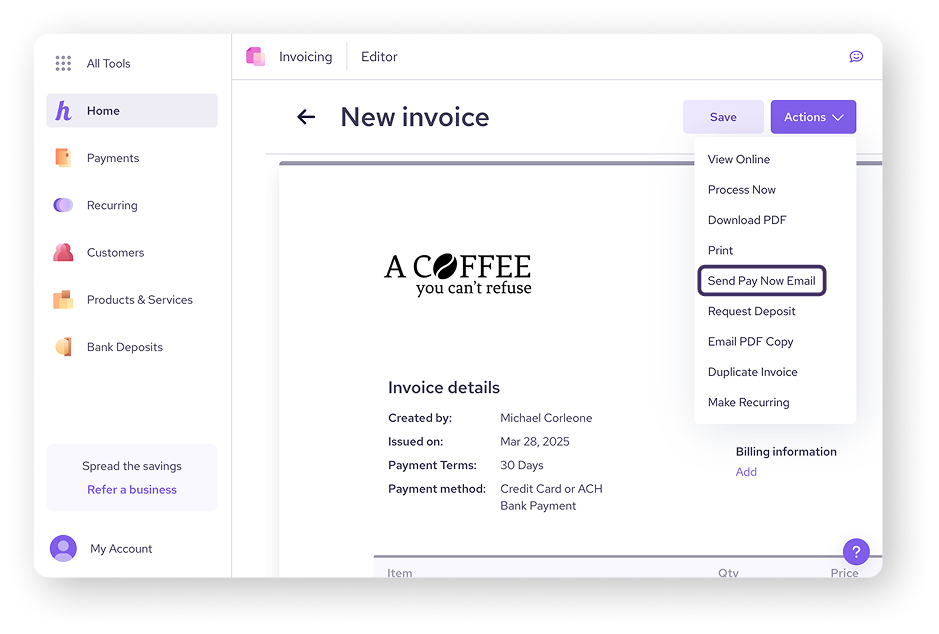
Select Actions and then Send Pay Now Email
The tool will automatically draft a message for you based on your invoice number, amount due, and due date
Review the email and make any edits
Once ready, click Send

From there, your customer can select Review and Pay Invoice in the email. They’ll be taken to a separate page with the invoice on it.
| In the top-right corner of the page, your customer can select Pay Now to pay for the invoice. |
Customers will then be guided through the payment method that was specified on the invoice. (e.g. credit card, ACH bank payment, or both.)
Processing a payment manually
If you need to manually process a payment for a customer, you can do so through your Helcim account.
Go to the Invoicing tool
In the Invoices tab, select the invoice that needs to be paid
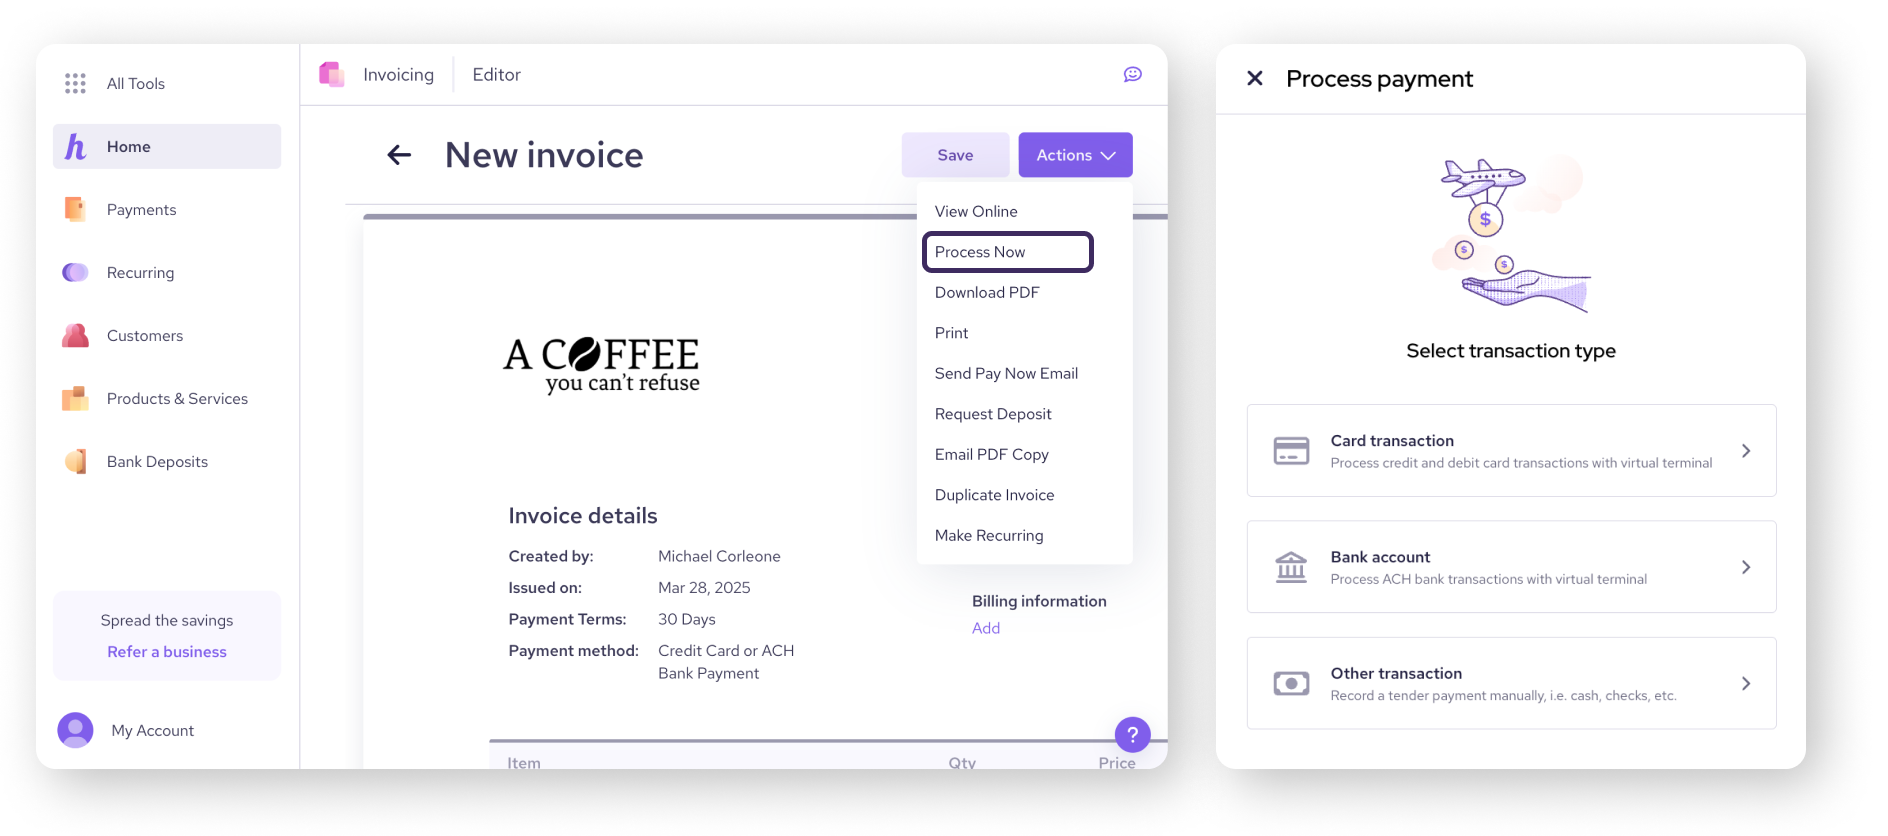
Select Actions and then Process Now
Choose the transaction type.
You can choose a Card transaction, or a Bank account for an ACH payment (EFT for Canadians) through the virtual terminal
Either option will redirect you to the Helcim Virtual Terminal in a new tab. Use the terminal to process the payment.
| If the customer pays with cash or check, select Other transaction. Fill out the payment details and select Save to mark the invoice as paid. |

Requesting deposits
Helcim Invoicing also allows you to accept deposits for invoices. This can be useful for projects that require upfront payment or for securing a customer's commitment.
To request a deposit, go to your Invoices and select the invoice that needs a deposit.
Select Actions and then Request deposit.
Fill out the deposit details, including the deposit amount, due date, and an optional subject line.
Once you've entered the deposit details, click Send to send the deposit request to your customer.
Next steps
Now that you know how to process payments for your invoices, we can now look into how to manage due invoices.
| Check out our next article in the series on managing due invoices. |
FAQ & troubleshooting
What payment methods does Helcim Invoicing accept?
Helcim Invoicing accepts a variety of payment methods, including ACH, credit card, and debit. You can also track cash and check payments you’ve taken in your merchant account.
How do I know when a customer has paid an invoice?
You'll receive a notification when a customer pays an invoice. You can also view the payment status of your invoices in your Helcim account.
What happens if a customer doesn't pay an invoice?
If a customer doesn't pay an invoice, you can send them a reminder email or contact them directly to follow up. You can also set up automatic payment reminders in your invoice settings.
Can I refund a payment made on an invoice?
Yes, you can refund a payment if you need to. Simply go to Payments > Transactions, find the transaction corresponding to the invoice, select the three dots on the right, and then Refund.