If you need to add a new customer before sending an invoice, update details for a regular customer, remove an old contact, or fix a duplicate entry you accidentally created, then you’re in the right place!
This guide makes managing your customer list simple – here's exactly how to add, edit, delete, and merge profiles in Helcim.
In this article
Adding a new customer
Here’s how to add a new customer to your customer list.
Step 1: Create a new customer profile
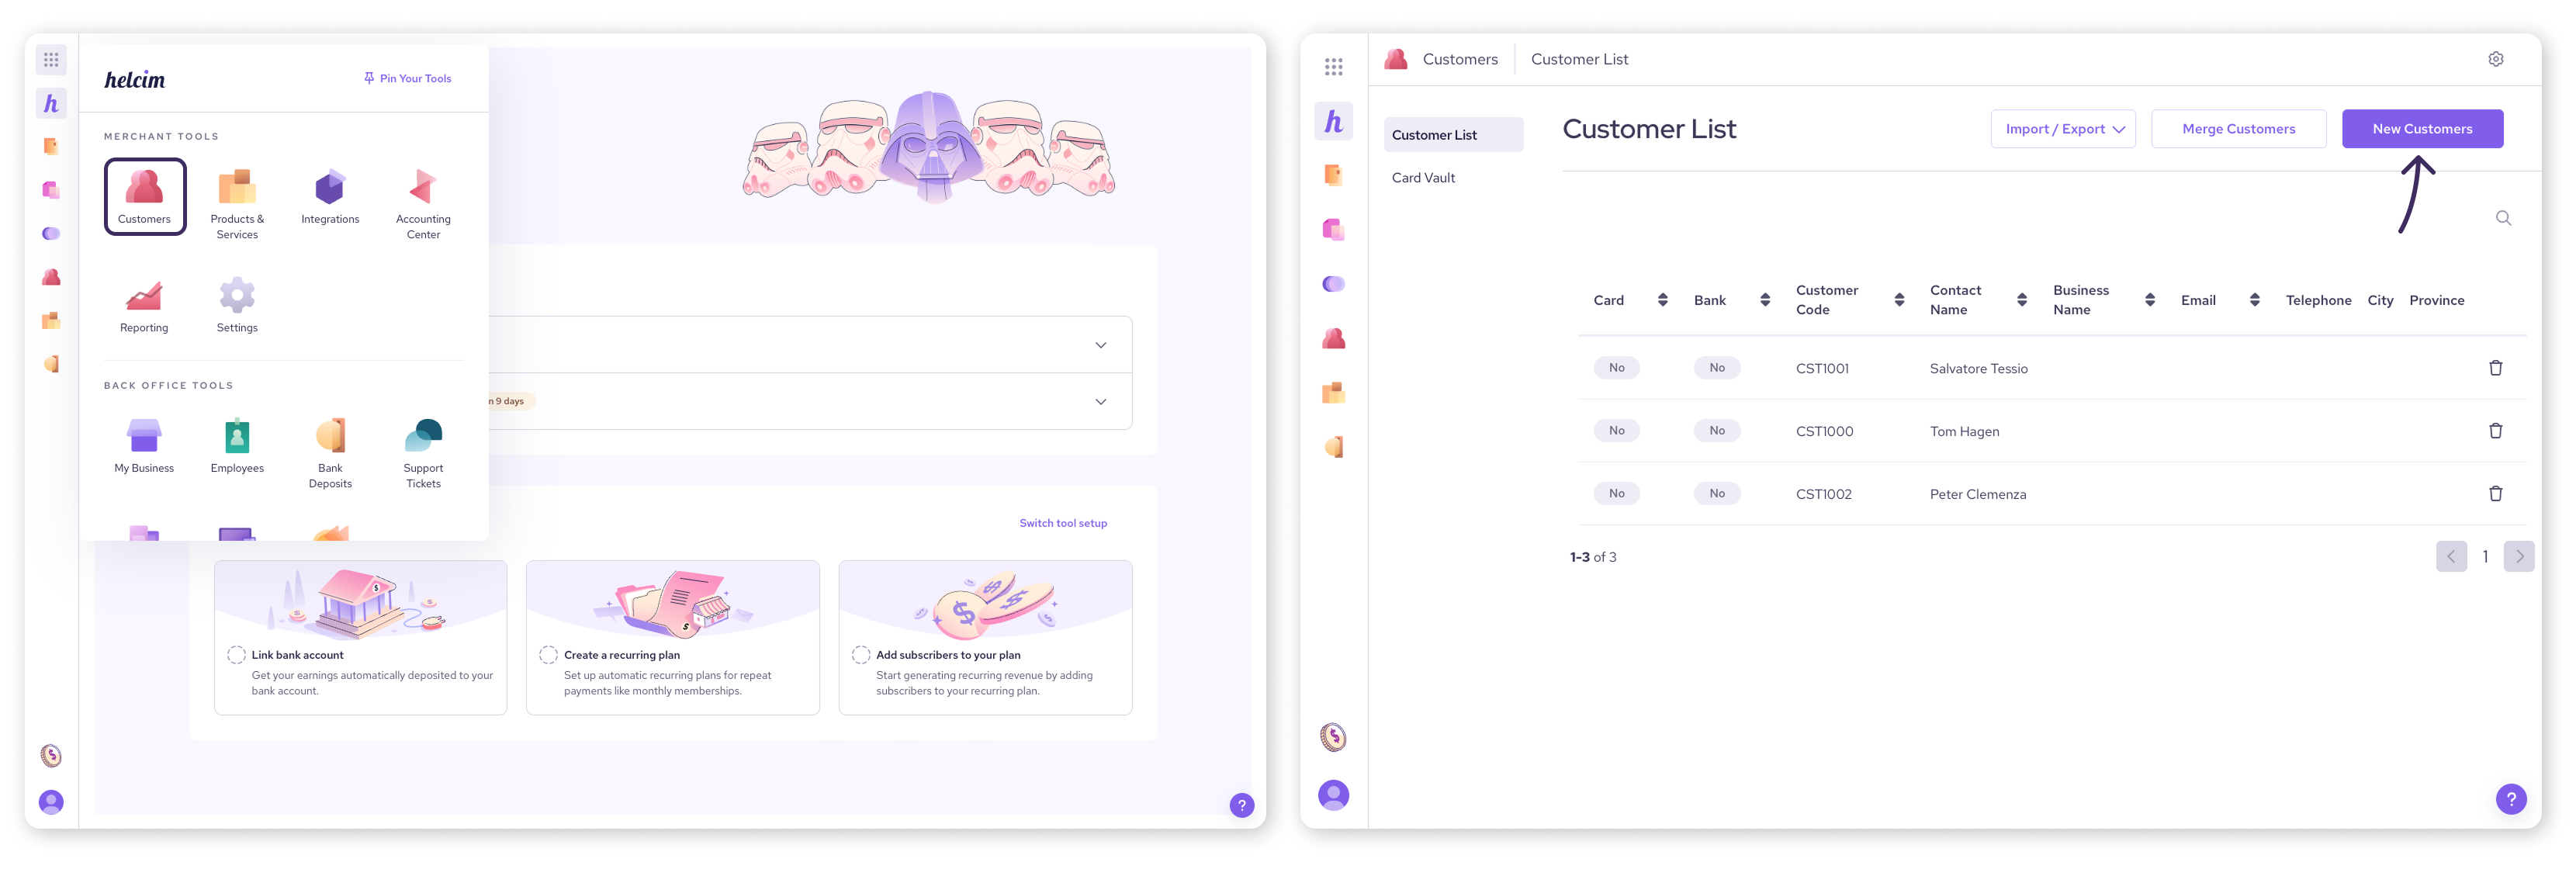
Navigate to Customers in the All Tools menu, then click Customer List.
Click the New Customers button in the top right corner.
Step 2: Fill out the customer’s basic information
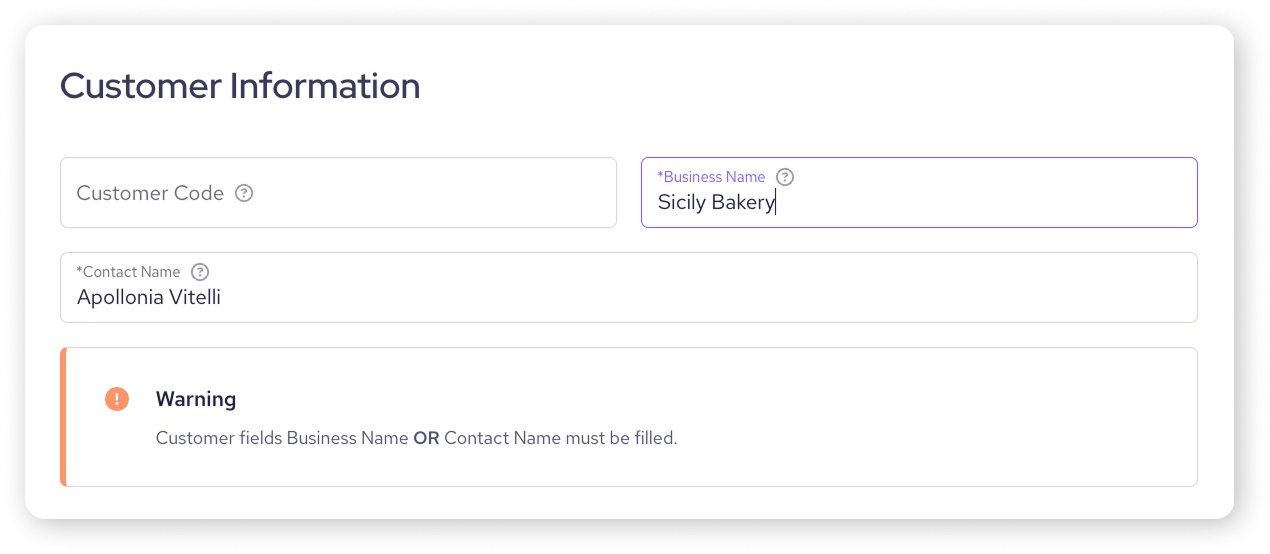
Under the Customer Information tab, fill in the basics:
Customer Code: If you leave this blank, a code will auto-generate based on your settings. You can also enter a unique code.
Business Name: If applicable.
Contact Name: The primary person's name.
Step 3: Enter the customer’s address details
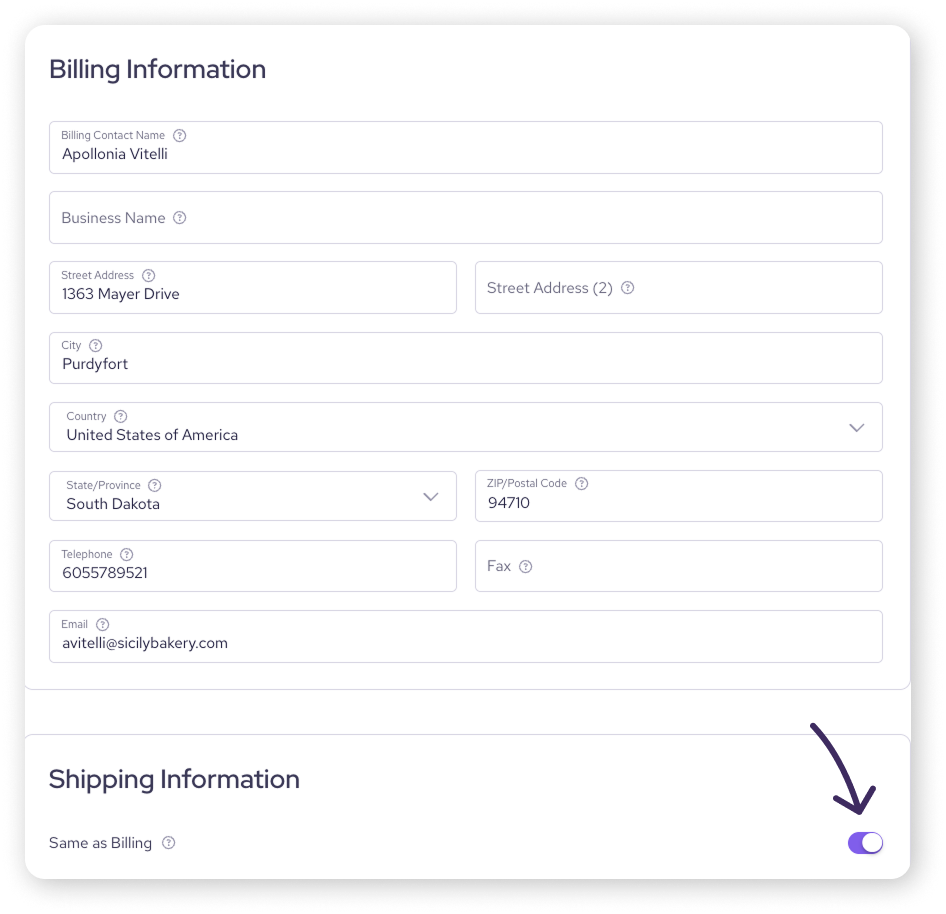
Enter the Billing Information provided by your customer.
For Shipping Information, you can toggle the switch ON to use the same address as billing, or toggle it OFF to enter a different shipping address.
Step 4: Configure advanced options for the customer (optional)
Click the Advanced Options tab for additional settings (all optional):
Tax Exempt: Specify if the customer is exempt from taxes.
VAT Number: Enter if applicable for Level 3 processing.
Accepts Marketing: Track if they've opted into marketing communication.
Wholesale Pricing: Toggle on if they are eligible for wholesale prices on your products.
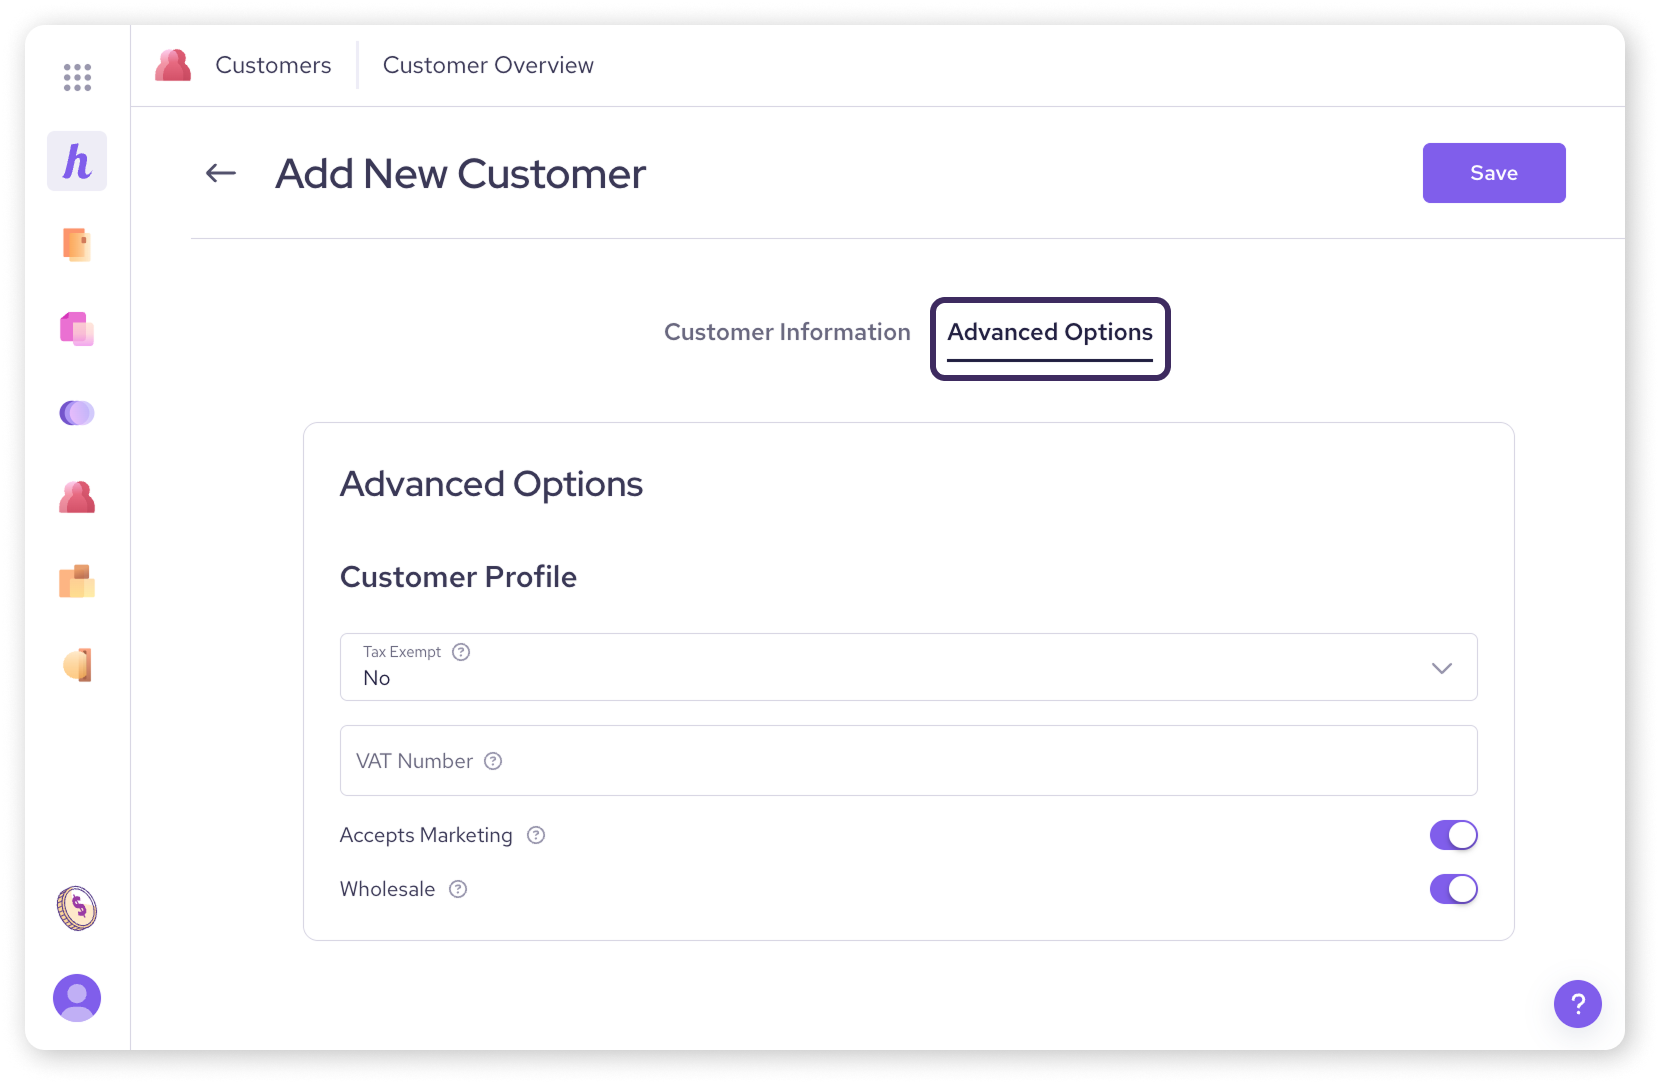
Click Save in the top right to add the customer to your list.
Editing an existing customer's information
Need to update a customer's details? Here’s how.
Go to Customers > Customer List. Use the search bar at the top to quickly find the customer by name, email, code, etc.
Click on the customer's name or anywhere on their row in the list to open their profile.
Edit any fields that need updating.
Click Save to apply your changes.
Deleting a customer
If you need to remove a customer profile completely:
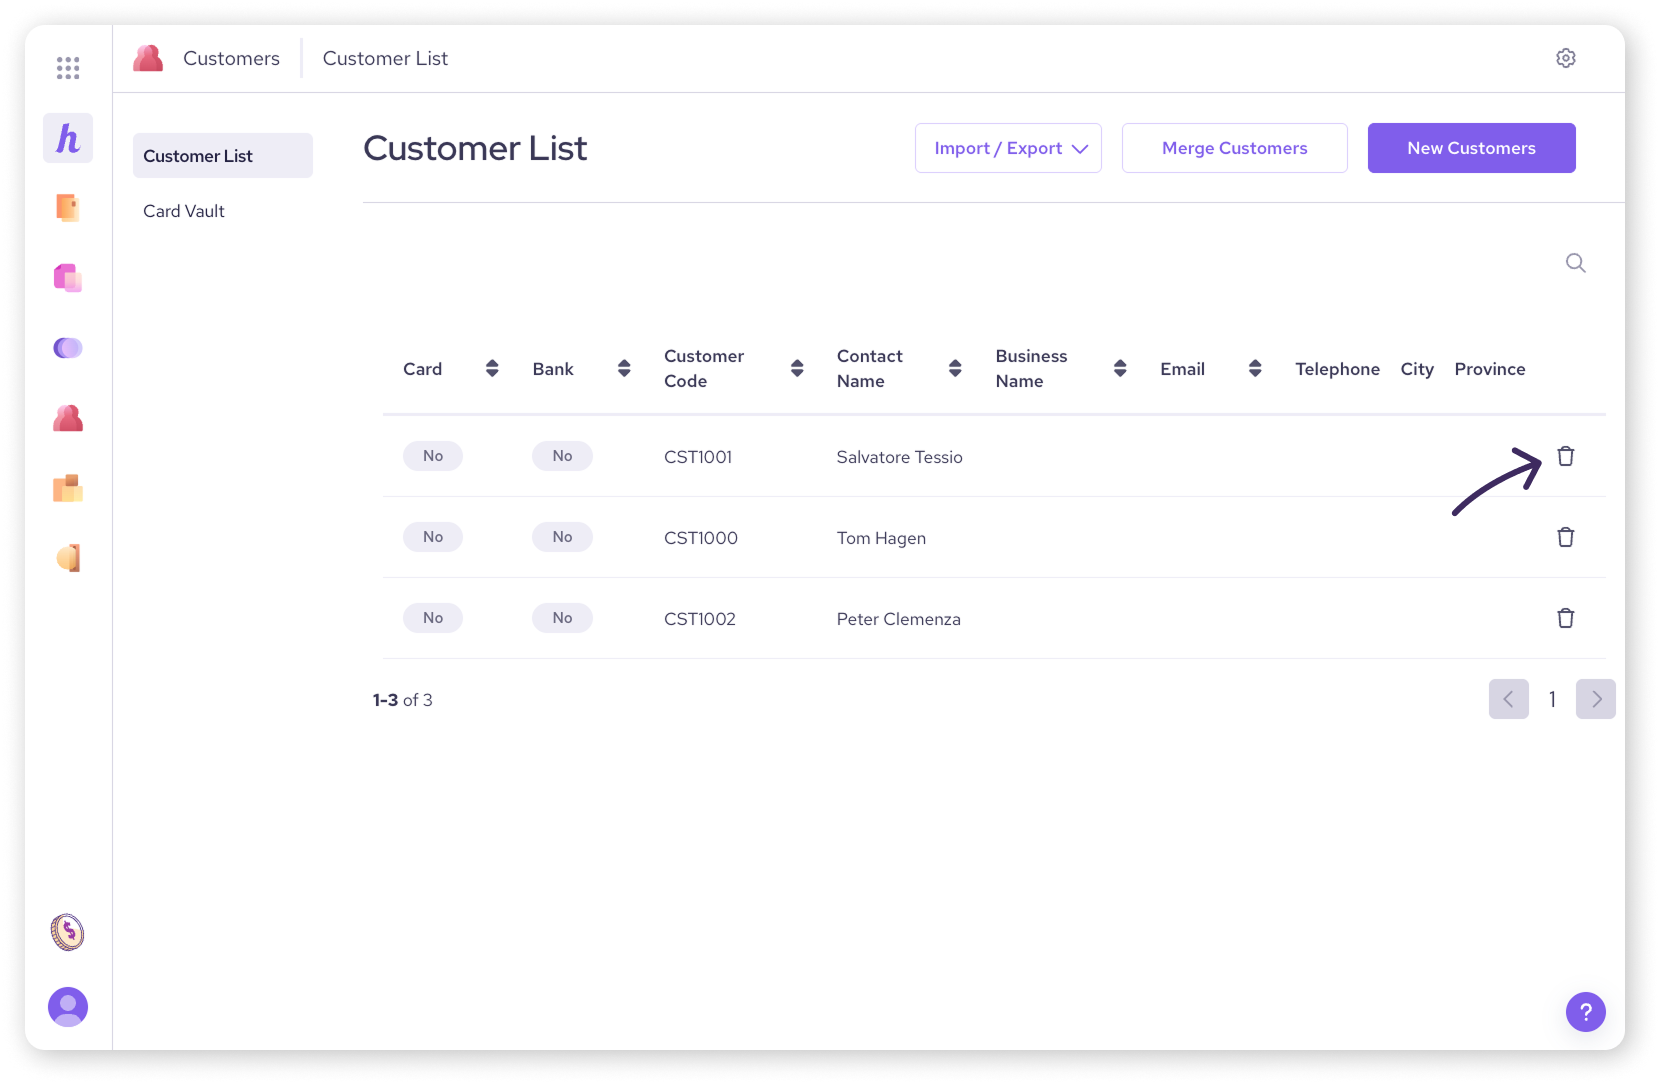
Find the customer on the Customer List page (use the search icon if needed).
Click the Trash Can icon on the far right of that customer's row.
A confirmation pop-up will appear. Click Yes to permanently delete the profile.
| Heads up: Deleting a customer profile is permanent and cannot be undone. Ensure you definitely want to remove the profile before confirming. |
Merging duplicate customer profiles
Accidentally created two profiles for the same customer? You can merge them to keep things tidy.
From the Customer List, click the Merge Customers button in the top right corner.
Search for Primary Customer: Find and select the profile you want to keep. All information will be merged into this primary profile.
Search for Secondary Customer: Find and select the duplicate profile you want to merge and remove.
Remove Duplicate Cards: Decide if you want the system to automatically delete any duplicate credit cards found during the merge. Toggle the switch ON (recommended to avoid confusion) or OFF.
Review your selections carefully, ensuring the primary customer is the one you intend to keep.
Click Merge in the top right.
Confirm by clicking Yes.
The secondary profile's unique information (like transaction history, notes, etc.) will be added to the primary profile, and the secondary profile will be deleted.
.png)
Next steps
Now that you know how to manage customer profiles, you might want to manage their payment methods or import customer data in bulk:
FAQs
What happens to the customer's history when I merge profiles?
The transaction history, notes, saved payment methods, and other activity from the secondary (merged) profile are combined with the primary profile. The secondary profile itself is then deleted.
Can I undo deleting or merging a customer?
No, deleting or merging customer profiles is permanent and cannot be undone through the platform. Please be certain before confirming these actions.
What's the difference between a billing and shipping address?
The Billing Address is primarily used for payment verification (it should match the address associated with the customer's credit card or bank account). The Shipping Address is where you would send physical goods. They can be the same or different.