Want to make sure your receipts look professional and reflect your brand? Customizing your receipts is a great way to provide a polished experience for your customers.
This guide will walk you through using Helcim’s Receipt Theme Designer so you can create receipts that are informative and uniquely yours, right from the start!
In this article
Accessing the receipt branding tab
The Branding section is where you can choose the appearance of your receipts. Here’s how to get there:
Open the All Tools menu and select Settings.
Then, select Branding from the left-side menu.
Select the Receipt tab from the top to open the designer.
.png)
Customizing your receipt
The receipt branding editor has two tabs: Content and Design.
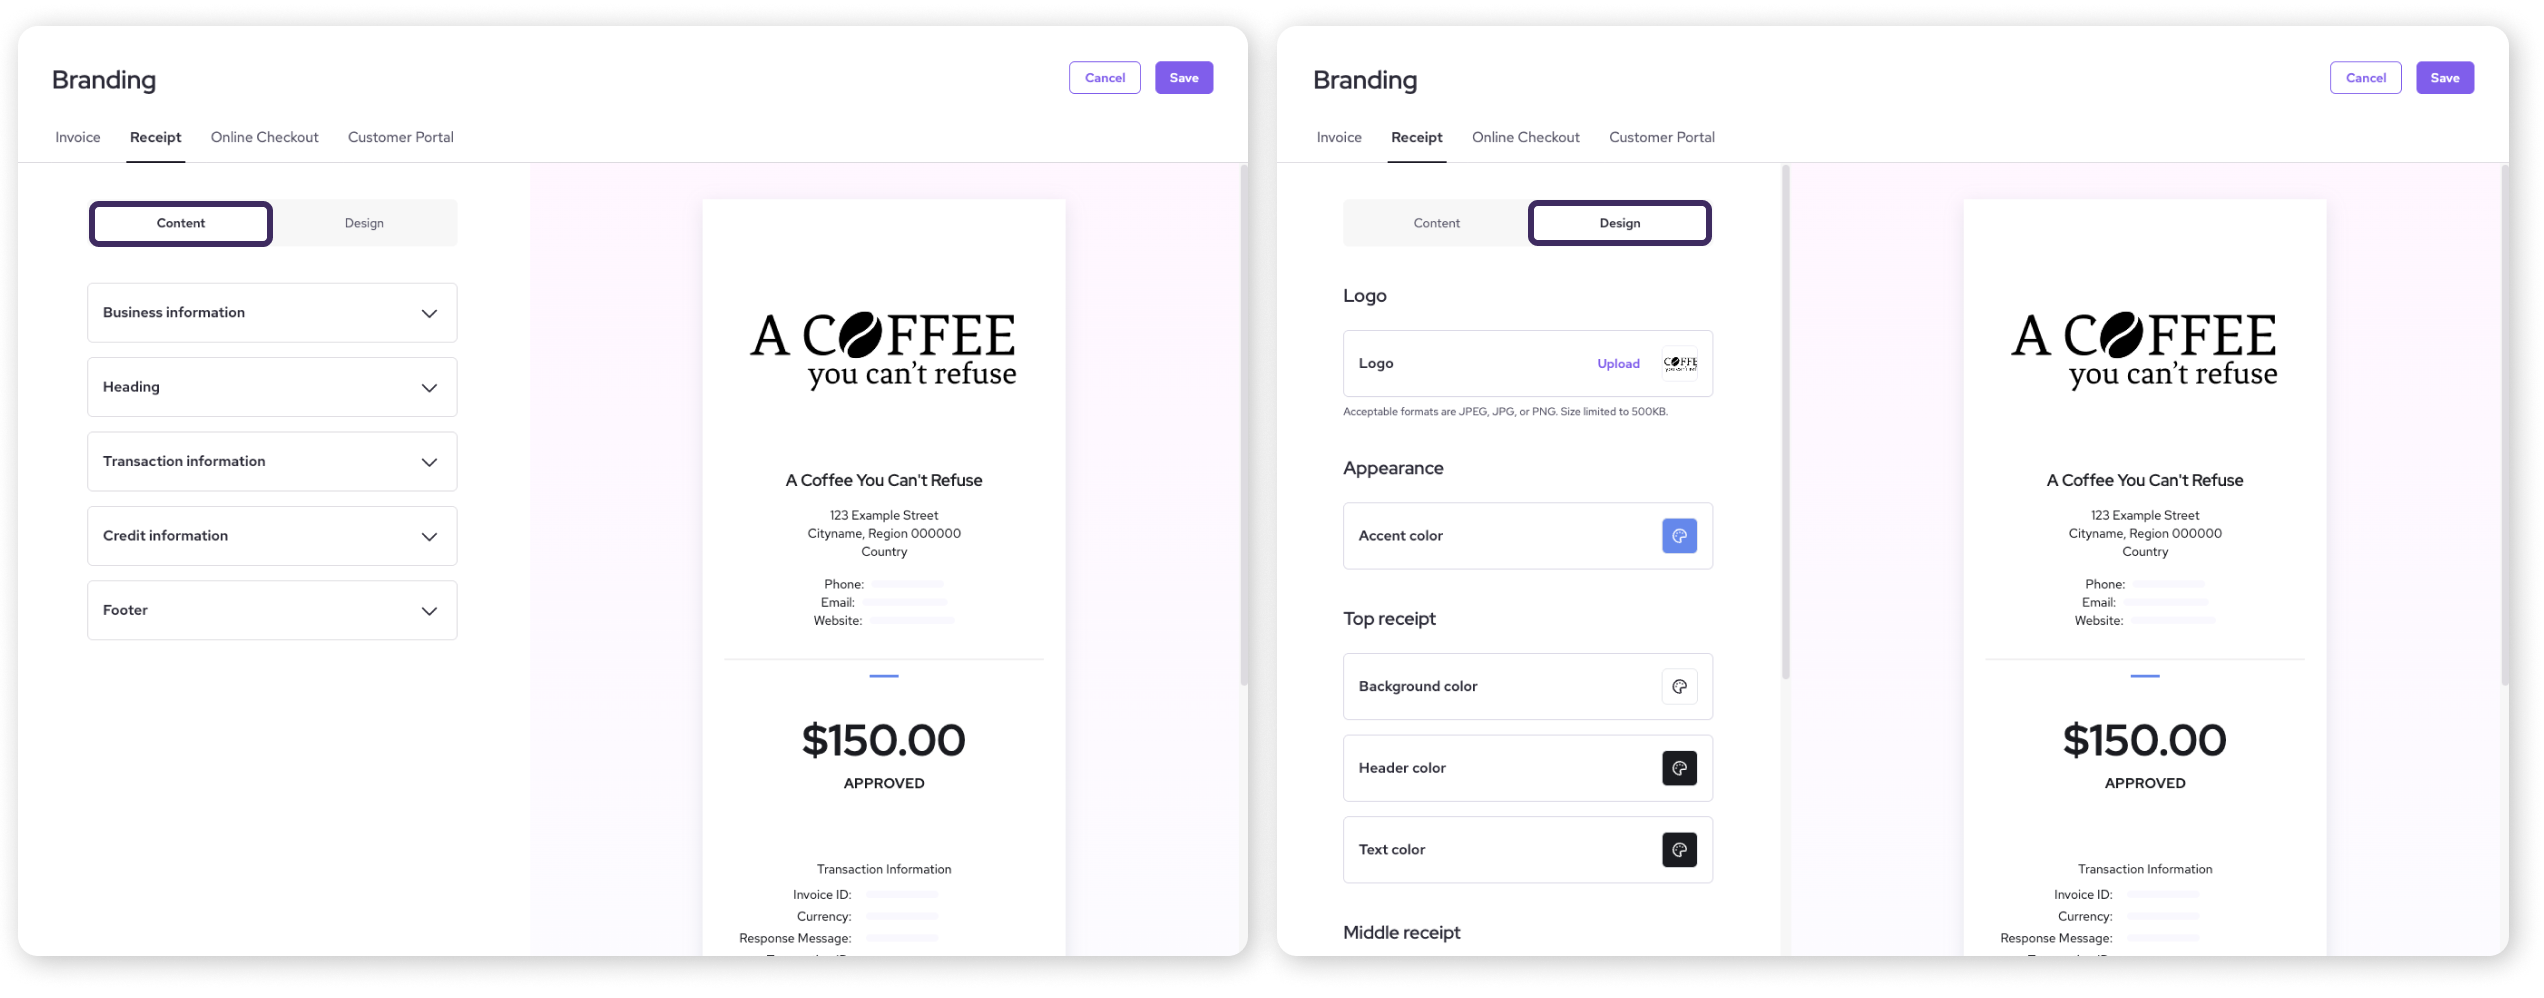
Content
Let’s start with the Content tab. Click on the dropdowns to edit different areas of the receipt, then click Save to apply your changes.
| Tip: You can also quickly edit specific sections by hovering over an area on the image of the receipt and clicking on the Pencil icon that appears. |
Business Information
Choose to show or hide your Business Name, Legal Name, Contact Information, Tax Number, and Website using the toggle buttons.
.png)
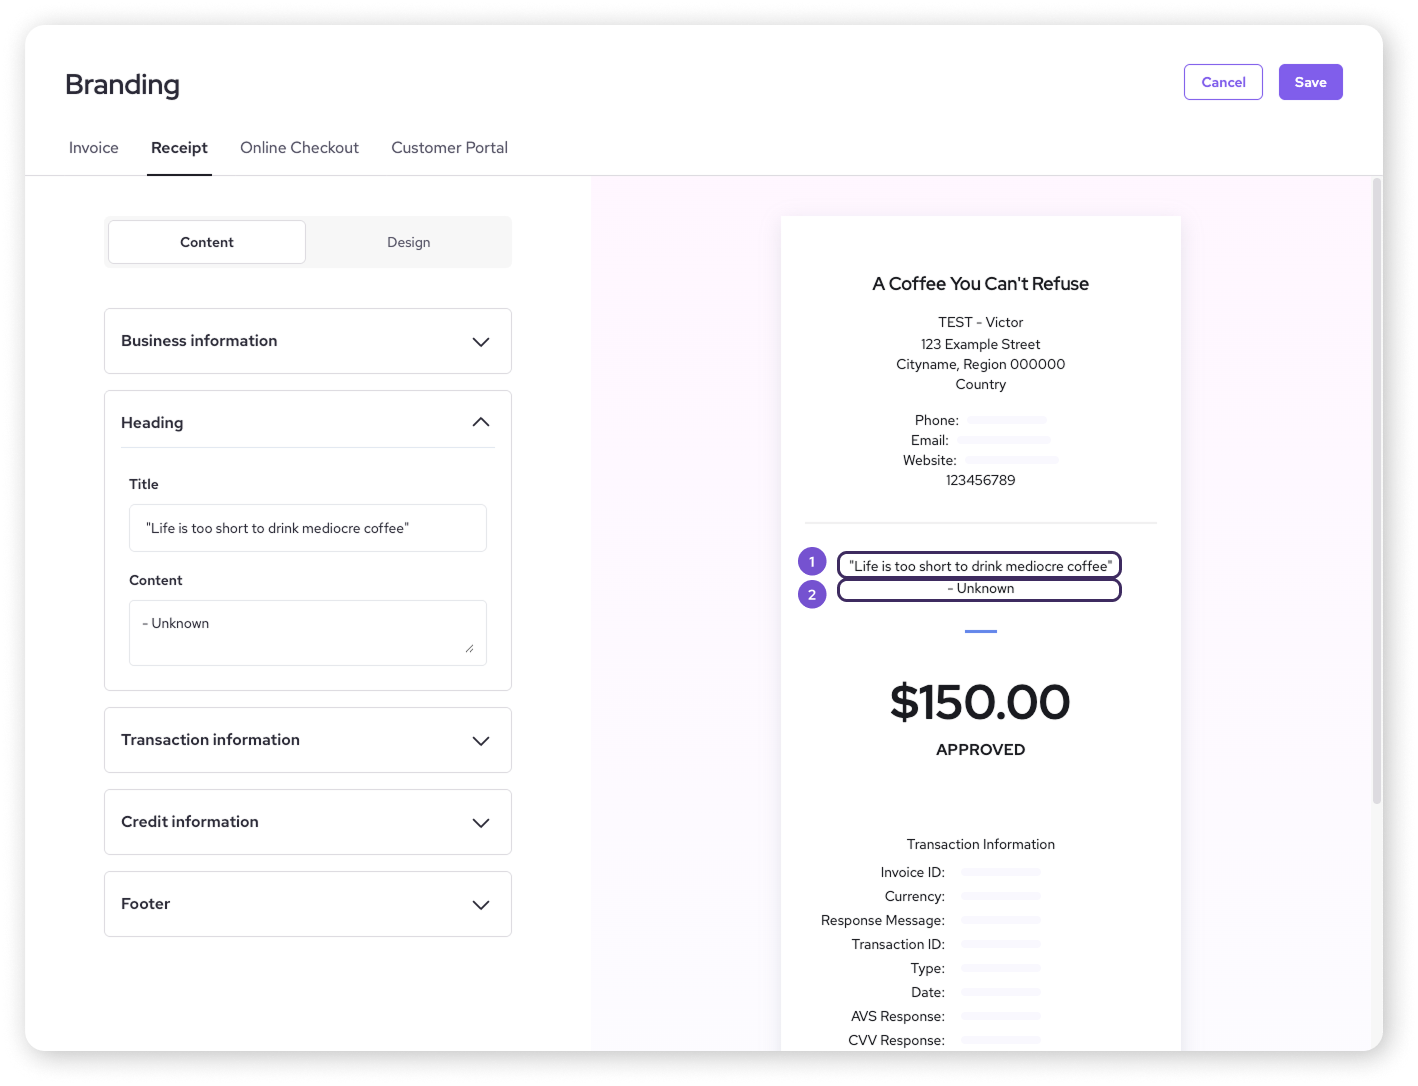
Heading
Add a custom message near the top of your receipt by writing in the Title and Content boxes.
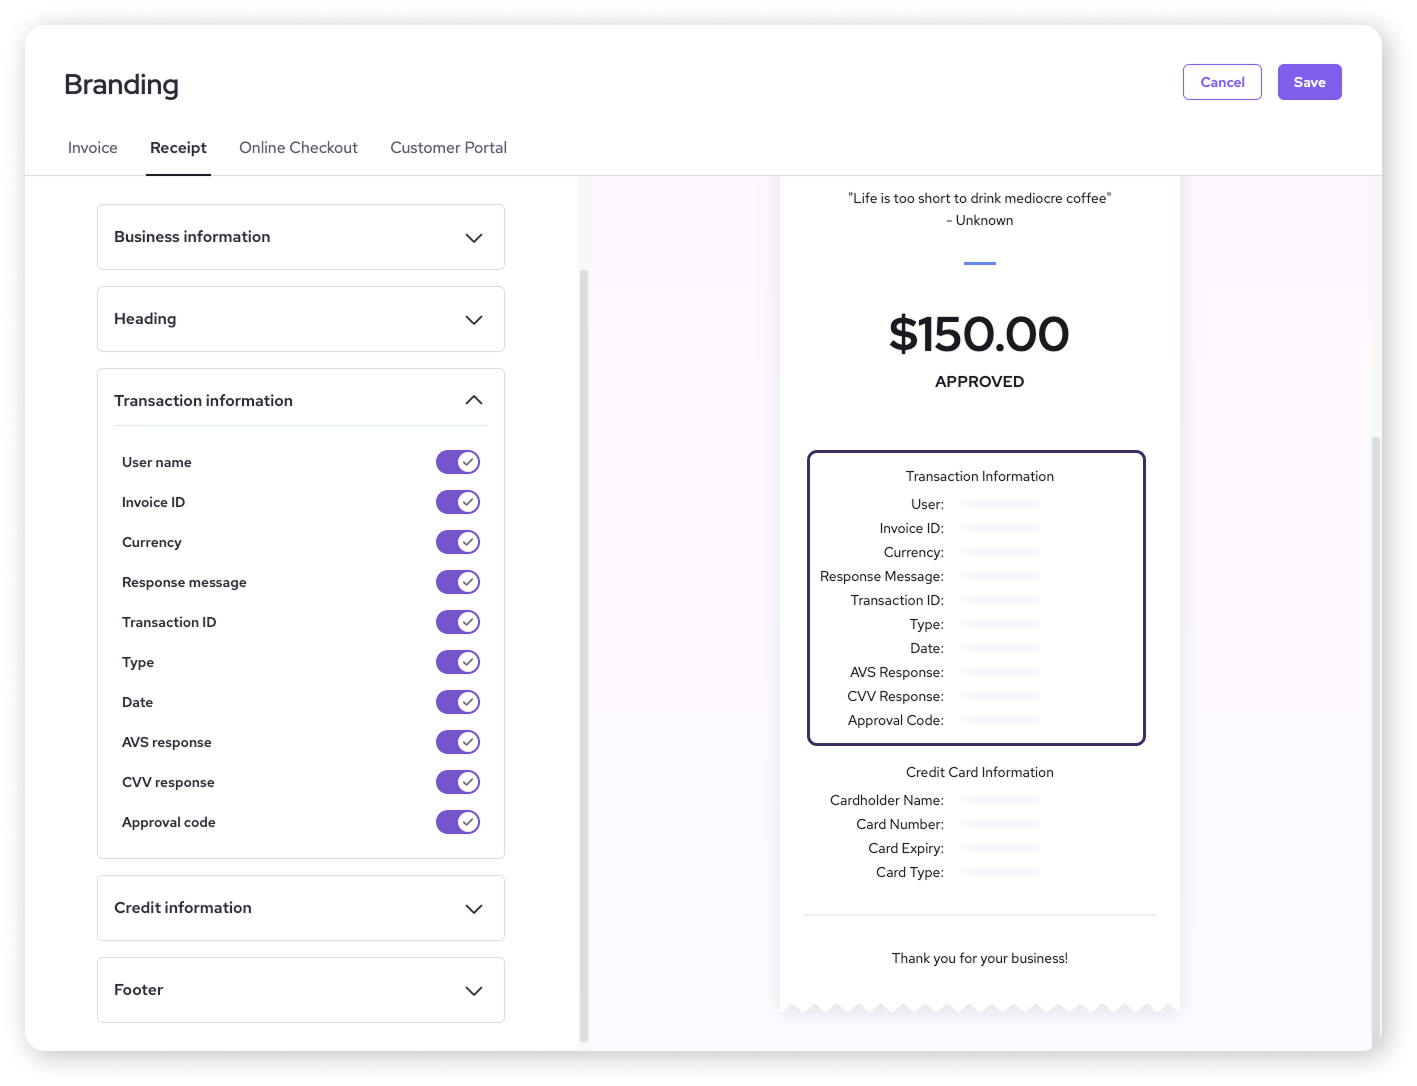
Transaction Information
Toggle whether to display details about the transaction, like the Invoice ID, Currency, Response Message, Transaction ID, and more.
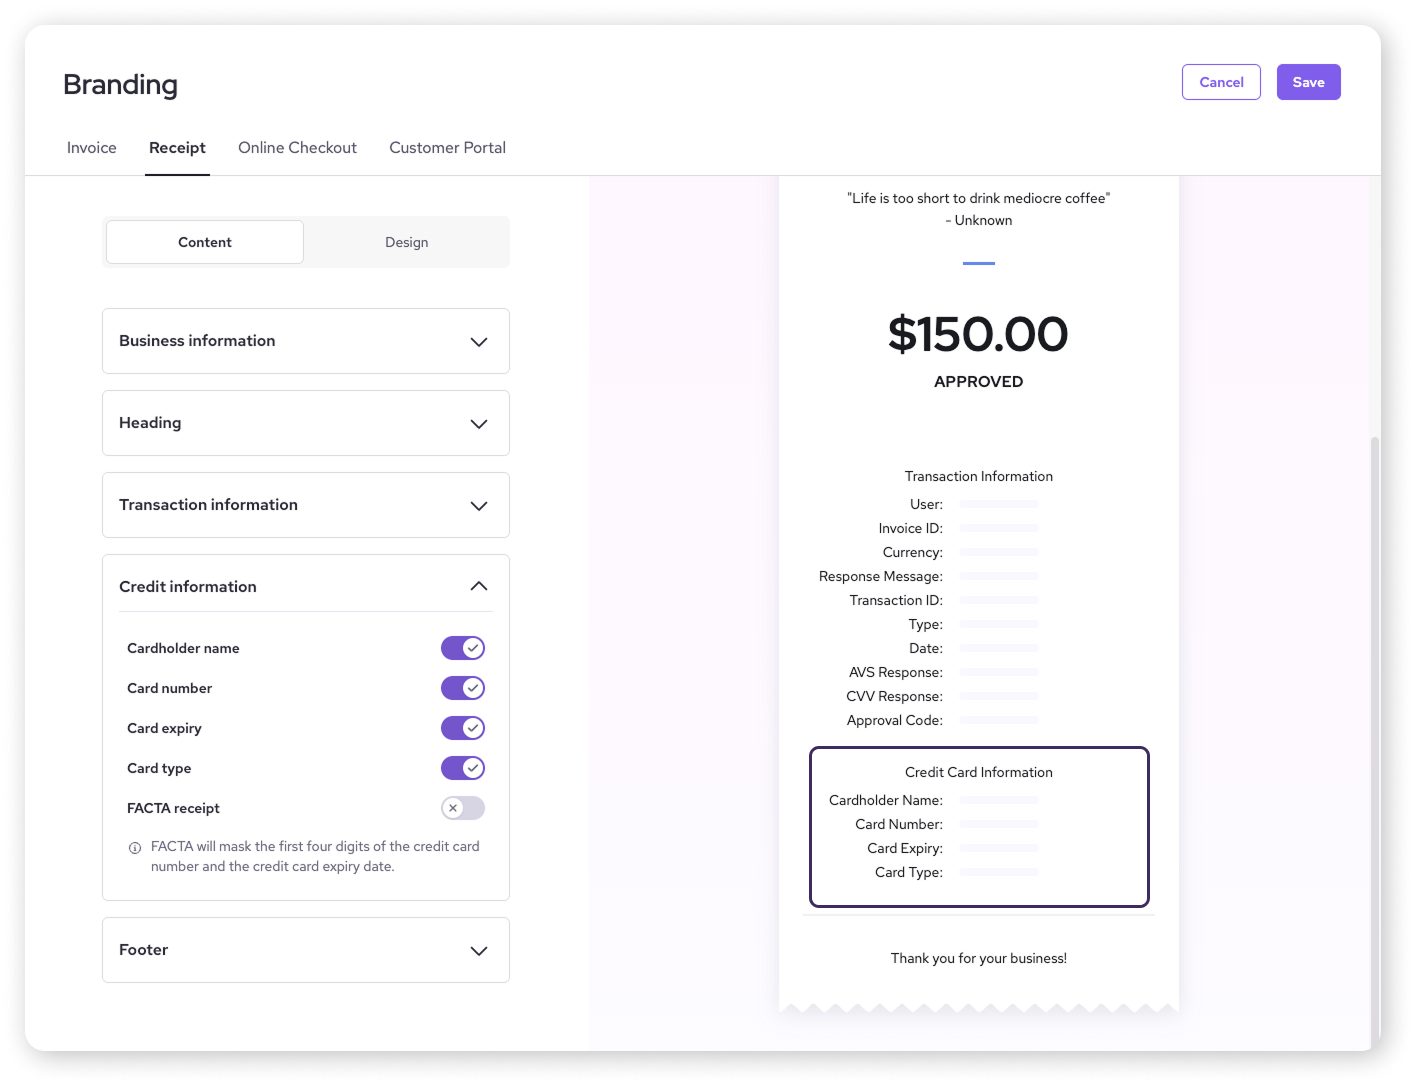
Credit Information
Toggle on or off the visibility of the Cardholder Name, Card Number, Card Expiry, and Card Type.
| You can also enable FACTA Receipt. This will censor the cardholder's information to align with the Fair and Accurate Credit Transactions Act, which sets rules for how credit card information can appear on receipts. |
Footer
Add a custom thank you message or other notes for your customers using the Title and Content text boxes at the bottom of the receipt.
.png)
Design
Once you've got the content down, it's time to add some visual flair to your receipt! Click on the Design tab for the following options.
| As you update each area, you’ll see your changes reflected live in the preview receipt. This way, you know exactly how it will look! |
Logo
Upload your company logo to personalize your receipts.
| Hit browse and upload a .jpeg or .png file of your logo. For best results, use a resolution of 336 × 210 px. |
![]()
Accent colors
Click the color icons to choose colors that match your branding for different sections.
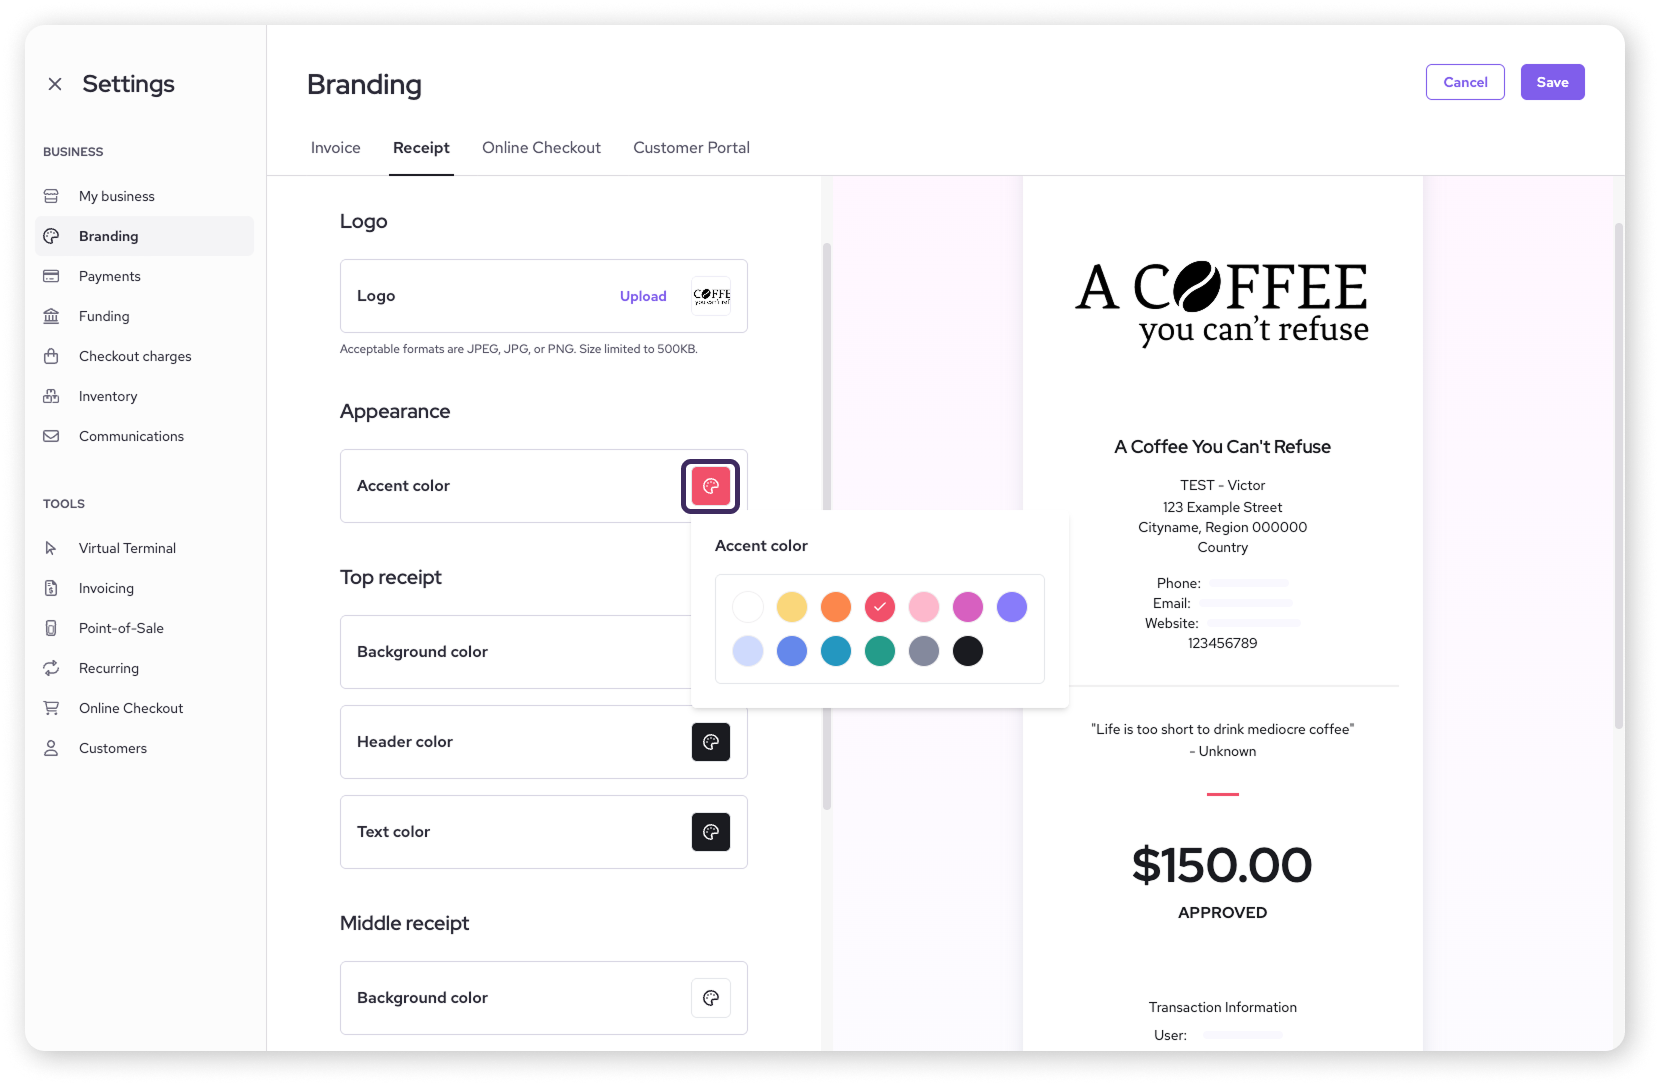
Text and background colors
You can set different background and text colors for the top, middle, and bottom of your receipts.
.png)
Saving your receipt
Happy with your design? Remember to click Save in the top right-hand corner to apply all your wonderful changes.

Next steps
Now that your receipts are looking sharp, you're even closer to smoothly running your business with Helcim!
Ready to process a payment? Head over to our article: Take your first payment with Helcim to see how it's done.
After you've made some sales, you'll want to know how to keep track of them. Learn more in: View your transaction history.
FAQs
Why should I customize my receipts?
Customizing your receipts helps reinforce your brand, provides a professional touch, and ensures customers have all the necessary information about their purchase. It's a small detail that can make a big difference in customer experience!
What's the FACTA Receipt option for?
The FACTA Receipt option helps you comply with the Fair and Accurate Credit Transactions Act. It ensures that sensitive cardholder information, like full card numbers, is not displayed on the printed receipt, protecting your customers' data.
Can I change my receipt design later?
Absolutely! You can go back to the Receipt Theme Designer anytime to make updates or try a new look. Just remember to Save your changes.
What if I don't have a logo?
No problem! You can still customize all other aspects of your receipt. If you get a logo later, you can easily add it then.