Ready to process a payment quickly and easily? Helcim's Virtual Terminal transforms your computer, tablet, or phone into a secure payment terminal.
This guide walks you through the steps of taking a payment, so you can get paid faster and more efficiently. Let's get started!
In this article
Video
Attaching a customer or invoice
Before entering payment details, you have the option to attach a saved customer profile or a pre-existing invoice. This can save you time and effort:
Click the Attach button in the Virtual Terminal.
Search for the customer or invoice you want to use.
If you want to add a new customer, select Create New Customer.
Select a customer or invoice to attach from the search results.
Attaching a customer: If you attach a customer, their saved payment information (if available) will automatically populate the relevant fields in the Virtual Terminal. You can then review and modify the information as needed.
Attaching an invoice: If you attach an invoice, the payment amount due will automatically populate the "Payment Amount" field. This also links the payment directly to the invoice for easy record-keeping.
| If the customer on the invoice has a saved card, it will also be populated in the Virtual Terminal. |
.png)
How to enter payment information
Once you've attached a customer or invoice (or if you choose not to), you can proceed with entering payment information:
Payment amount: If you didn't attach an invoice, enter the total amount you're charging the customer. If you did attach an invoice, this field will be pre-filled.
Payment method: Select either Credit Card or ACH Payment.
.png)
.png)
Choosing payment methods (credit card vs. ACH bank payment)
The information you need to enter will vary slightly depending on whether you're processing a credit card or bank payment:
Credit card: You'll need the customer's credit card number, expiration date, CVV code, cardholder name, billing address, and postal/zip code.
ACH bank payment: You'll need the customer's bank account number, transit number, bank ID, account type (chequing or savings), account holder name, and contact information. For new customers, you may also need to request authorization to store their bank account information.
| For either of these payment methods, any payment info entered will be stored and tokenized for the future. This means for subsequent transactions, you won’t have to enter it in again! |
Adding taxes, comments, and invoice numbers
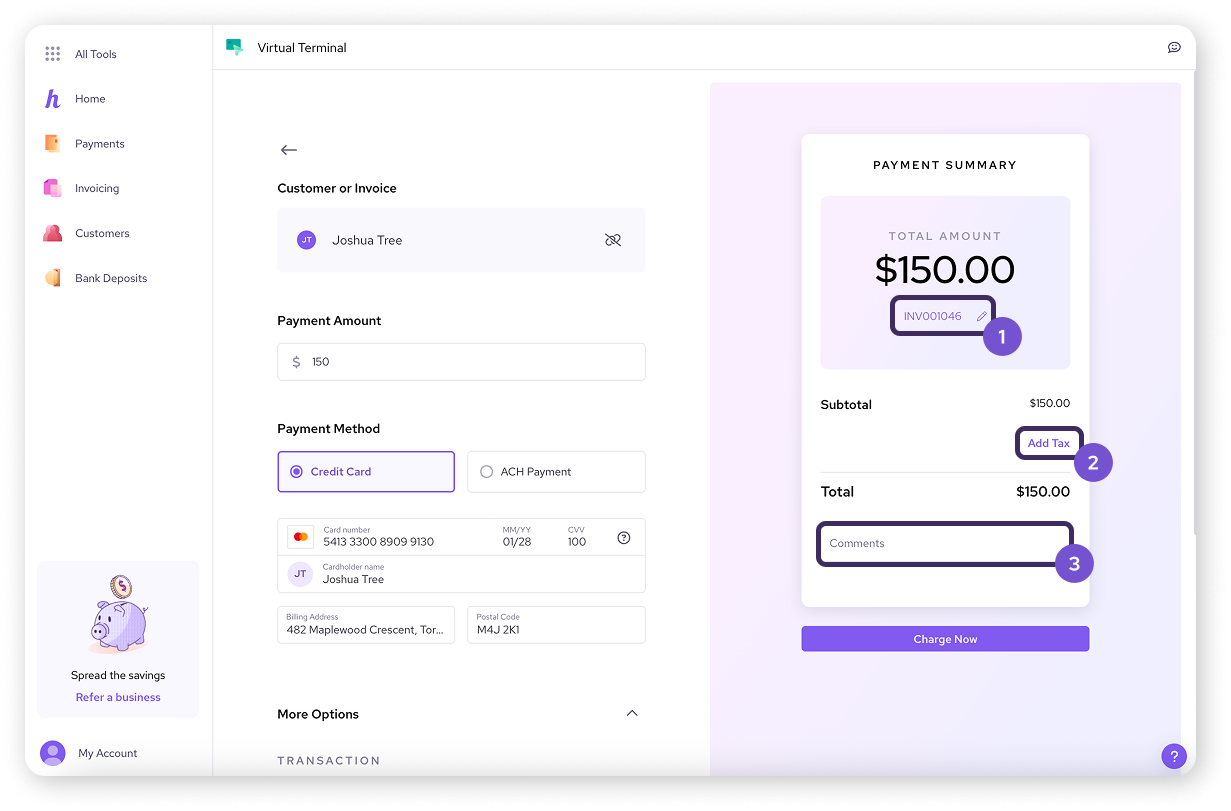
Before completing the payment, you have the option to add additional details in the Payment Summary tile:
Invoice number: If you click on the pencil icon under the total amount, you can change number for the invoice generated for the transaction.
Tax: You can add a tax amount to the transaction. You can choose from preset tax rates or enter a custom percentage.
Comments: Add any relevant notes about the transaction. This is helpful for record-keeping and can be seen on receipts.
Automatic invoice generation
If no invoice is attached, the Virtual Terminal will automatically create a new invoice for the transaction.
You can find this invoice in your Invoices list under the Invoicing tool.

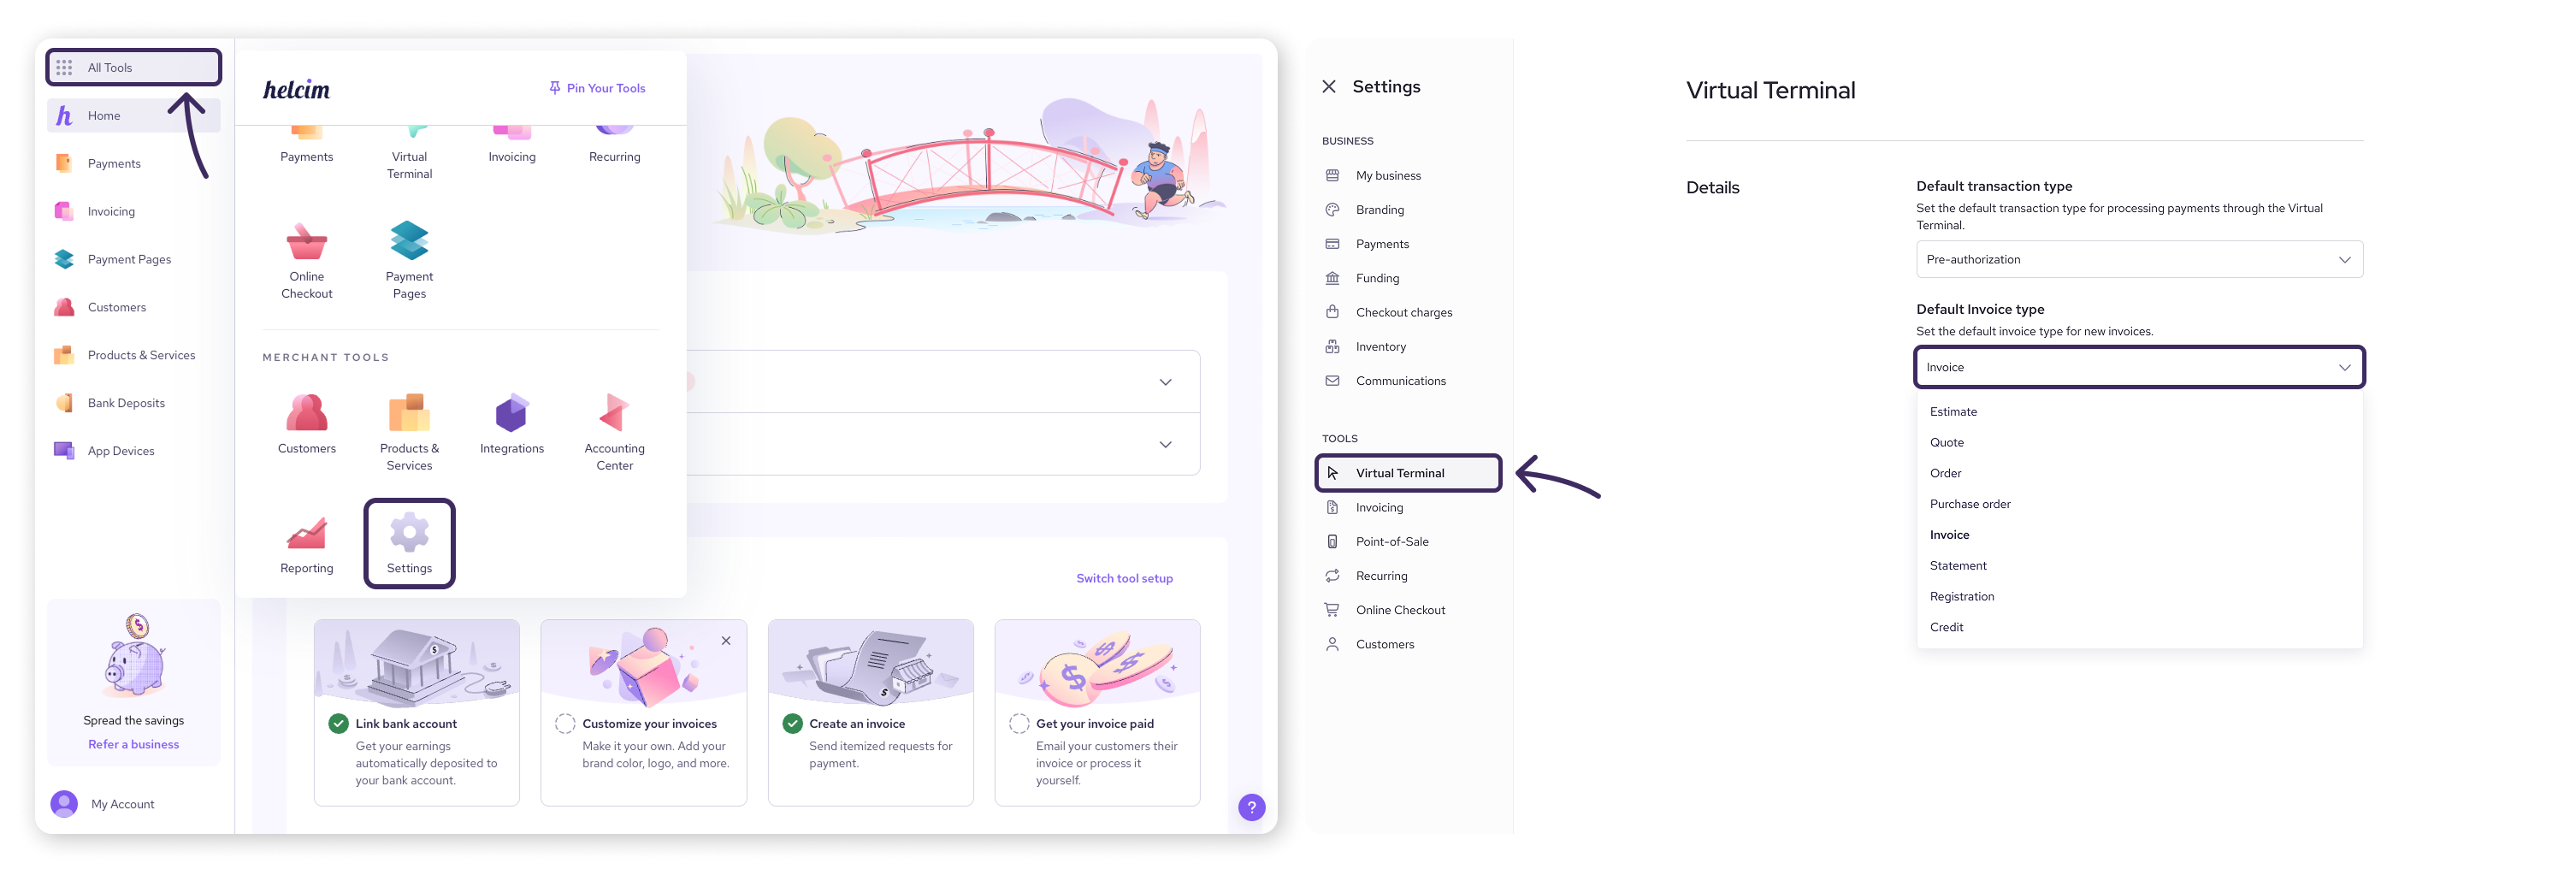
To change the default invoice type for this auto-generated invoice, go to All Tools > Settings > Virtual Terminal > Default Invoice type.
More options
Clicking on the "More Options" dropdown provides additional ways to customize your payment:
Terminal (credit cards only): If you have multiple terminals, select the one you want to use for this payment.
Transaction type (credit cards only): Choose between "Purchase" (for immediate charges) or "Pre-Authorization" (to hold funds for a later capture). Remember that pre-authorizations have an expiration date.
Type: Select the type of document you are creating (e.g., invoice, quote).
Currency: Choose the appropriate currency for the transaction.
PO number: Add a Purchase Order number if needed for your business records.
Completing the payment
Once you've entered all the necessary information, review it carefully to ensure accuracy. Then, click the Charge Now button (or the appropriate button for the type of transaction you're processing, such as Authorize for pre-authorizations or Request Authorization for new bank accounts).
| Once the payment is complete, you’ll have an option to send a receipt to the customer’s email. |
Next steps
Now that you know how to take a payment, you’re set to start doing business with the Virtual Terminal!
Here’s another article you can use to make the most of your experience.
| Payment options for the Helcim Virtual Terminal. Learn more about the different payment options available in the Virtual Terminal, including pre-authorizations, partial payments and how to manage them. |
FAQs
The "Charge Now" button is grayed out. What should I do?
Double-check that you've filled in all the required fields, including the payment amount, payment method, and all necessary card or bank account details. If you're still having trouble, contact Helcim support.
I accidentally entered the wrong payment amount. Can I change it?
You can't change the amount after the payment has been processed. You'll need to issue a refund and then process a new transaction with the correct amount. Contact Helcim support if you need assistance with refunds.
What is a PAD agreement, and why do I need it for bank payments?
A Pre-authorized Debit (PAD) agreement is a written authorization from your customer that allows you to withdraw funds from their bank account for agreed-upon transactions. It's a necessary step for processing bank payments (ACH/EFT) to ensure you have their legal permission to debit their account. This helps protect both you and your customer.