Ready to add the items you sell to your Helcim account? Getting your products set up is the first step to streamlining your sales and managing your offerings.
This guide will walk you through how to add a new product, include details like pricing and images, and make edits in your Helcim dashboard or Helcim POS app.
In this article
Add a new product in the Helcim dashboard
Here’s how to create a new product listing in your Helcim dashboard, on any web browser.
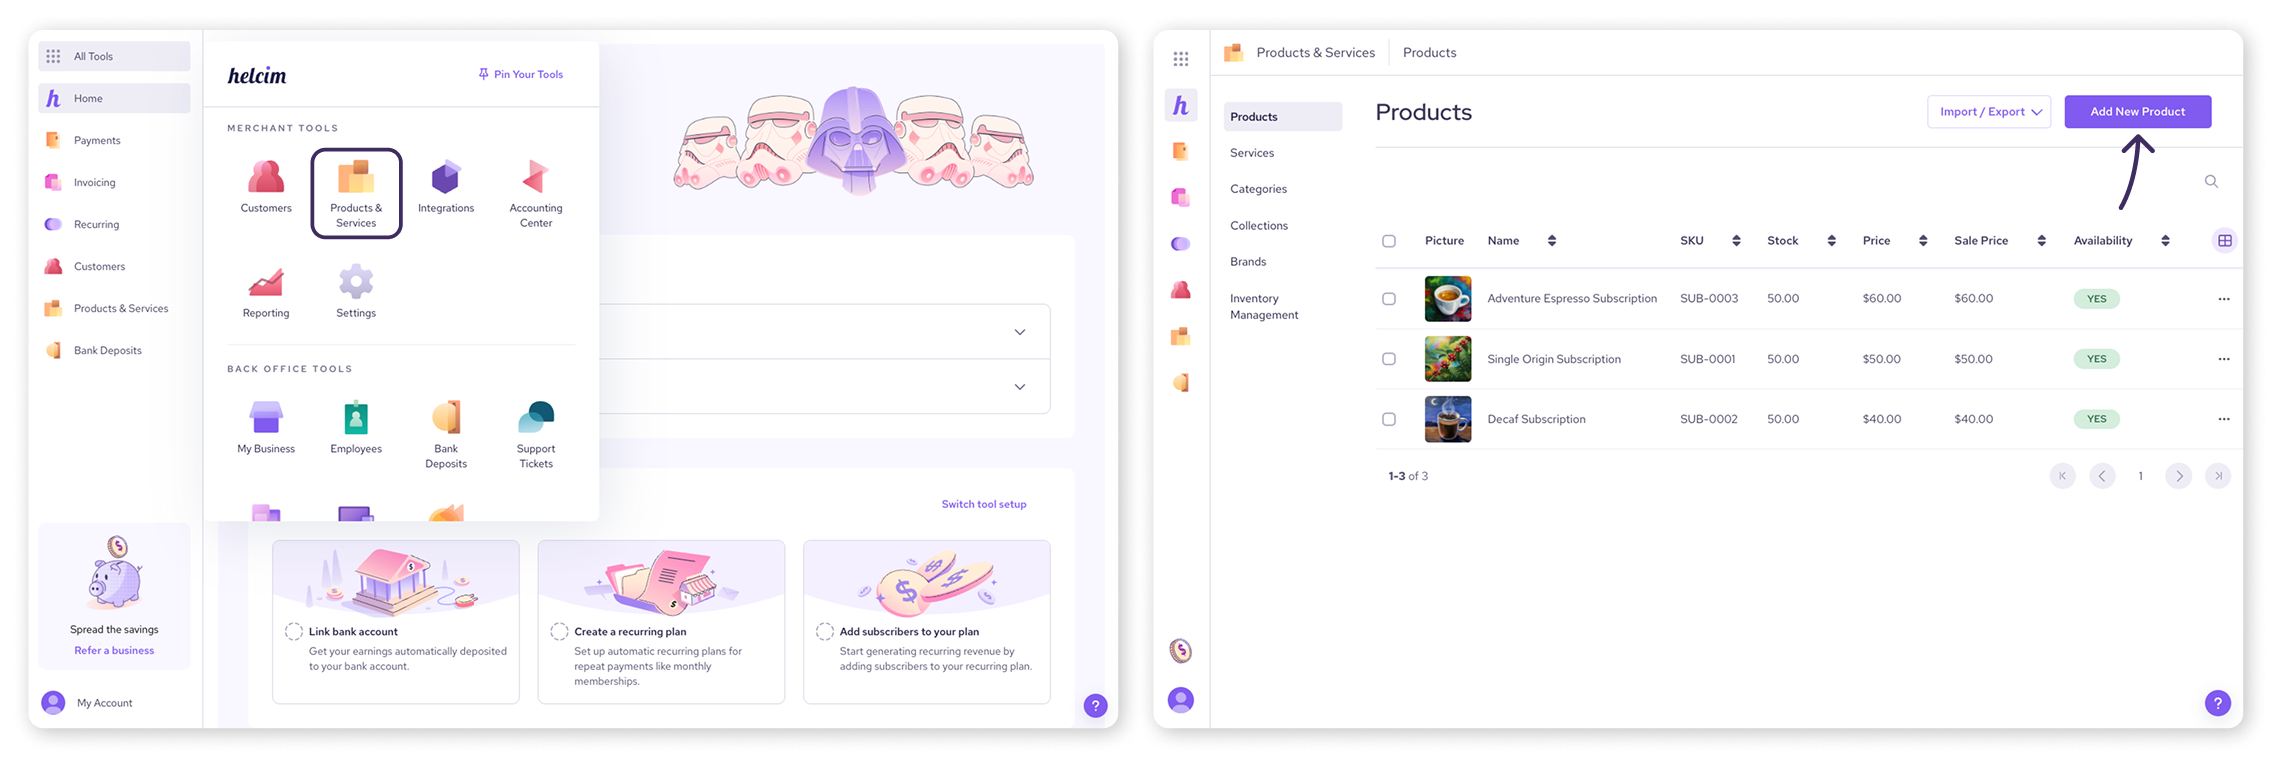
Log into your Helcim account.
Navigate to your products section by clicking the All Tools menu, then selecting Products & Services.
In the top right-hand corner, click the Add New Product button.
A page will open where you can fill in the details of your new product.
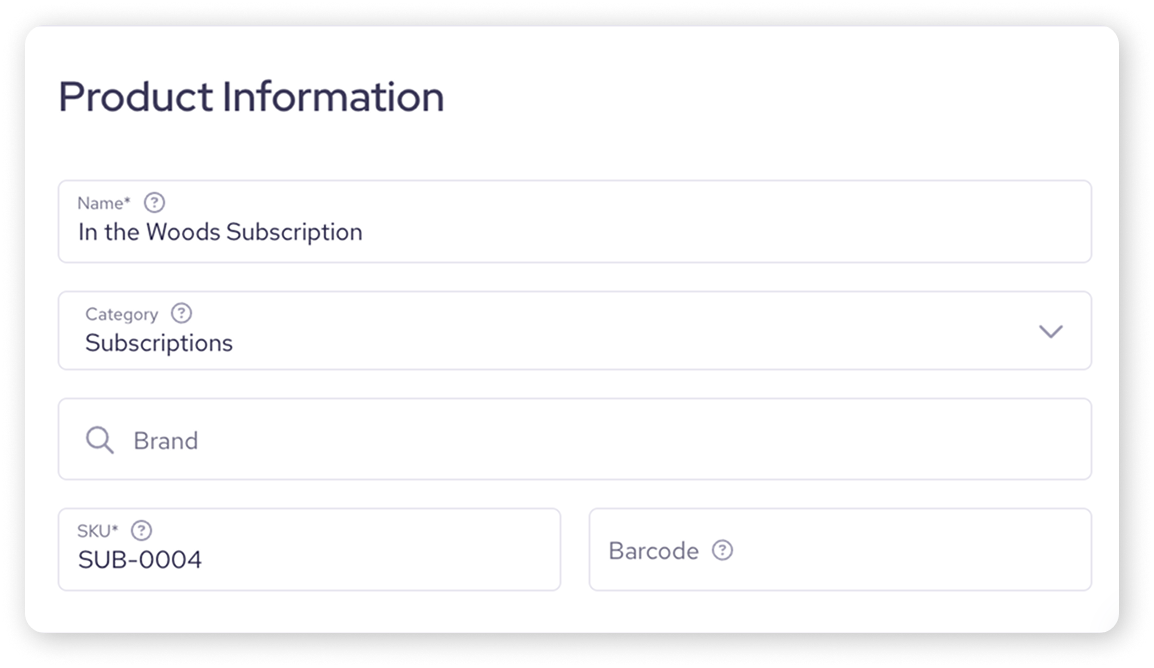
Step 1: Product information
Name: Enter the product name.
Category: Select an existing category if you've already set them up (optional). A category must already exist to be selected here.
Brand: Search for and select an existing brand if applicable (optional).
SKU: Enter the Stock Keeping Unit for your product. This field is mandatory.
Barcode: Add the product's barcode number if you have one (optional).
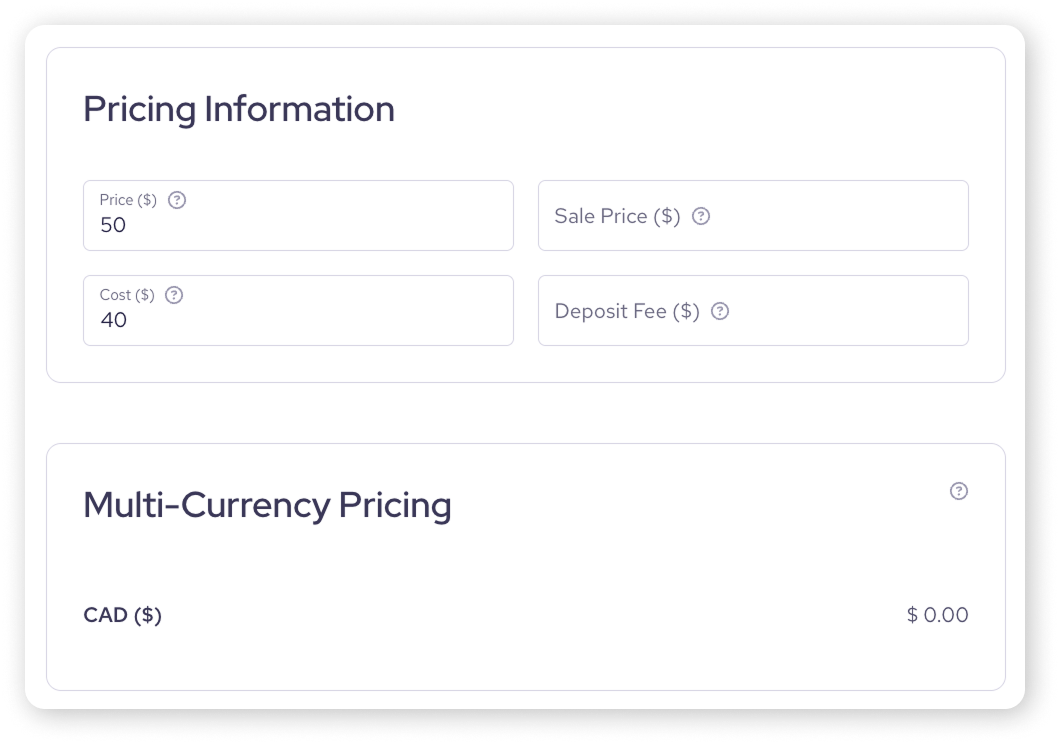
Step 2: Pricing information
Price: The regular selling price for the product.
Sale Price: If it's on promotion, enter the sale price here (this will override the regular price).
Cost: What your business pays for the product (not visible to customers).
Deposit Fee: If applicable (e.g. for bottle deposits), enter it here. This amount is always tax-exempt.
Note the Multi-currency Pricing section: If you have other currencies enabled for your account, this field will display the calculated price in those currencies.
| Need more complex pricing options? Check out our advanced pricing options article. |
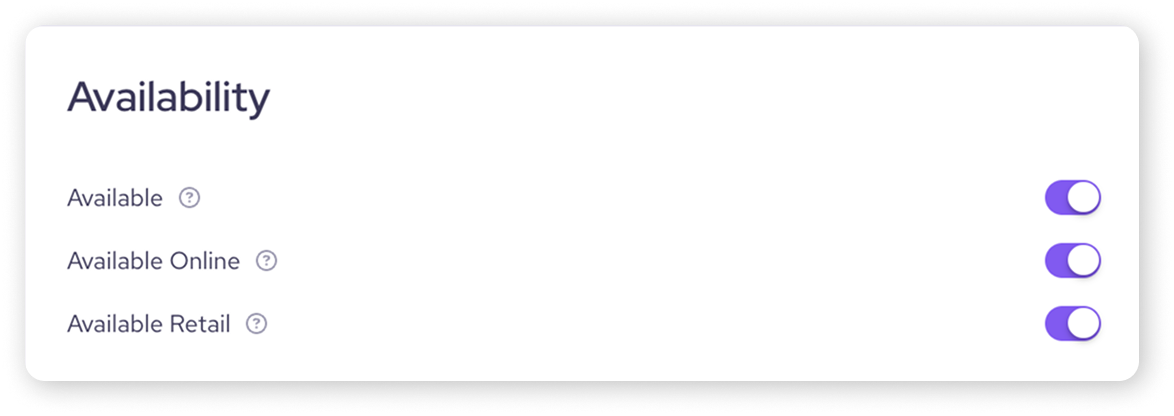
Step 3: Set the availability
Turn the Available toggle ON.
Then, specify if the product is Available Online (for your Helcim Online Store) and/or Available Retail (for the Helcim POS app) using their respective toggles.
Step 4: Add a description
Type a Description for your product if desired (optional).

Step 5: Save your product
Click Save in the top-right corner to create the product. The product will now be accessible from your product library, your online store, or your POS app, depending on your availability settings.
.png)
Add images to your product
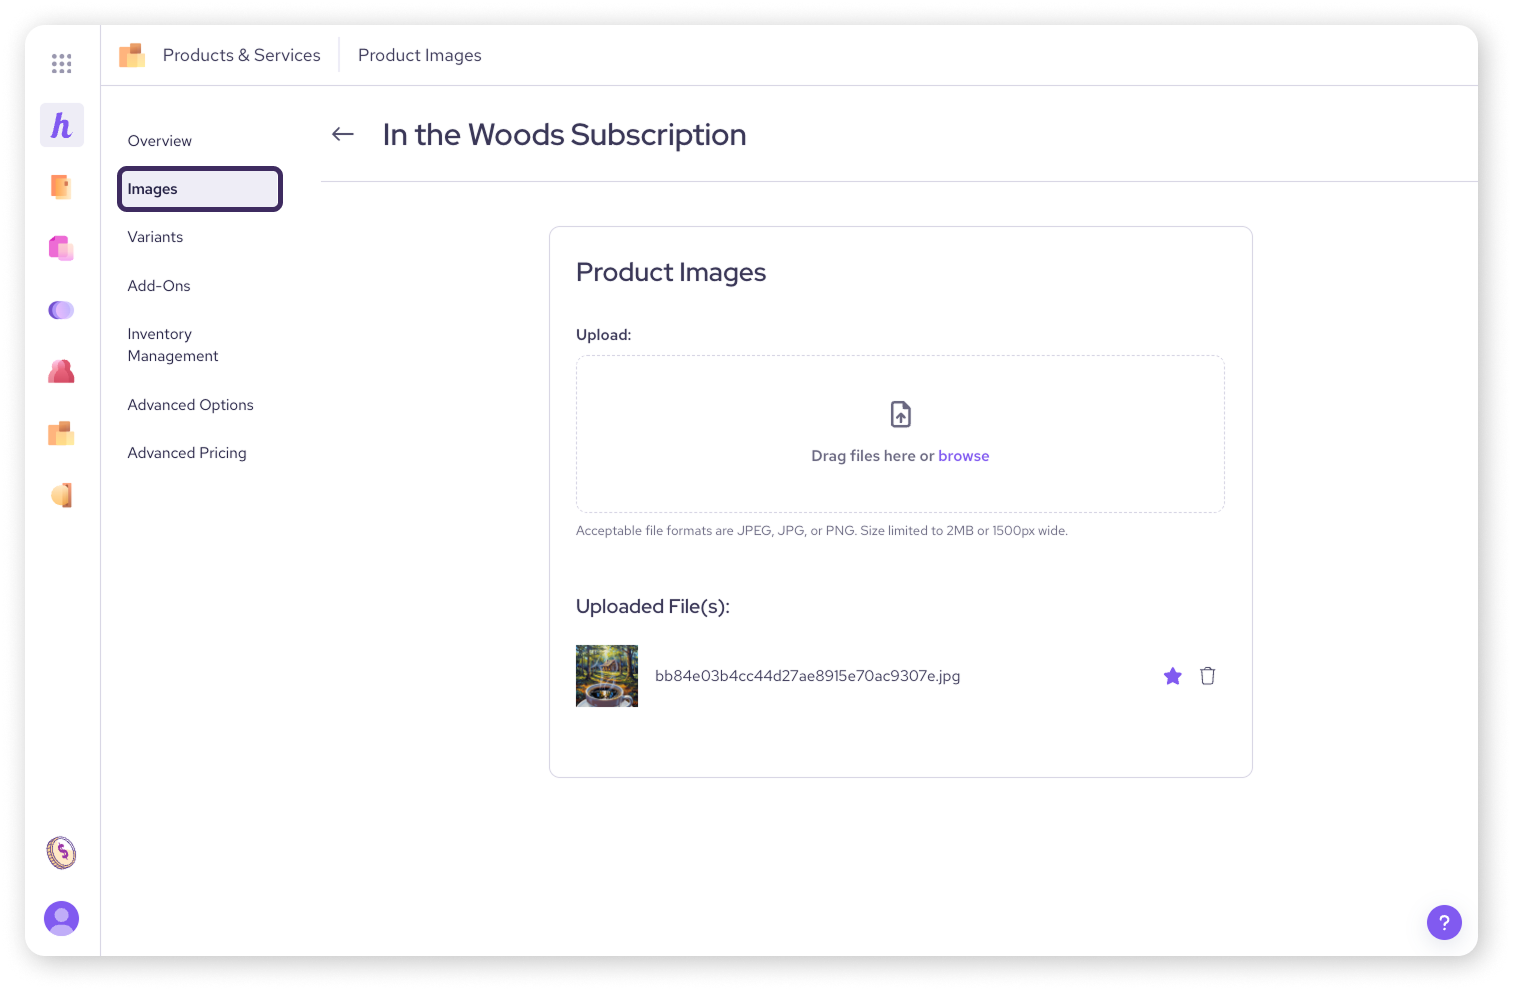
Once you've saved the new product, a menu will appear on the left, allowing you to add images.
Select Images from this left-hand menu.
Drag an image file directly onto the upload area, or click browse to select an image file from your computer.
File requirements: Acceptable formats are JPG or PNG, and the file size should be below 2MB.
As images are uploaded, they will appear in a list under 'Uploaded File(s)'.
To choose a primary image for the product listing, select the Star icon next to that image.
To remove an uploaded image, select the Trash can icon next to it.
Use advanced options
After creating a product, you can access more settings:
From the menu on the left side of the product page, select Advanced Options.
Here you can:
Set a Color Placeholder (for products without images)
Toggle Tax exemption to make the product exempt from sales taxes (either in full, on the provincial or state level, or on a country level).
Toggle Shipping exemption to make the product exempt from shipping charges.
Toggle Inventory tracking. If you turn this on, you can also set the Low stock threshold for alerts.
Set the weight and dimensions of the product under Specifications (for shipping calculations)
Remember to Save any changes made in this section.

Add a new product in the Helcim POS app
Did you know you can also add new products directly within the Helcim POS app? This can be handy for quick additions while you're managing your store or on the go.
| To learn how, see our guide: Add products in the Helcim POS. |
Edit a product
Need to make changes to an existing product? You can do so in your Helcim dashboard.
From your Products & Services list, simply click on the product name you want to edit.
This will reopen the full product page (not a side drawer), where you can modify any of the fields you previously entered.
Click Save after making your edits.
Delete a product
You can also remove a product permanently from your Helcim dashboard.
Go to your Products & Services list.
Find the product you wish to delete.
On the far right of the product row, click the three dots icon (ellipsis).
Select Delete from the dropdown menu that appears.
Confirm the deletion if prompted.
Next steps
Learn how to add and edit a service.
Does your good come in different sizes or colors? See how to use variants and add-ons for products.
Moving products from elsewhere? Learn how to import products.
Dive deeper into configuring and managing your product inventory.
FAQs
What if I don’t see any categories or brands when adding a product?
Categories and brands must be created separately in the Products & Services tool before they can be assigned to a product. Learn how to create these in our article on organizing products.
Once you’ve created categories and brands, you can go back into a product’s edit page and use them as sorting options.
Is the SKU really mandatory?
Yes, the SKU field is required to save a new product in this interface. Feel free to put something temporary to start, and then return to edit it later.
Where do I set up my main tax rates?
Overall tax settings are managed in your main account Settings, under Taxes. The Tax exemption option on the product page applies those existing rules.
To learn more, visit our article on setting up your taxes.