As your list of products (goods and services) grows, keeping things organized becomes essential! A tidy catalogue isn't just nice to look at – it makes managing your items easier, helps customers (and you!) find things faster, and allows for useful filtering in reports and sales tools like the Helcim POS app.
Helcim offers three main ways to group your products: categories, brands, and collections. Let's explore what each one does and how to set them up.
Using categories
Think of categories as the primary way to structure your products or services for both internal management and customer-facing displays (like your Online Store or POS).
Creating or editing a category
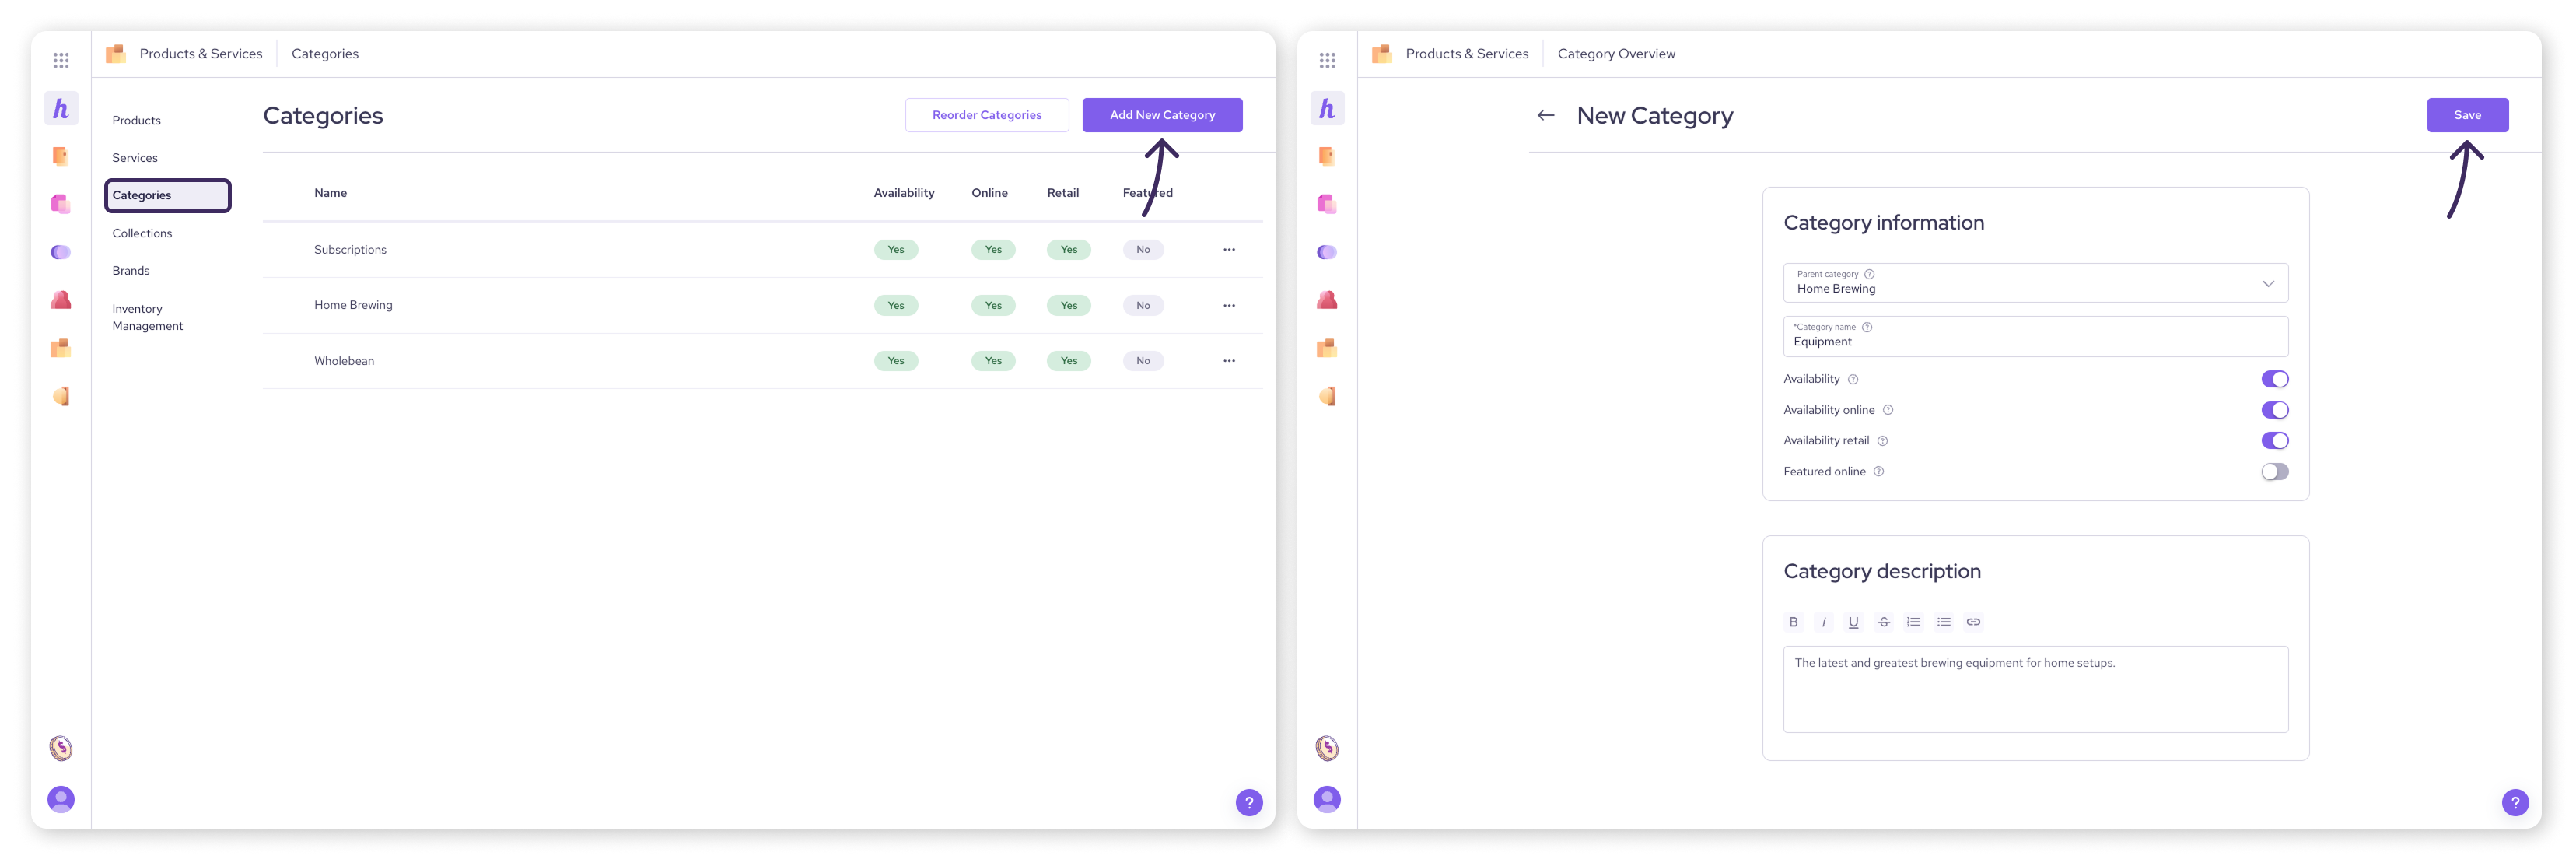
In the Categories page
Navigate to Products & Services (via All Tools).
Click the Categories tab on the left-side menu.
Click the Add new category button in the top right.
Enter a Category Name (e.g., "Apparel", "Consulting Packages").
Optional: To create a sub-category, select a Parent Category from the dropdown.
Optional: Set Availability options if needed (though this can often be managed at the product level).
Click Save.
Other methods
You can create new categories while you’re adding a new product in the Products & Services tool. Learn more here.
You can also quickly add new categories directly within the Helcim POS app. Learn more here.
Assigning products to a category
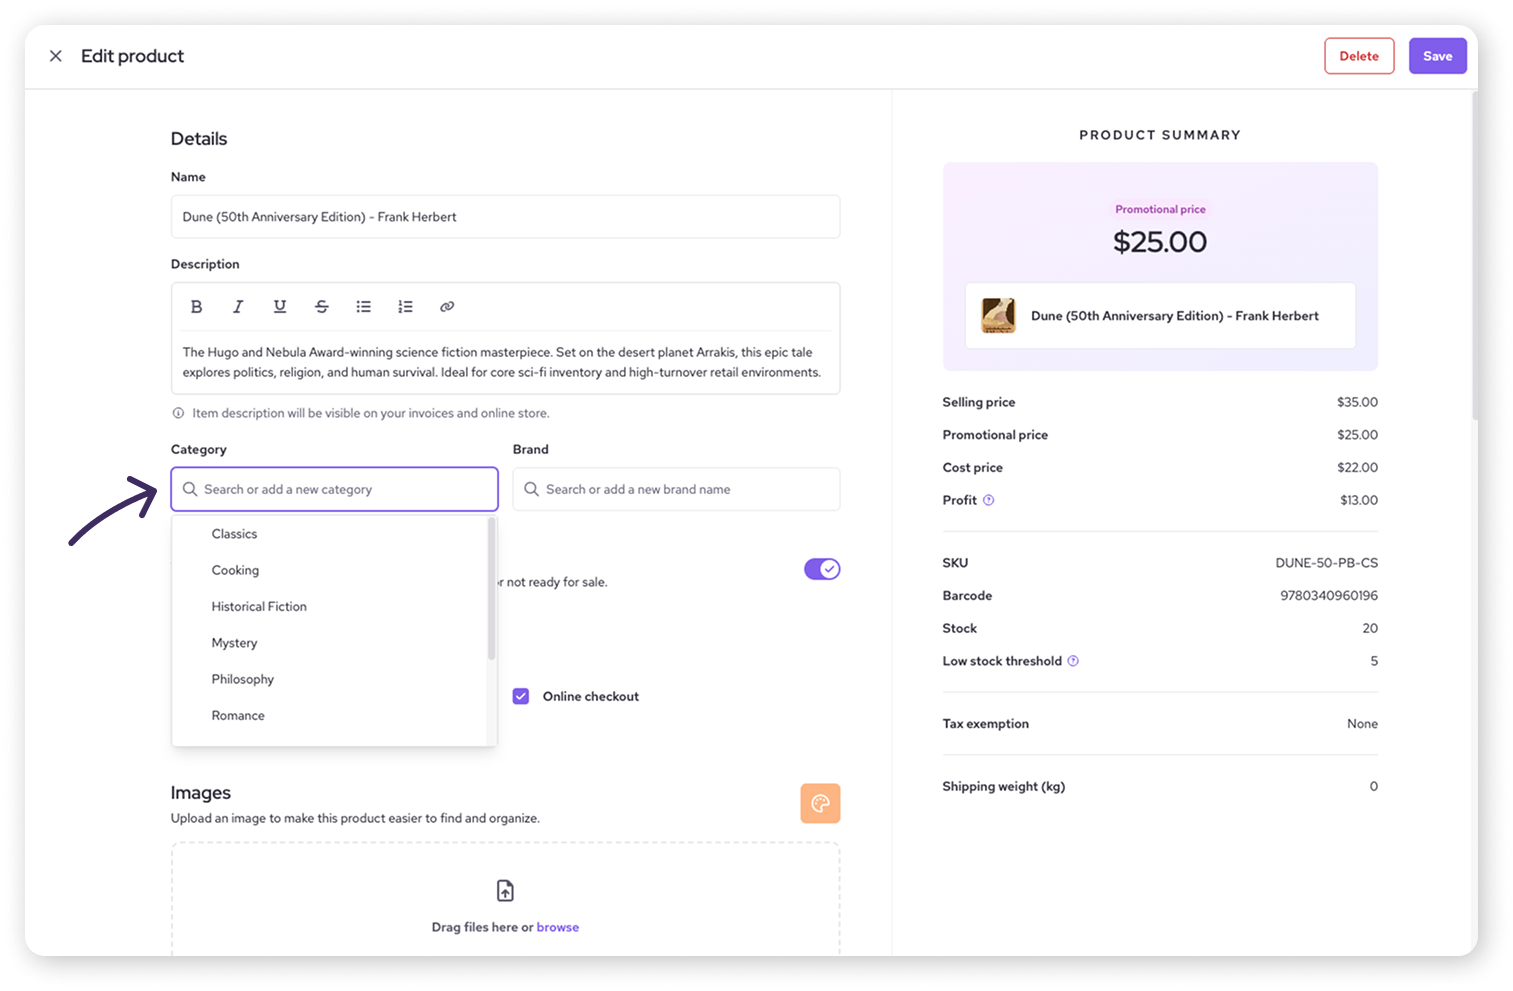
You can assign products when adding/editing them individually.
Click the
 icon on a product to open the editor.
Select the Category field to see a list of existing categories.
Type to search for a specific category.
Once you select one, click Save in the top right corner.
Reordering Categories
The order categories appear in the Categories list determines their display order in tools like the Helcim POS.
Go to the main Categories list page.
Click the Reorder Categories button in the top right.
Drag and drop the category names into your desired order. (Note: You can only reorder main categories, not sub-categories directly).
Click Save Categories.
Using brands
Brands are a helpful way to organize and filter products, especially useful internally or within the POS.
Creating or Editing a Brand
Navigate to Products & Services.
Click the Brands tab on the left-side menu.
Click the Add New Brand button in the top right.
Enter the Brand Name.
Optional: Add a Brand Description.
Optional: Set Availability options.
Click Save.

Assigning Products to a Brand
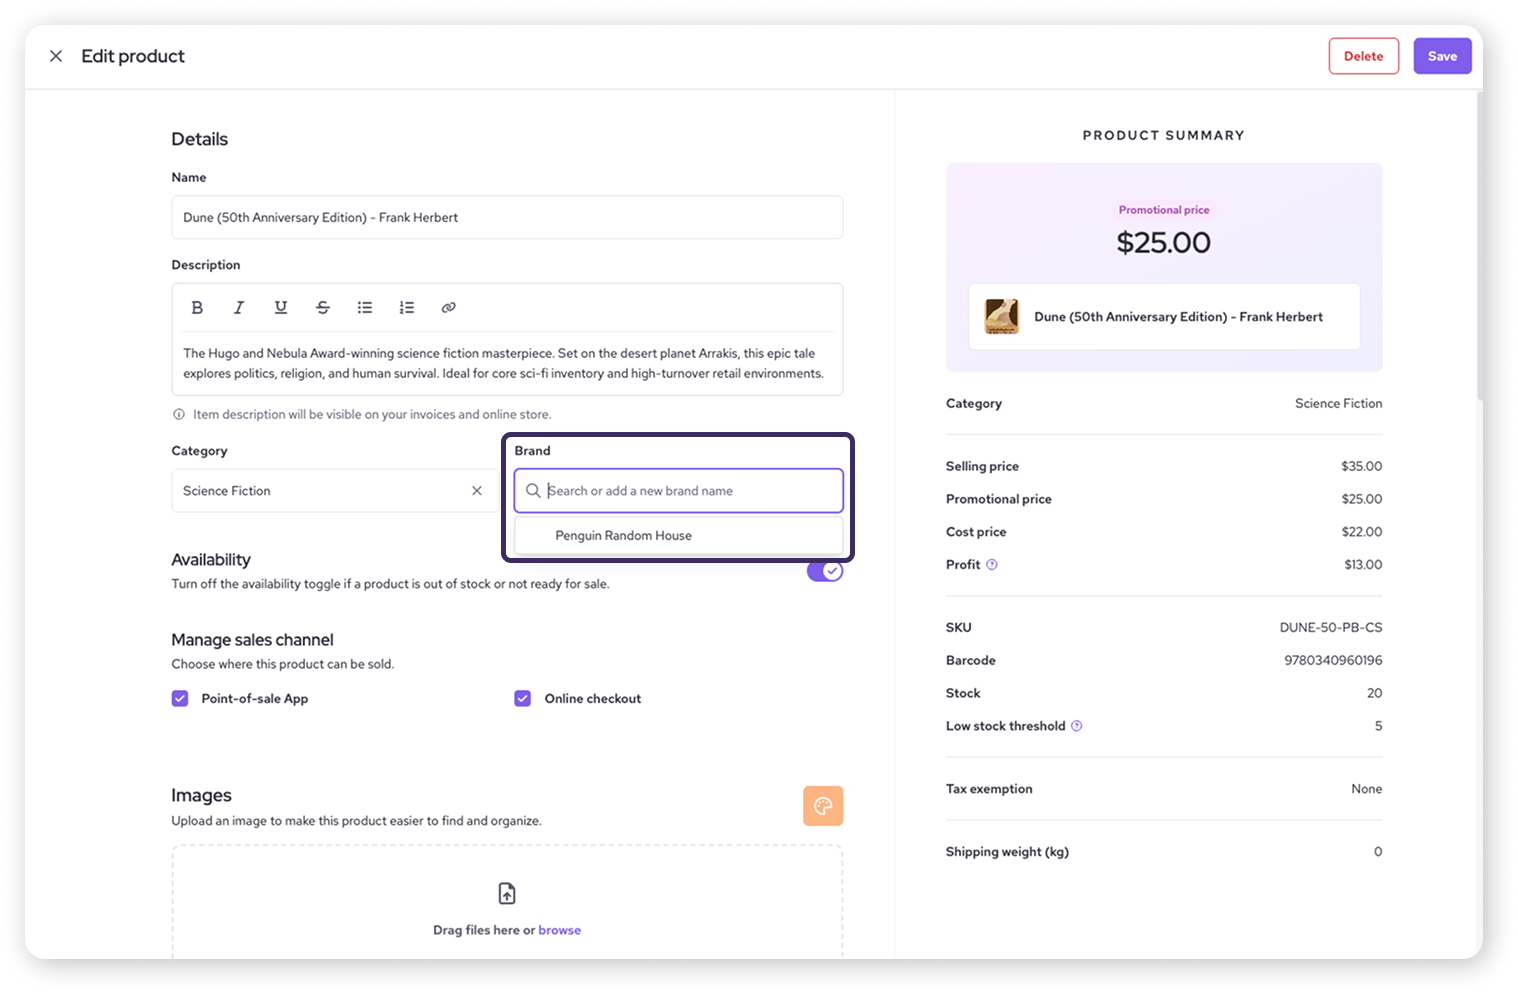
Similar to categories, you can assign brands when editing a product.
Click the
icon on a product to open the editor.Select the Brand field to see a list of existing brands.
Type to search for a specific brand.
Once you select one, click Save in the top right corner.
Using collections
Collections are used for additional grouping and sorting of products. They can be used for specific promotions or internal management tasks.
Creating or Editing a Collection
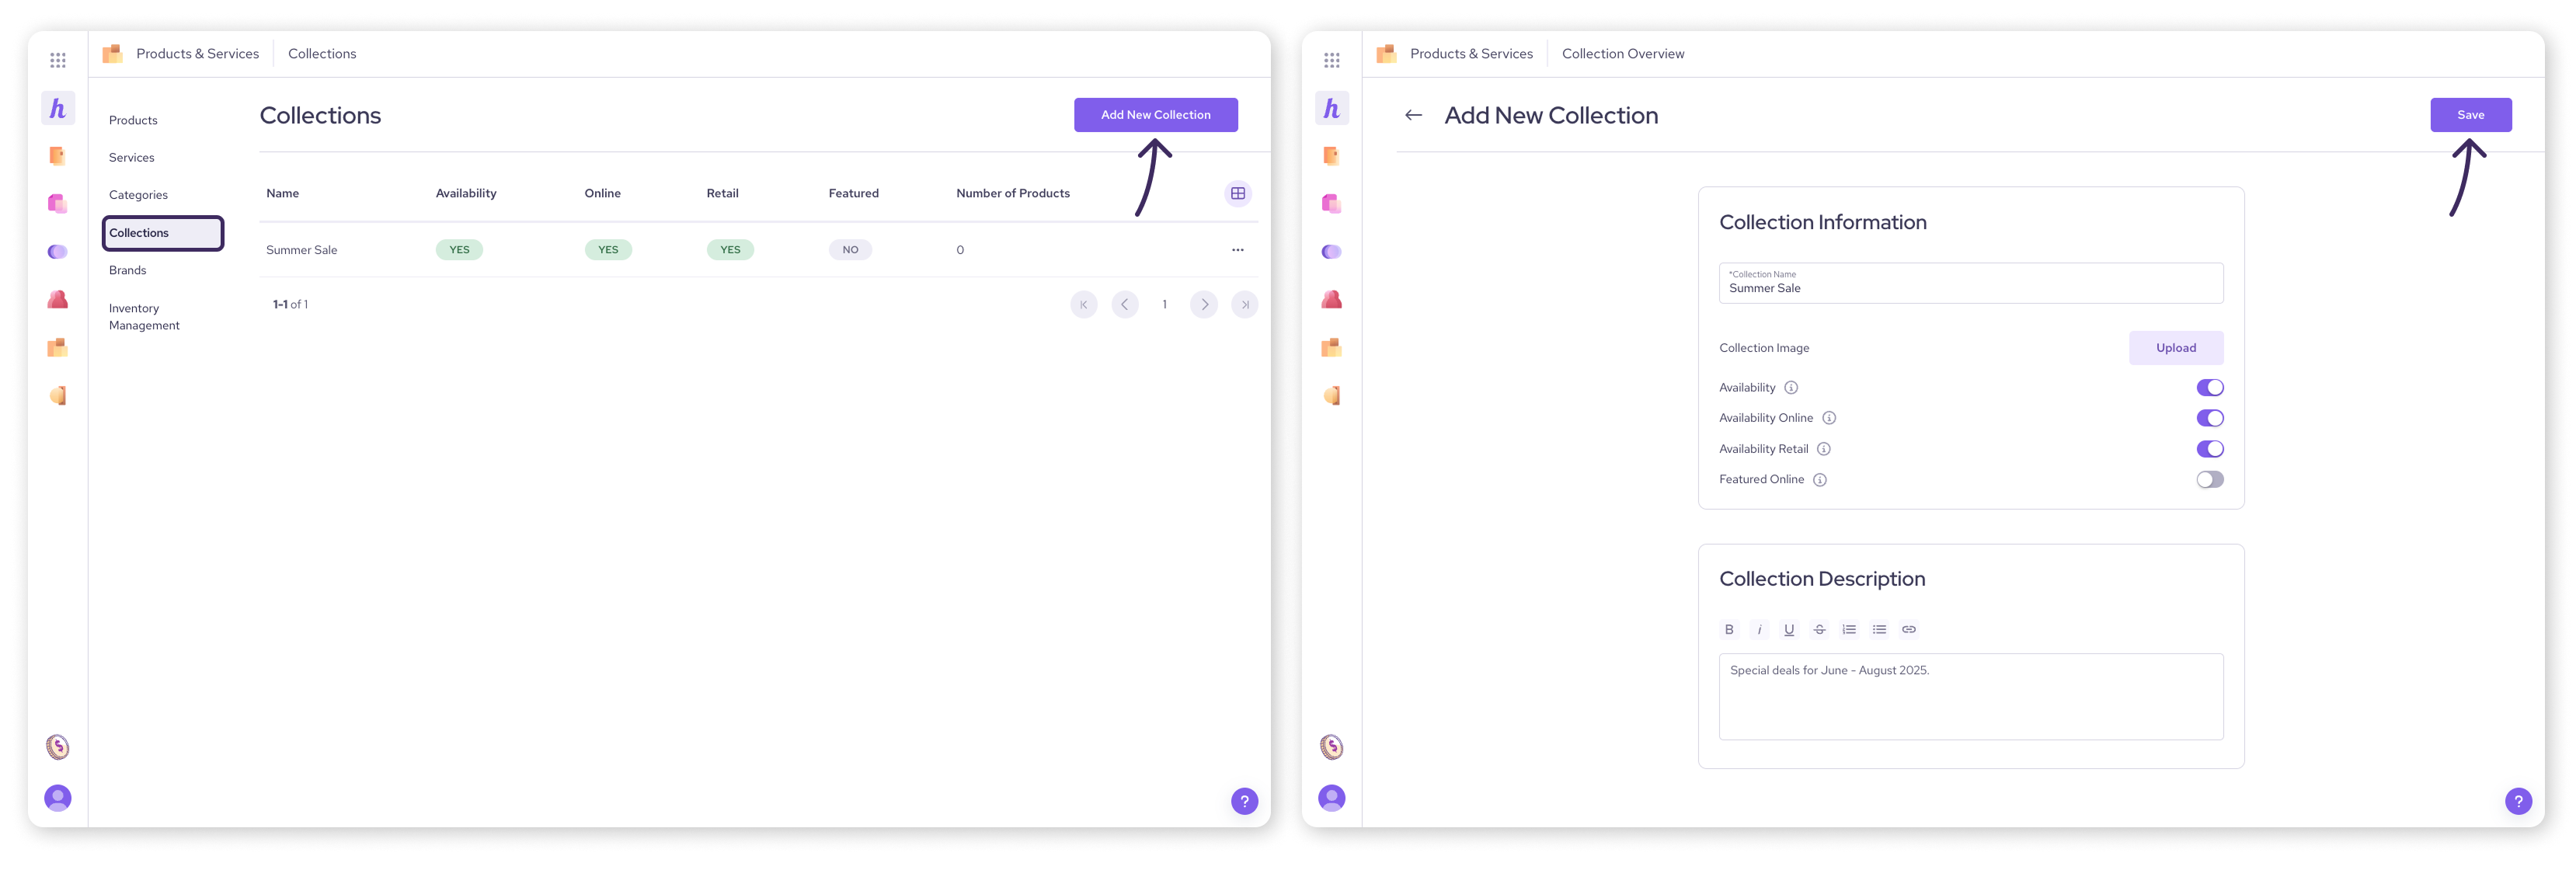
Navigate to Products & Services.
Click the Collections tab on the left-side menu.
Click the Add Collection button in the top right.
Enter the Collection Name.
Optional: Add a Collection Description.
Optional: Set Availability options.
Click Save.
Assigning Products to a Collection
Go to the Collections tab and click on the Collection you want to add products to.
Select Products under Collection from the menu on the left.
Search for existing products and click on them to add them to this collection.
.png)
Conclusions
Organizing your catalogue pays off!
Use categories for primary structure, customer display, POS layout, and defining add-ons.
Use brands for additional filtering and organization, especially helpful in the POS.
Use collections for flexible grouping and management.
Taking a little time to set these up can save you a lot of hassle down the road and make your product management much smoother.
Next steps
Apply add-ons or create product variations: Create variants and add-ons for products
Add more items to your organized catalogue: Add and edit products / Add and edit a service
FAQs
What's the main difference between categories and collections?
Categories are generally used for the main, often customer-visible structure (like store aisles) and are required for add-ons. Collections are more for flexible, often internal, groupings (like a "Featured Summer Items" group) that might cross multiple categories.
Can a product belong to multiple categories, brands, or collections?
A product belongs to one primary category and one brand, but can be assigned to multiple collections.
How do categories affect my Online Store or POS?
Categories influence the navigation structure in your Online Store and how items are grouped or filtered in the POS app, making it easier for customers and staff to find things.
What do the 'Availability' toggles do when creating categories/brands/collections?
These toggles control where the category, brand, or collection itself is visible or active:
Availability: The main toggle to make the item generally available to customers across applicable Helcim tools.
Availability online: Makes the item available specifically in Helcim's Online Store (Online Checkout tool).
Availability retail: Makes the item available specifically in the Helcim Point-of-Sale (POS) App, including the Smart Terminal.