If you have many products, services, or product variants to add to your Helcim account, importing them from a spreadsheet file can save you a significant amount of time compared to adding them one by one.
This guide will walk you through the different import options available.
| This import tool is for adding or updating product details like name, price, description, and variants. If you only need to update stock quantities for existing goods, check out the dedicated Inventory Import process in the Configure and manage inventory article. |
In this article
Accessing the Import/Export function
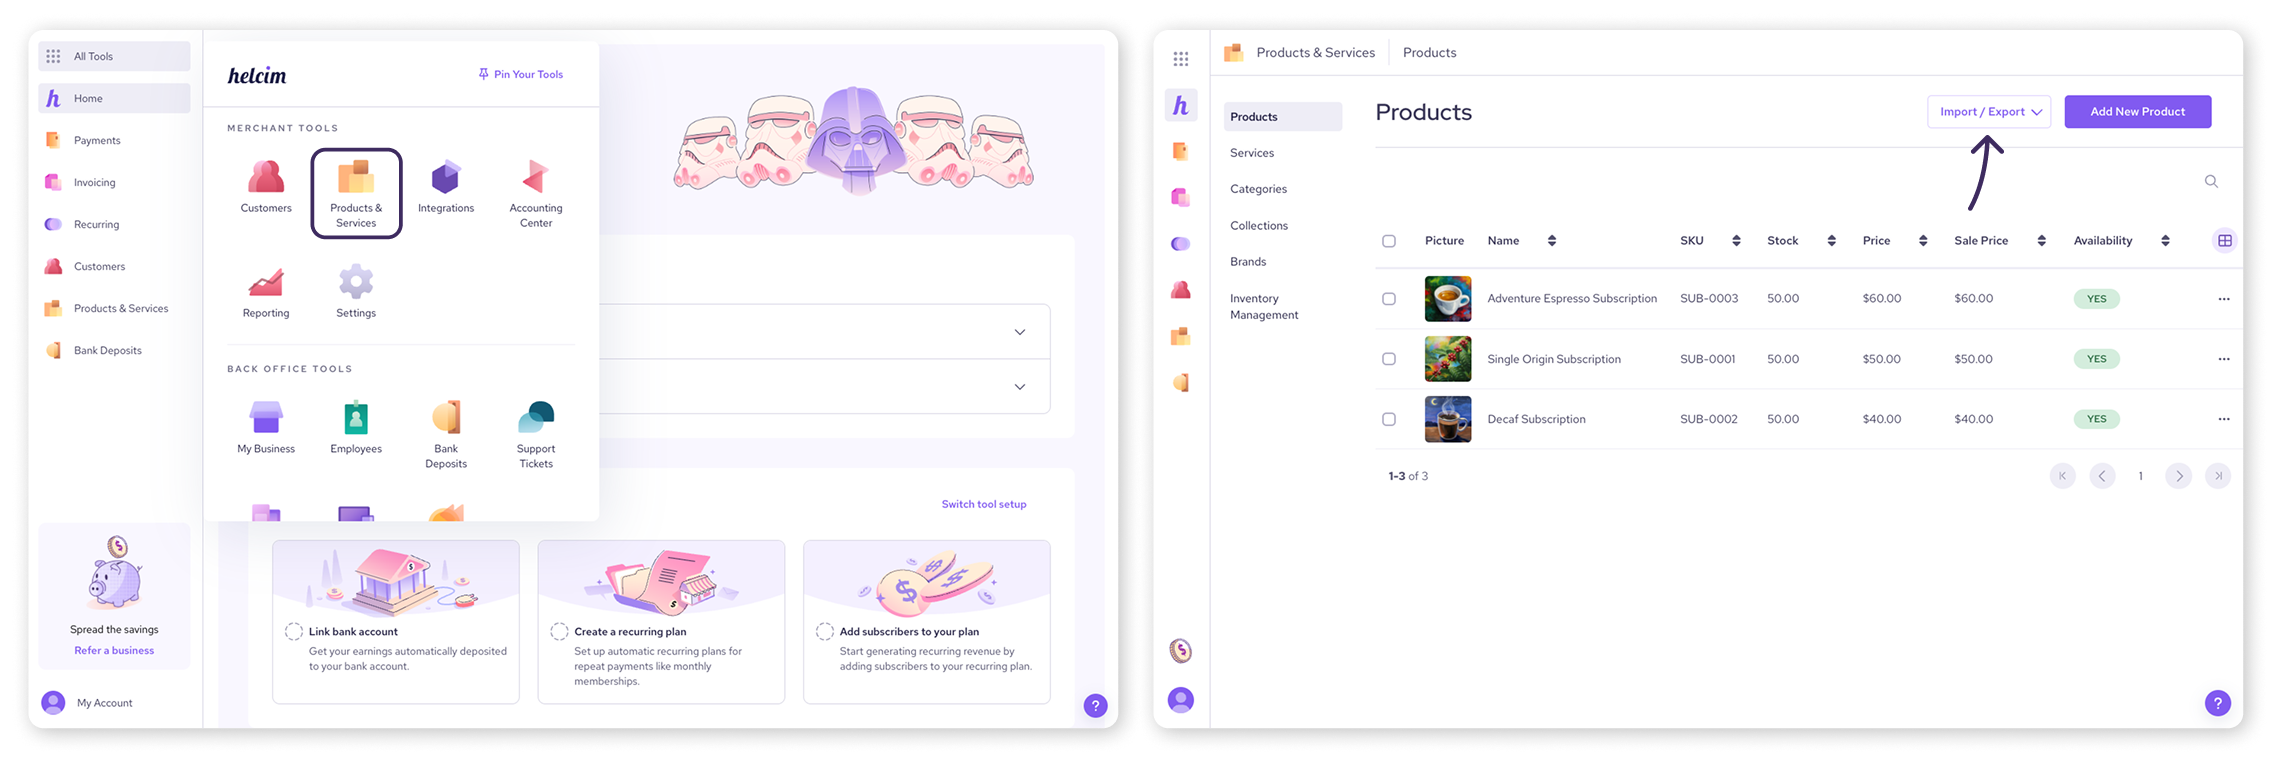
Navigate to Products & Services (you can find this under the All Tools menu).
On the main Products page, click the 'Import/Export' button
Choosing your import type
After clicking 'Import/Export', you'll typically be presented with a dropdown menu or options to select the type of import you want to perform.
The import types that we’ll look at are:
Product Import: For importing your main product details.
Product Variant Import: For importing the different variations (e.g. size, color) of existing products.
Service Import: For importing your services.
For all these import types, you will use a CSV File prepared according to Helcim's sample templates.
A reminder for QuickBooks and product imports
QuickBooks Desktop
Please be aware that QuickBooks Desktop is a deprecated service and is no longer supported for direct data integration with Helcim.
QuickBooks Online
Helcim does offer an integration with QuickBooks Online, but this is primarily for syncing invoices and transaction data, not for your product and services list. You can learn more about this integration in this article.
If you wish to transfer your products and services list from QuickBooks Online into Helcim, you will first need to export that data from your QuickBooks Online account.
For general guidance on exporting data from QuickBooks Online, you can refer to articles like this one from QuickBooks: Export data, reports, and lists from QuickBooks Online.
Once you have exported your data from QuickBooks Online, you must manually transfer this information into the appropriate Helcim sample CSV file (see steps below).
The direct QuickBooks Online export format cannot be uploaded as-is for your Helcim product/service catalogue.
General steps for CSV imports
The following steps apply once you've selected your import type and are ready to prepare your data using Helcim's specific CSV template.
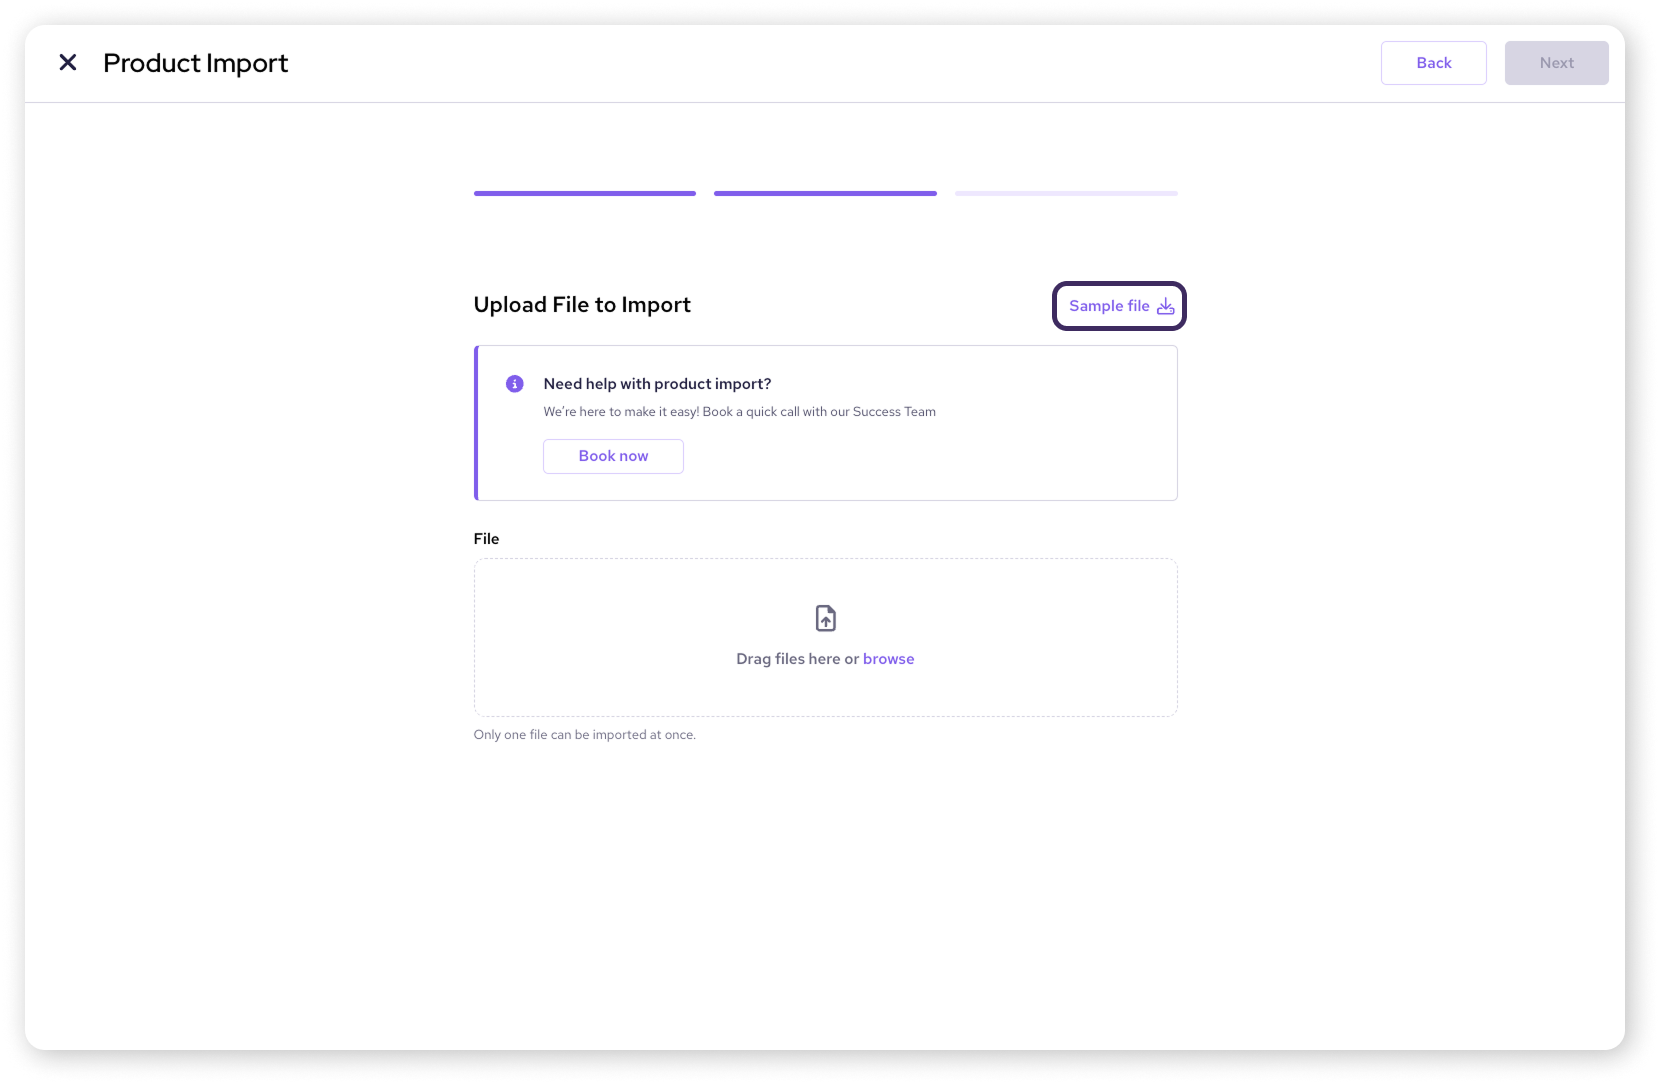
Step 1: Download the sample file
Select Sample file on the upload screen to download the CSV file. The file template will be unique for the type of data you are importing.
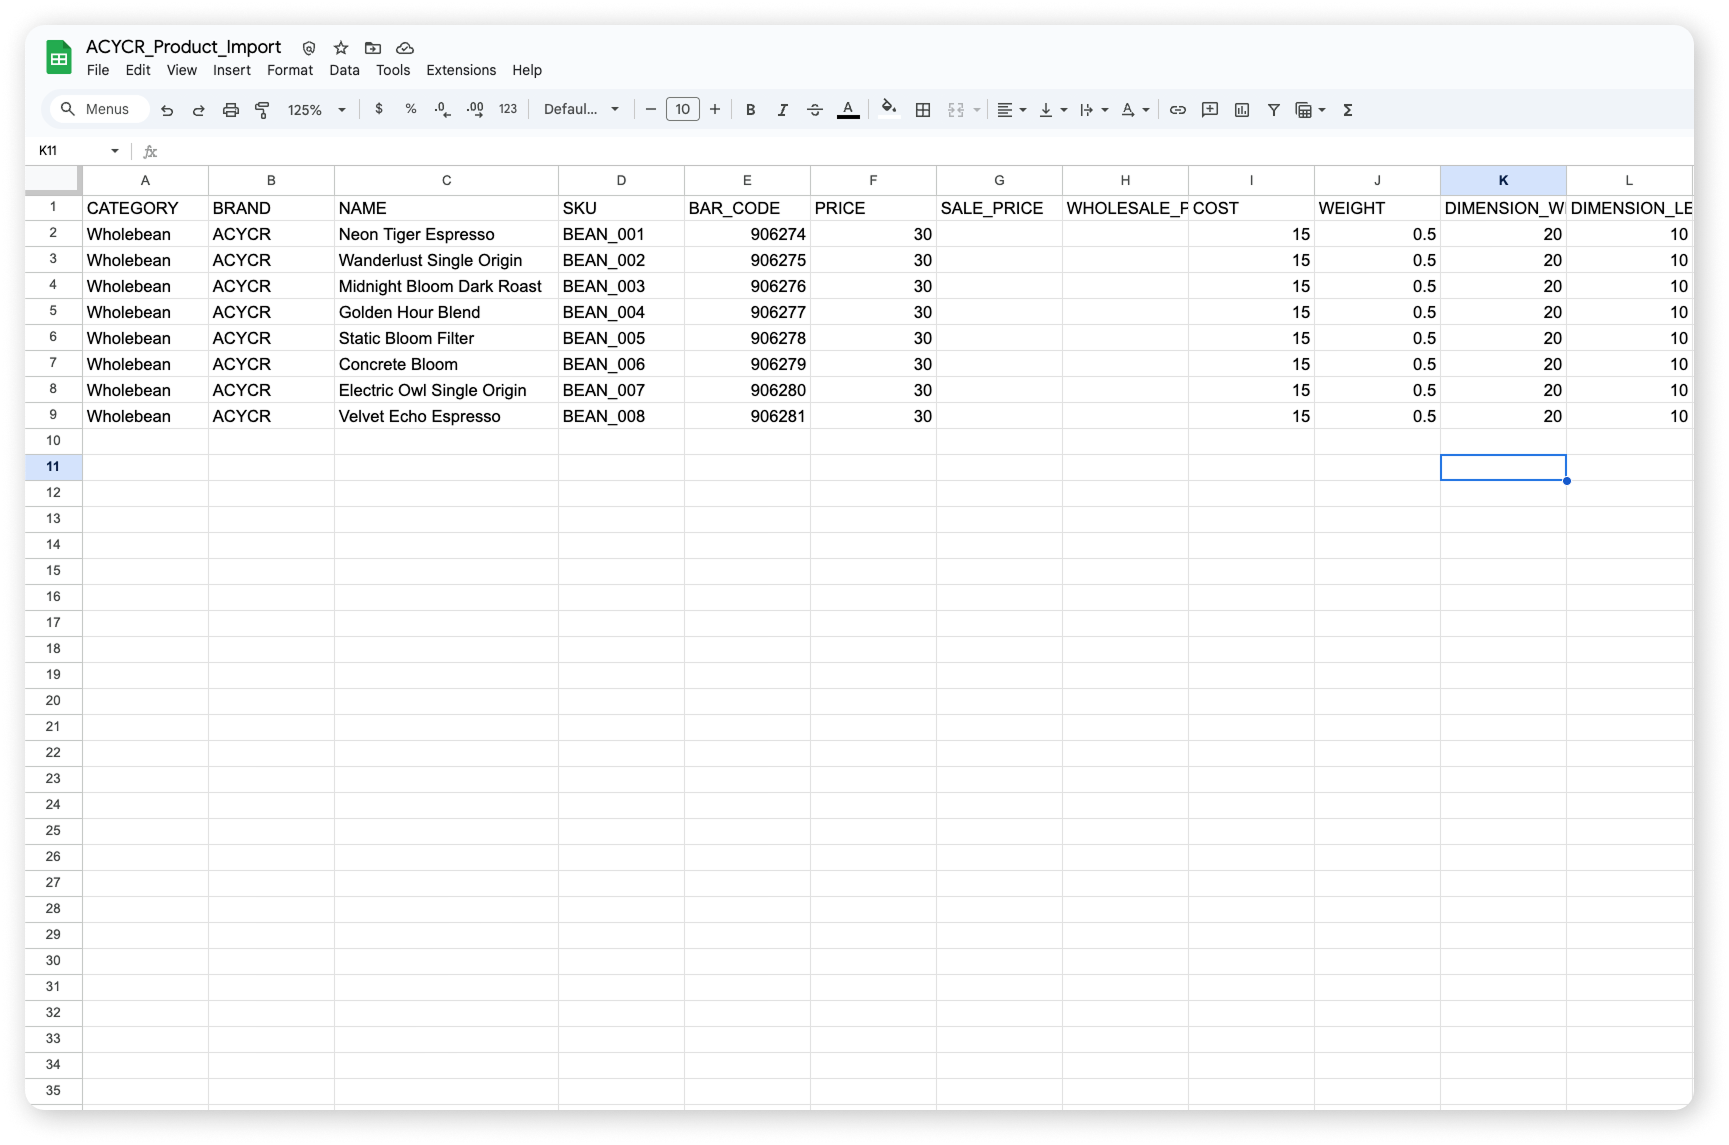
For Product Import, the file will include columns for CATEGORY, BRAND, NAME, SKU, PRICE, COST, WEIGHT, TRACK_INVENTORY, DESCRIPTION, etc..
For Product Variants Import, the file will include columns for PARENT_SKU, SKU, OPTIONS, VARIANT, STOCK, PRICE, etc..
For Service Import, the file will include columns for NAME, CATEGORY, PRICE, SALE_PRICE, DESCRIPTION, etc.
Step 2: Prepare your CSV file
Open the downloaded sample CSV file in your preferred spreadsheet program (like Microsoft Excel, Google Sheets, or Apple Numbers).
Review the example data to understand how your information should be structured. For a full breakdown of each column, visit this section of the article.
Important: Clear the sample data rows from the file, but do not delete the header row (the first row containing the column titles).
Carefully enter or copy your data into the corresponding columns under the correct headers. Ensure your data matches the format expected for each column (e.g., "YES"/"NO" for availability fields, specific date formats if applicable).
Save your completed file in CSV format.
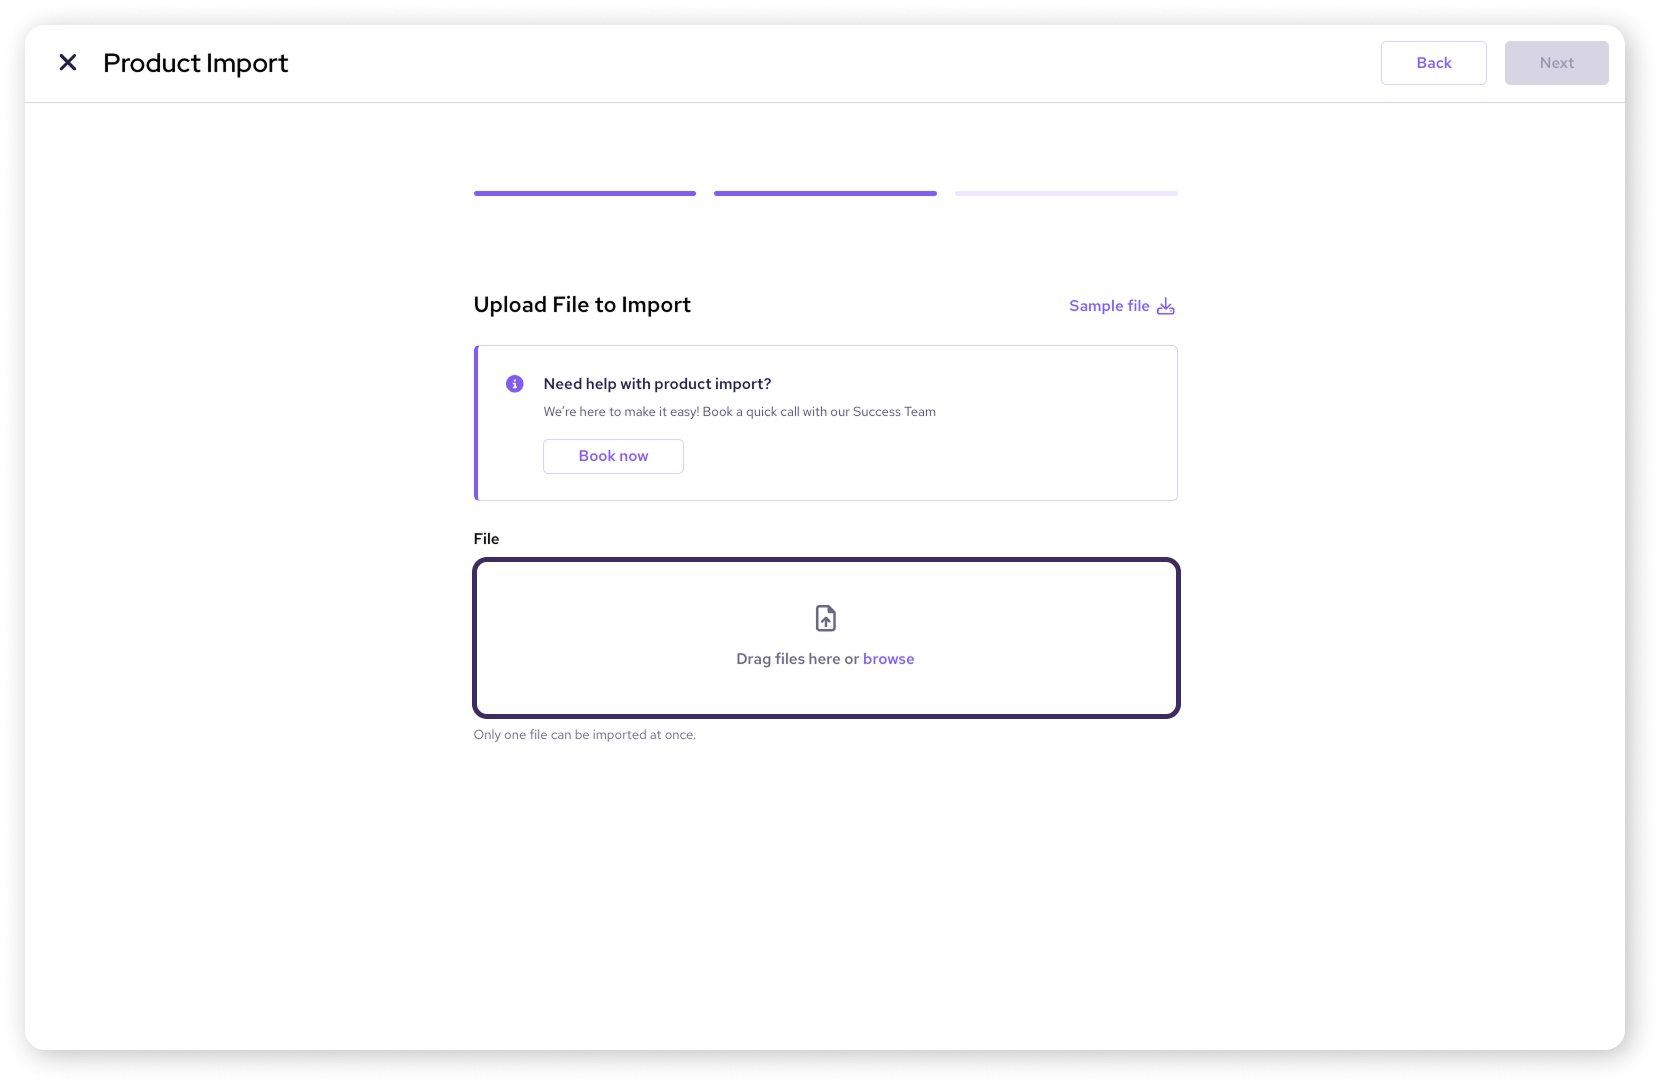
Step 3: Upload your prepared CSV file
Go back to the import screen in your Helcim account.
Upload your edited CSV file. You can usually do this by dragging the file into an upload area or by clicking a browse button to select the file from your computer.
Step 4: Review and confirm the import
After the file is uploaded, the interface will display a preview of the data from your file.
Carefully review this preview to ensure your information appears correctly and is mapped to the right fields.
Check the boxes for each product as you review. To Select all, use the checkbox in the upper left.
Click the Confirm button to imported the selected items.
Your products, variants, or services should now be imported into your Helcim account.
.png)
Filling out the sample CSV file
When you download the sample CSV file for your import, you'll find various columns. Here’s a breakdown of what each column means for each type of import, and how to fill it out.
Product Import
Product Variants Import
Service Import
Next steps
Double-check your imported items: Add and edit products / Add and edit a service.
Learn about organizing your products with categories, brands, or collections.
Need to update only stock levels in bulk? Read our article on configuring and managing inventory
FAQs
What's the difference between Product Import and Inventory Import?
Product Import (this article) adds or updates full product details (name, price, SKU, variants, etc.). Importing inventory is a separate, simpler process specifically for updating only the stock quantity of existing goods.
Can I update existing products using this import tool?
Yes, if your file includes an SKU that already exists in your Helcim account, the import tool will typically update the information for that existing product based on the data in your file's row.
Why did my import fail? / What are common errors?
Common errors include incorrect file formatting (ensure it matches the sample file structure and is saved as .csv or .xlsx), missing required fields (like Product Name), incorrect variant formatting (missing Parent SKU or incorrect semicolon usage), or exceeding file size limits. Double-check your file against the sample file and formatting tips.
How many products can I import at once?
While there isn't usually a strict row limit, very large files (thousands of products) can take longer to process or might encounter timeouts. If you need further assistance with importing, reach out to our support team.