Discount codes are a fantastic way to run promotions, reward loyal customers, or encourage first-time buyers. You can create codes for percentage discounts, fixed amounts off, or even free shipping.
This guide walks you through creating a new discount code and customizing its rules.
In this article
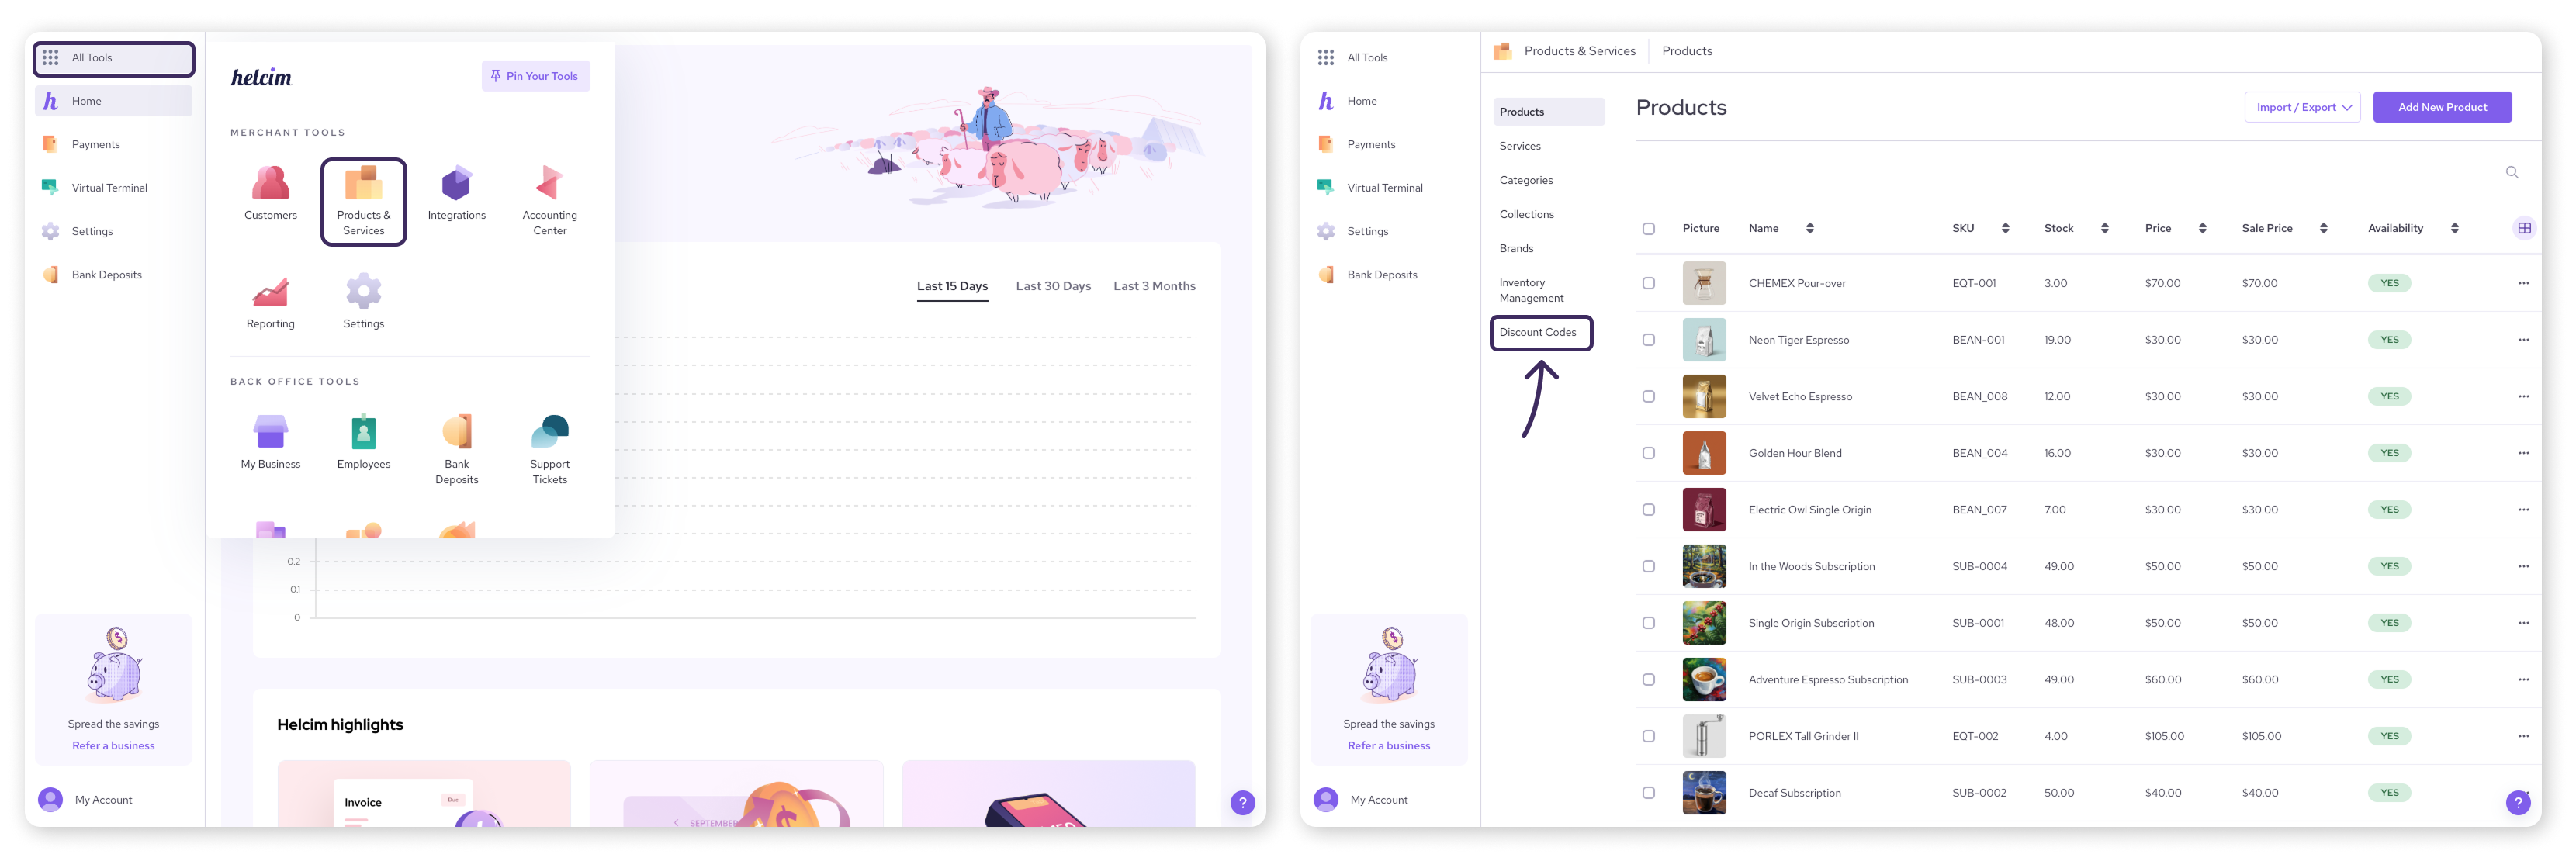
Find your discount codes
Open the All Tools menu and select Products & Services
From the left-side menu, select Discount codes
Create a new discount code
Select Create Discount Code
This opens a pop-up where you'll define your new discount.
Select a discount type
In the pop-up window, select the discount type that fits your needs.
Discount on total order: Offer a discount on the full purchase amount.
Discount on products: Offer a discount on a specific product, category, or brand.
Free shipping: Offer free shipping on orders.
Then, click Continue.
.png)
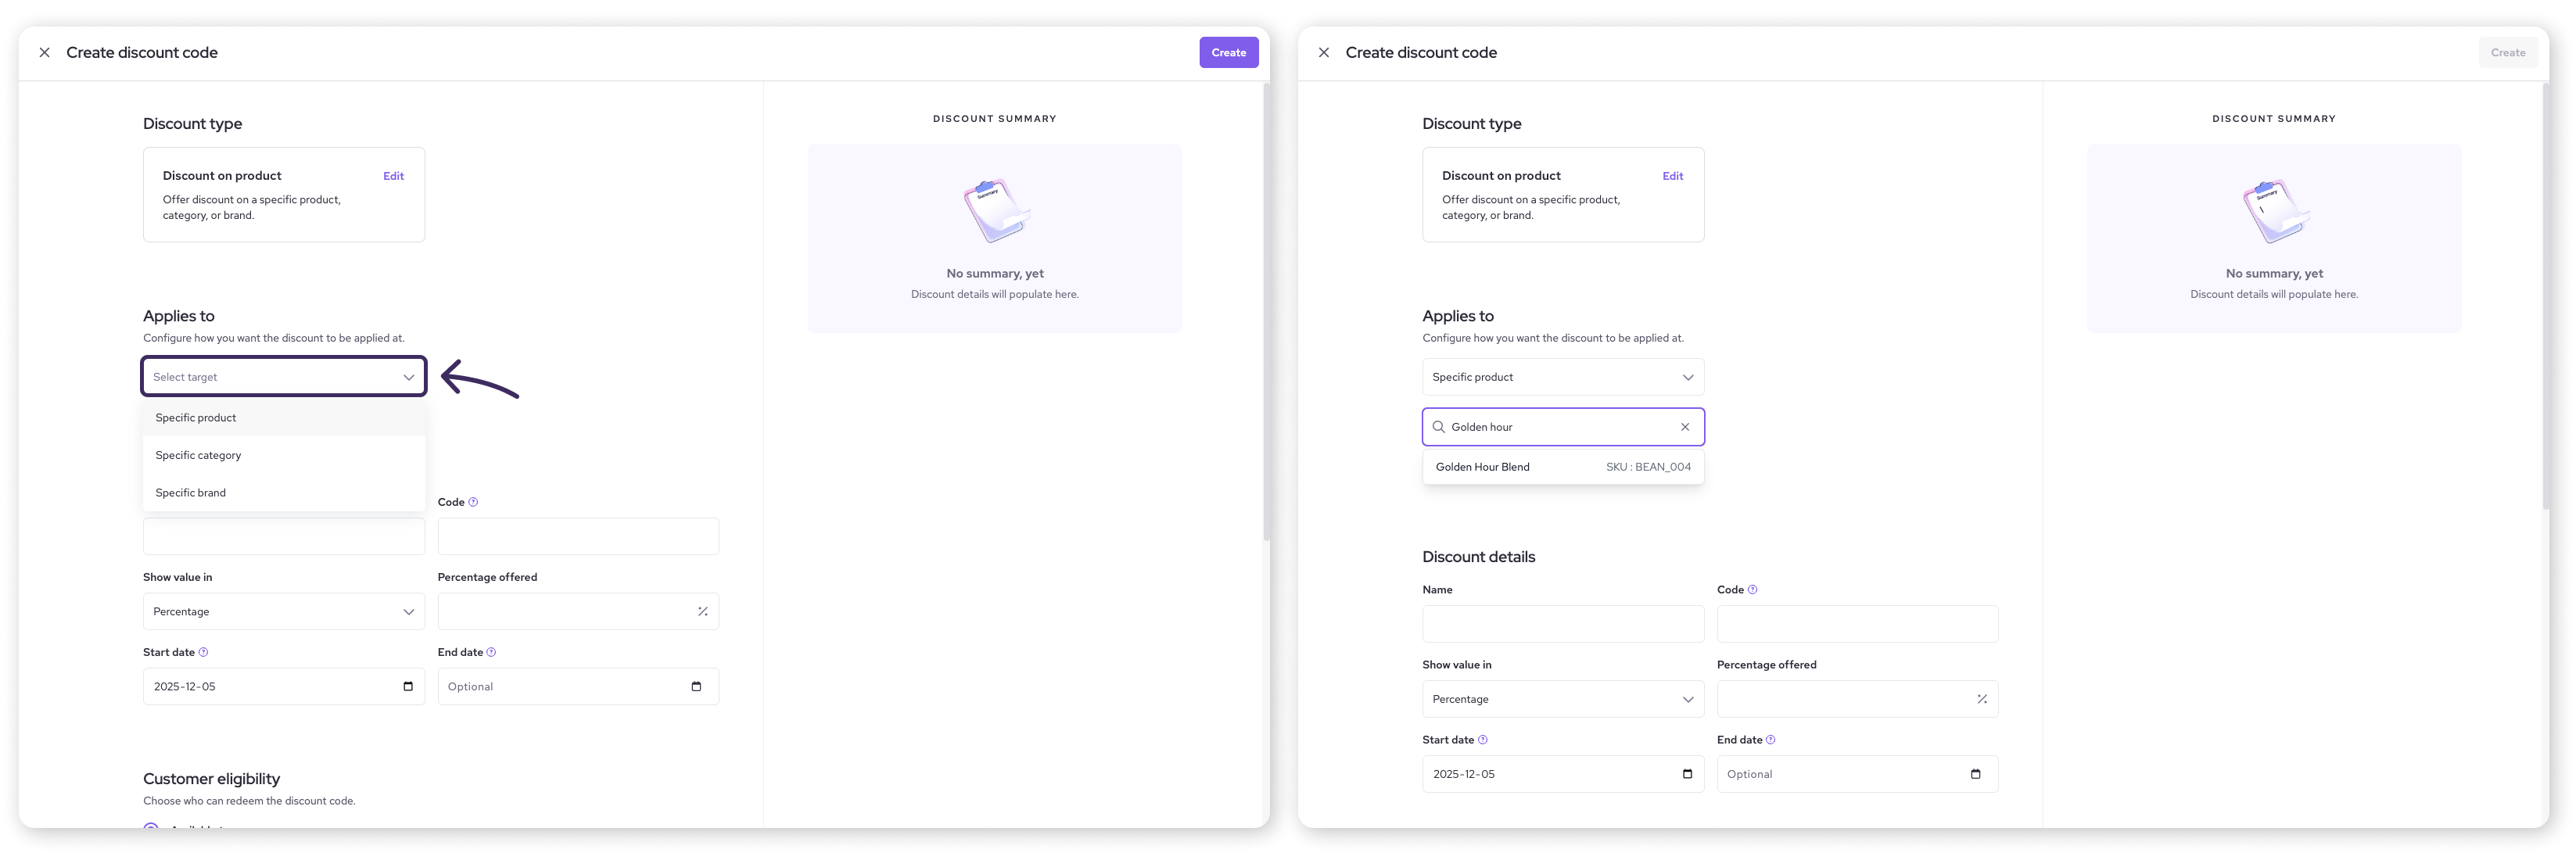
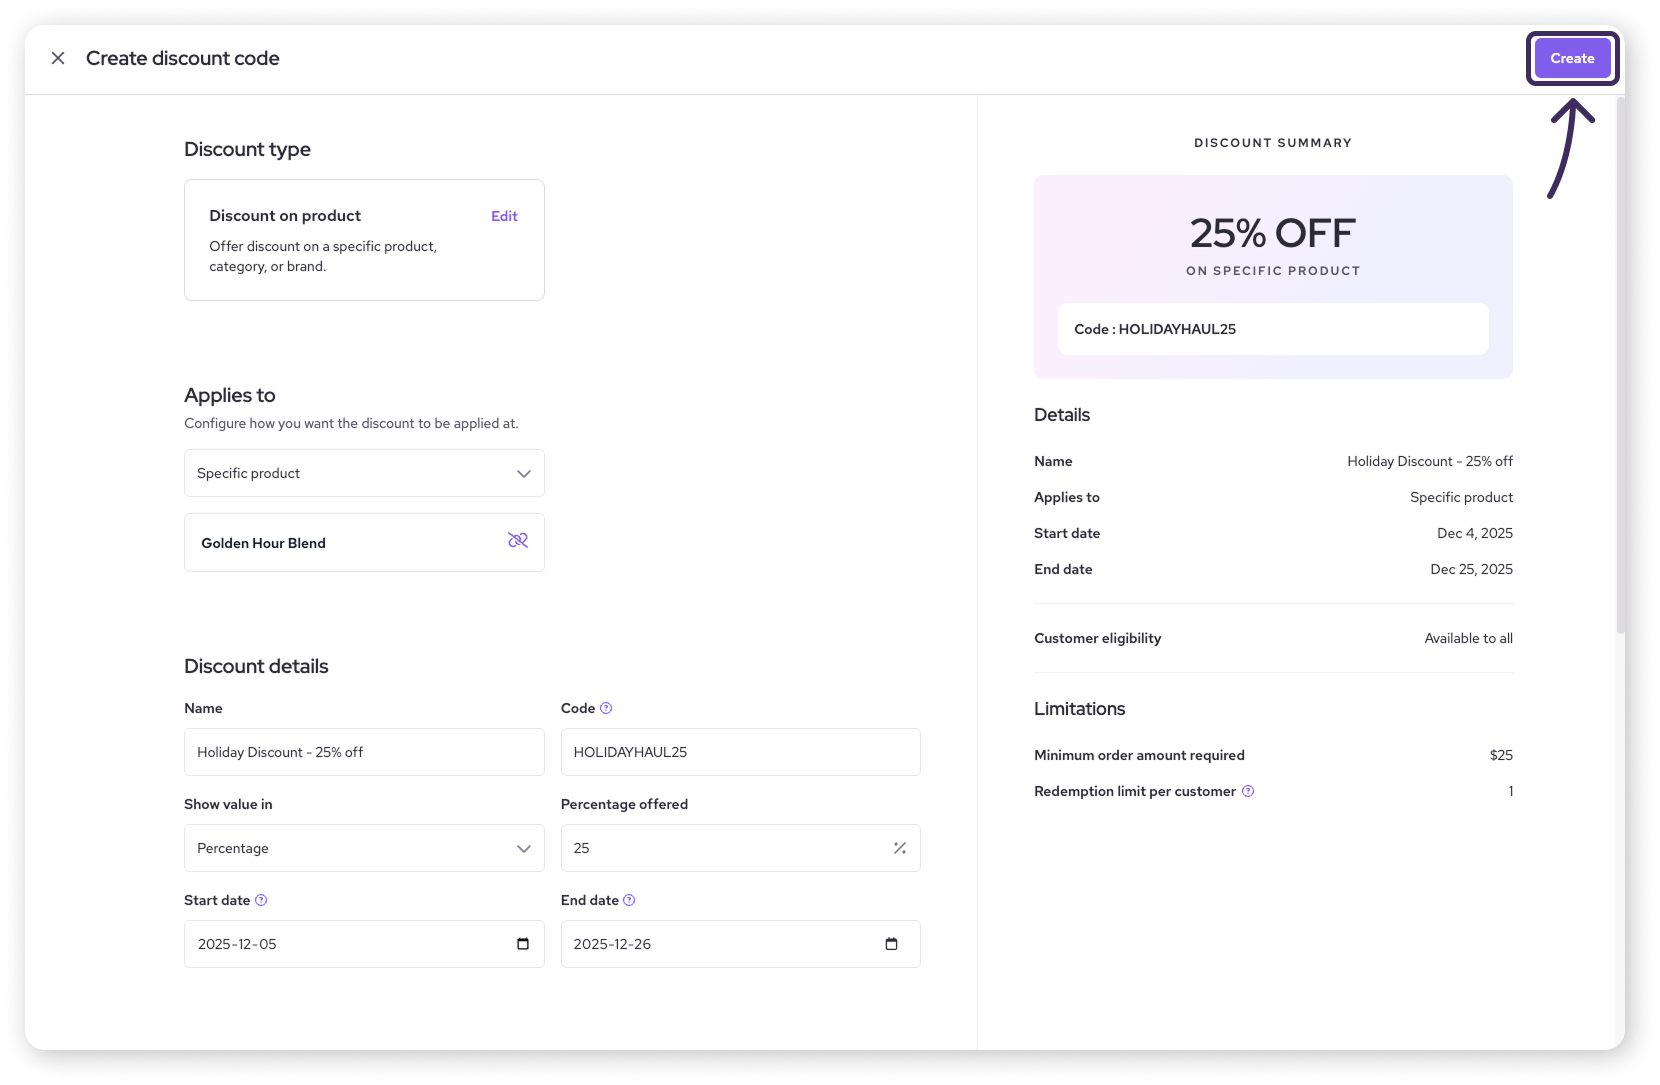
Configure your discount code
After selecting your discount type, fill out the details of your discount. Some fields may differ depending on the discount type you chose.
Applies to
This field will only appear if you choose Discount on products or Free shipping as your discount type. Select the level of product that you want the discount code to apply to.
Specific product: the code applies to a designated product
Specific product variant: the code applies to a designated variant of a product
Specific category: the code applies to a designated product category
Specific brand: the code applies to a designated product brand
| For free shipping discounts, you can also choose ‘Entire order’ as an option. |
Once you’ve selected an option, a search bar will appear. Type the name of a product, variant, category, or brand to add to the discount code.
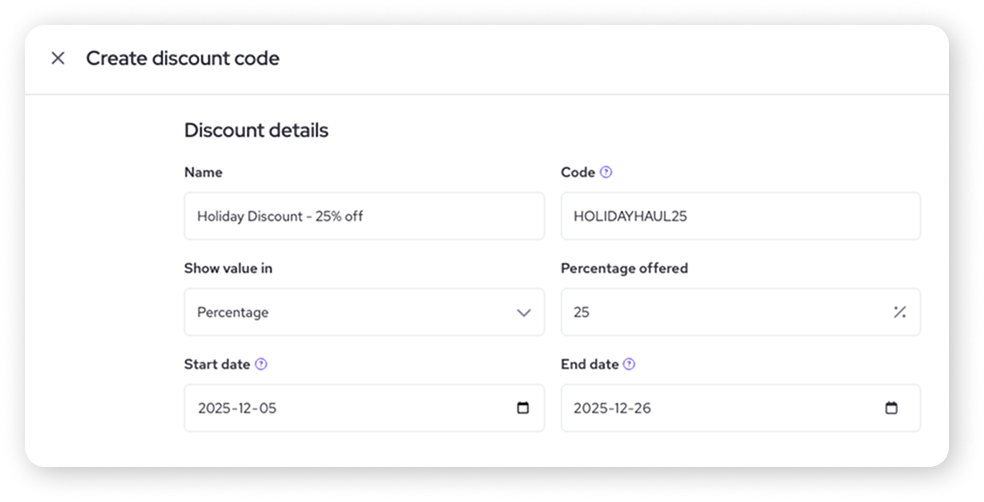
Discount details
Fill out the basic details of your discount.
Title: Give your discount an internal reference name (e.g. "Spring Sale 15%", "VIP Free Shipping").
Code: Enter the actual code customers will type in (e.g. SPRING15, WELCOME10, SHIPFREE). Keep it relatively easy to type!
Offer value in: Use the dropdown to select between ‘Percentage’ or ‘Dollar amount’ for the discount.
Percentage offered / Amount: Fill in the percentage or dollar amount for the discount.
Start Date / End Date: Set the dates when the code becomes active and when it expires. Leave the end date as ‘None’ if you don't want it to expire.
Minimum order value (optional)
If you want, you can set a minimum order amount your customer needs to meet in order to redeem the discount.
| Example: receive 20% off when you spend $100 or more. |
.png)
Set limitations (optional)
Set some rules on who can use your discount code and how often.
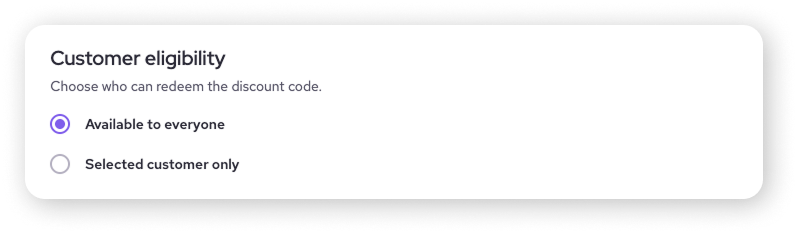
Customer eligibility
Select whether the discount can be redeemed by everyone, or only by a specific customer.
Available to everyone: the discount code will appear as an option for any customer that attempts to use it in your online store
Selected customer only: the discount code will only appear to the customer you add. Search the customer by name and select their profile tile to add them.
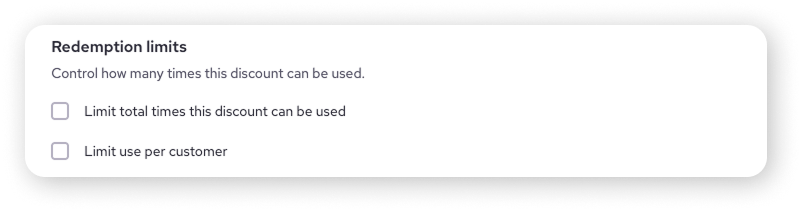
Redemption limits
Add a limit of how many times the discount can be redeemed, either in total or per customer.
Set a total limit: Check the box and enter the maximum total number of times the code can be used across all customers (e.g. limit a special offer to the first 100 uses).
Set a customer limit: Check the box and enter the maximum number of times a single customer can use the code (e.g. limit a 'welcome' discount to 1 use per customer).
Saving your code
Once you've configured all the options, click the Create button. Your discount code is now created and will become active at the start date you set for it.
Apply a discount code in the POS
Once you've created your discount codes, here's a quick overview of how to apply them during a sale in the Helcim Point-of-Sale (POS) app:
After adding items to your cart in the POS, tap Review.
If you've enabled discounts in your POS settings, you should see a Discount field.
Select the + sign next to the Discount field.
Under Preset, look for and select the discount code you created.
The code should now be applied to the eligible items in your cart.
| To learn more about enabling discounts in the app and different ways to add discounts to an order, visit this article: Apply Discounts in the Helcim POS. |
Next steps
Go back to the main guide for managing your product catalogue.
Organize the products or categories you might link discounts to.
FAQs
Can customers use multiple discount codes on one order?
Helcim’s POS only allows one discount code per order. The customer (or you, in the POS) would need to choose which code offers the better deal.
Can I edit a discount code after creating it?
Yes, you can go back to the Discount Codes list in the Products & Services page, click on the code name, and modify its details, then save the changes.
What happens if a discount applies to specific products, but the customer has other items in their cart?
The discount (percentage or amount) will typically only apply to the eligible items identified by the limitation (specific product, category, brand, etc.). Other items in the cart will remain at their regular price.
I followed the steps but my discount code isn't showing up in my Helcim POS app. What's wrong?
If you've just added a discount code through your Helcim settings, your app may need a refresh for it to show up. Try fully closing the app on your device, reopening it, and logging back in. Your discount code should now appear when you add a discount in your cart.