You're ready to bring your business online with Helcim Online Checkout – that's great!
This guide will walk you through the initial setup wizard, step-by-step. We’ll cover adding your business details, setting up essential merchant policies, and configuring your checkout options like shipping and pick-up.
In this article
Accessing the Helcim Online Checkout tool
First things first, let's find the tool in your Helcim account so you can get started.
From your dashboard, select All Tools, then click on Online Checkout.
A banner will appear, prompting you to take your business online. Click on Setup Your Store.
.png)
Step 1: Enter your business details
This section is where you'll input or confirm the core information about your business.
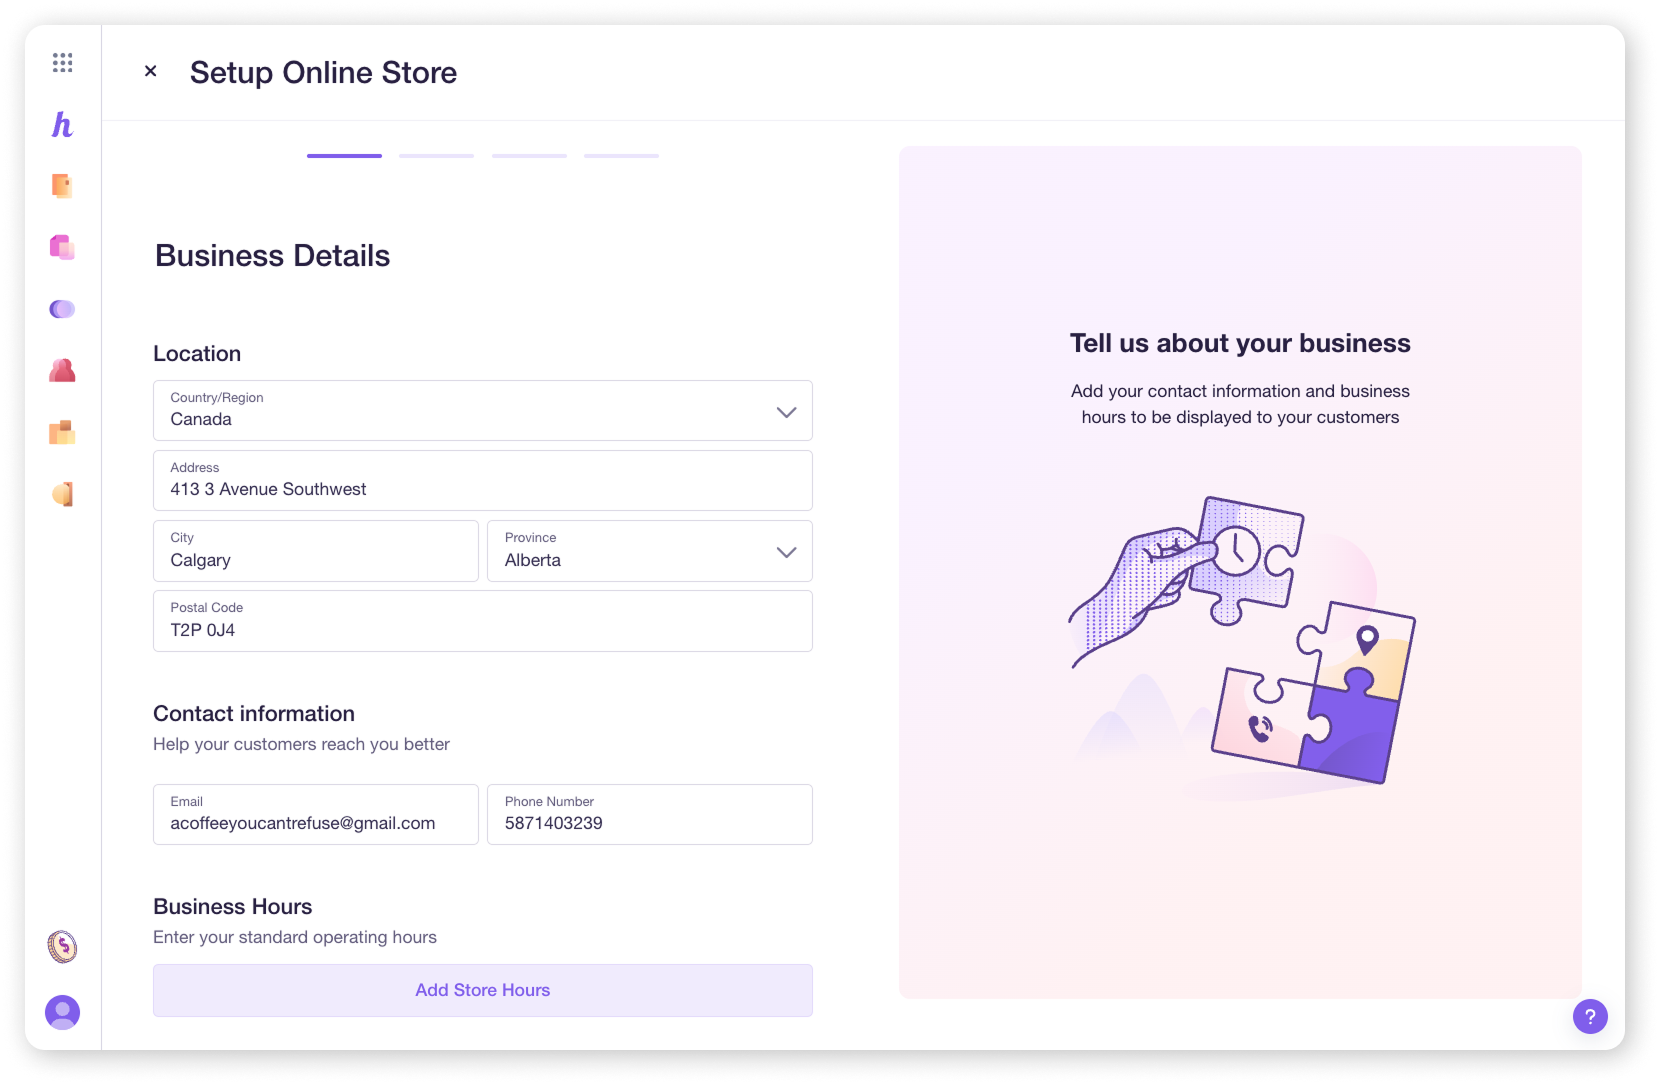
Business location
Your business location is pre-filled based on information from your sign up application. However, these fields can be edited to reflect new changes.
Contact information
Your contact information is also pre-filled with the information you provided during your sign up, but can also be edited.
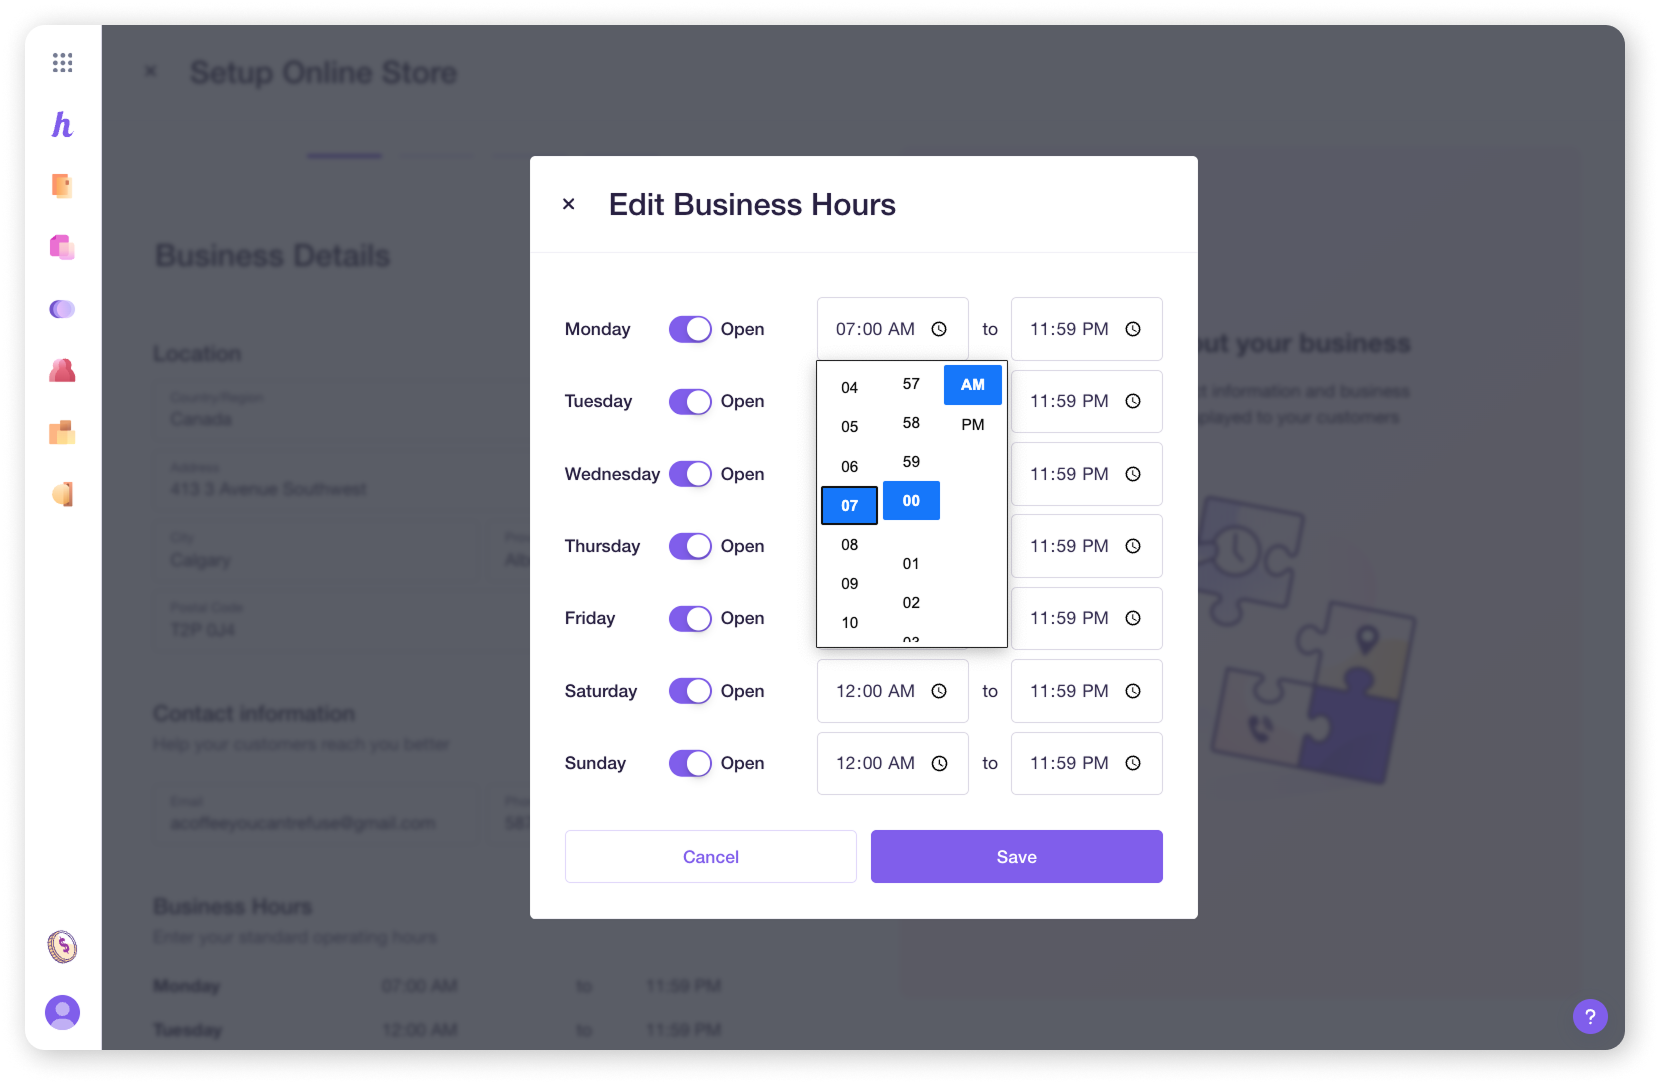
Business hours
Add your business hours by clicking on Add Store Hours.
In the pop-up, click the toggles for each day your store is open
Click on the clock icons to adjust your operating hours for each day
Once you have added your business hours, click Save to be brought back to the main screen and then Continue to proceed to the next section.
Step 2: Add your merchant policies
Clear policies build trust with your customers and are important for running your online store.
Here’s how to add them.
Return Policy
You will need to have a Return Policy to activate your Online Checkout. To make things easier for you, we provided a template you can use and edit. To use it, click on Use Template.
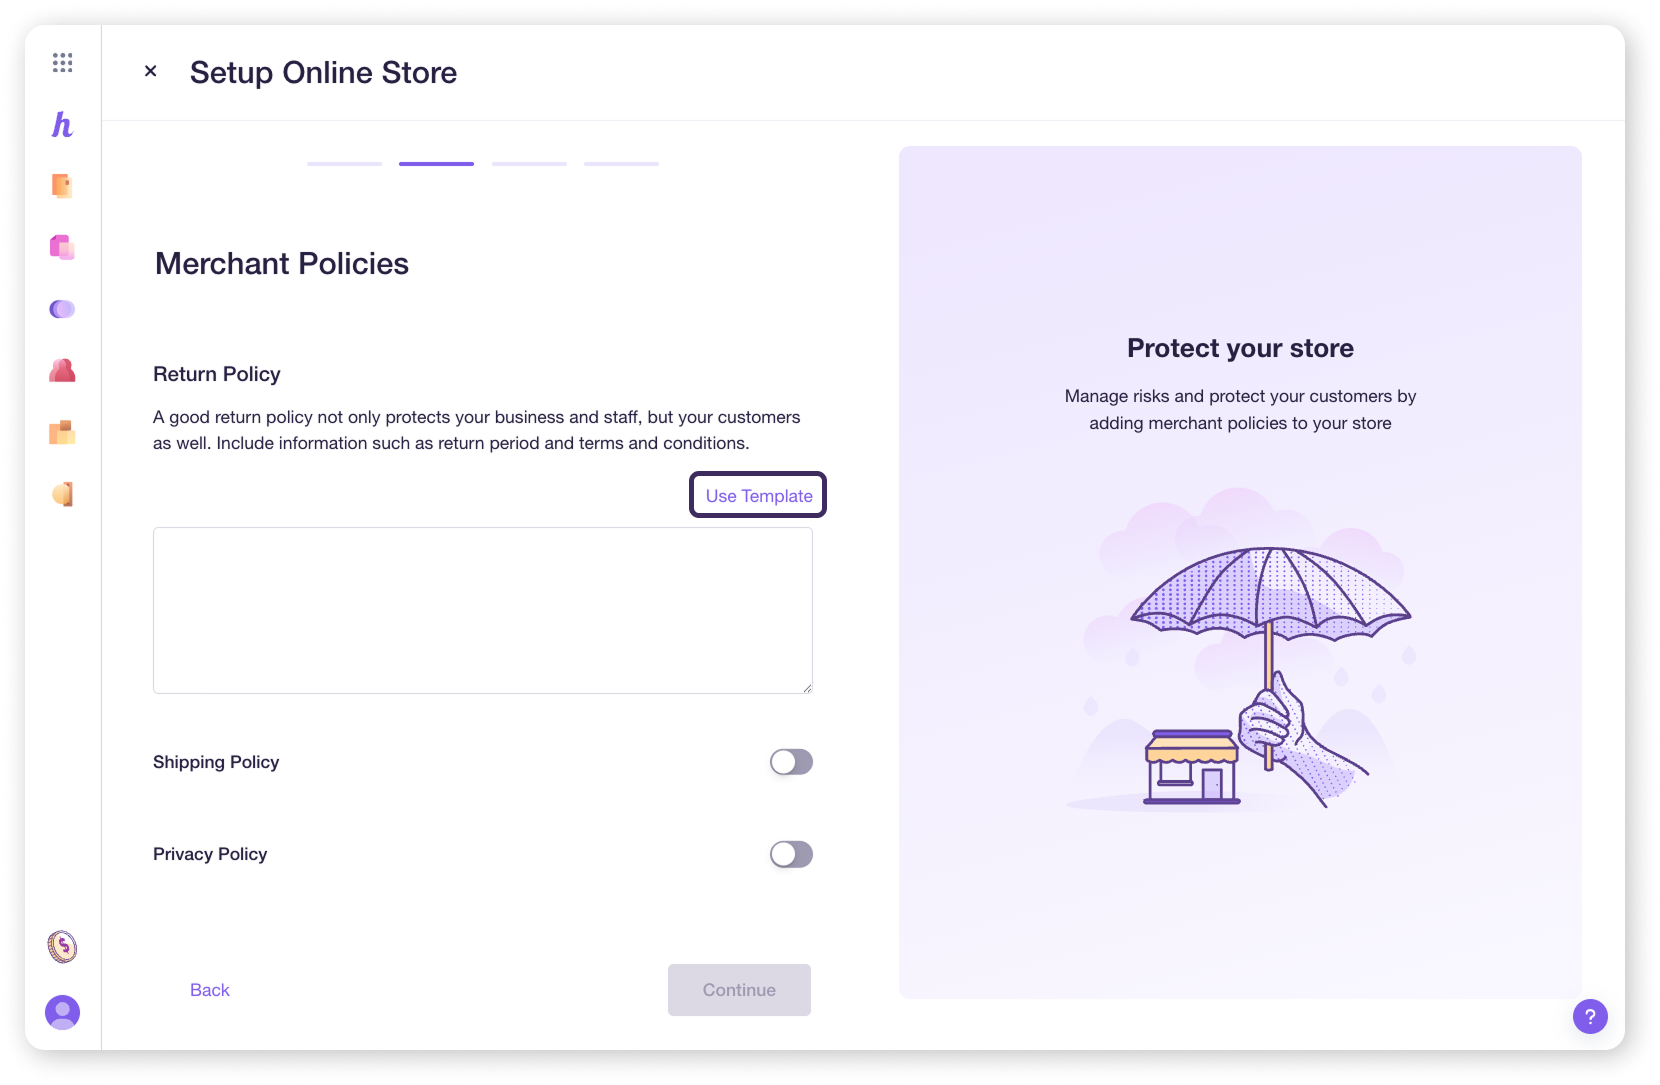
Shipping Policy
While not required, it’s best to have a Shipping Policy on hand if you are planning to ship your products to customers to protect your store. Click on the toggle to expand a text box where you can enter your shipping policy.
We also provide a Shipping Policy Template that you can use and edit by clicking Use Template.
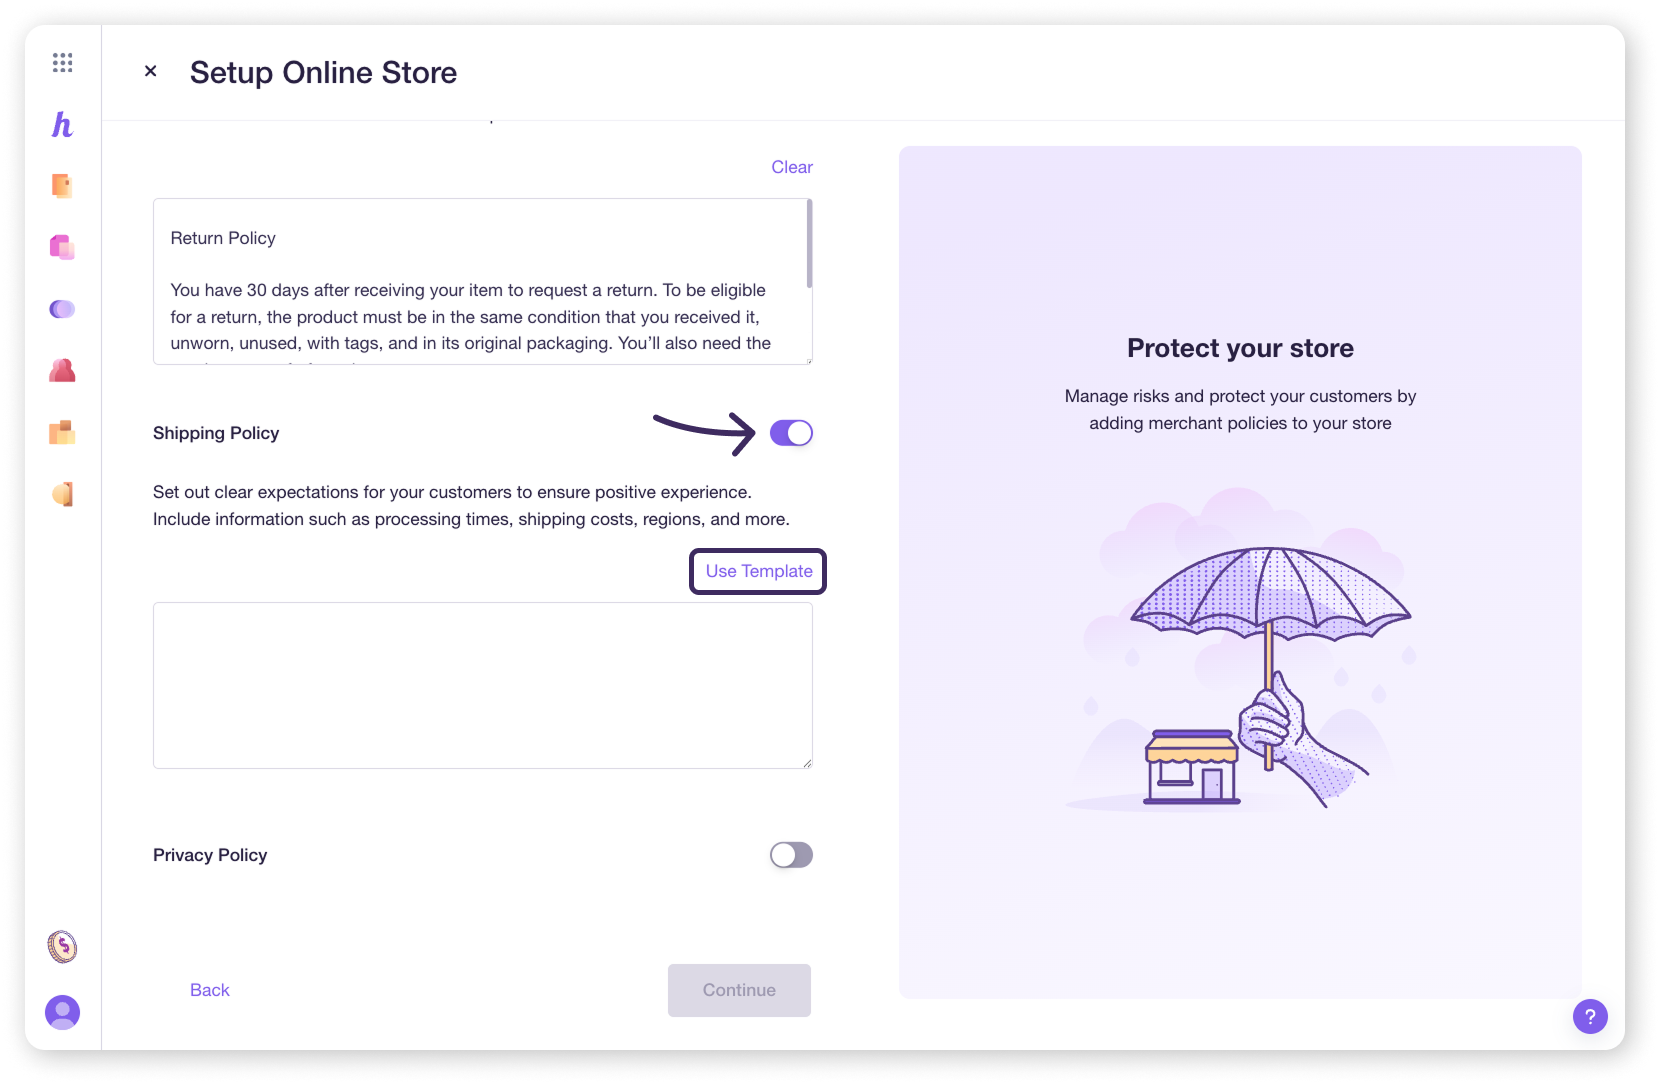
Privacy Policy
A Privacy Policy is not required by Helcim to activate your checkout, however it is important to have one since you are using your customer's information for billing and shipping. Click on the toggle to expand a fillable box.
Helcim does not offer a template for privacy policies because they are an agreement between you and your customers, and will vary depending on how you use your customer's data.

| While creating a Privacy Policy might seem daunting, it’s a key part of building trust and complying with regulations. Here are some resources online that can help you draft one suitable for your business. |
Step 3: Configure your checkout details
Now, let's decide how your customers will receive their orders. At this time, you can choose to offer either Shipping or Pick-up for your fulfillment method.
| Note: shipping is offered as the default fulfillment method. You can choose to turn it off by toggling Offer Shipping Service. |
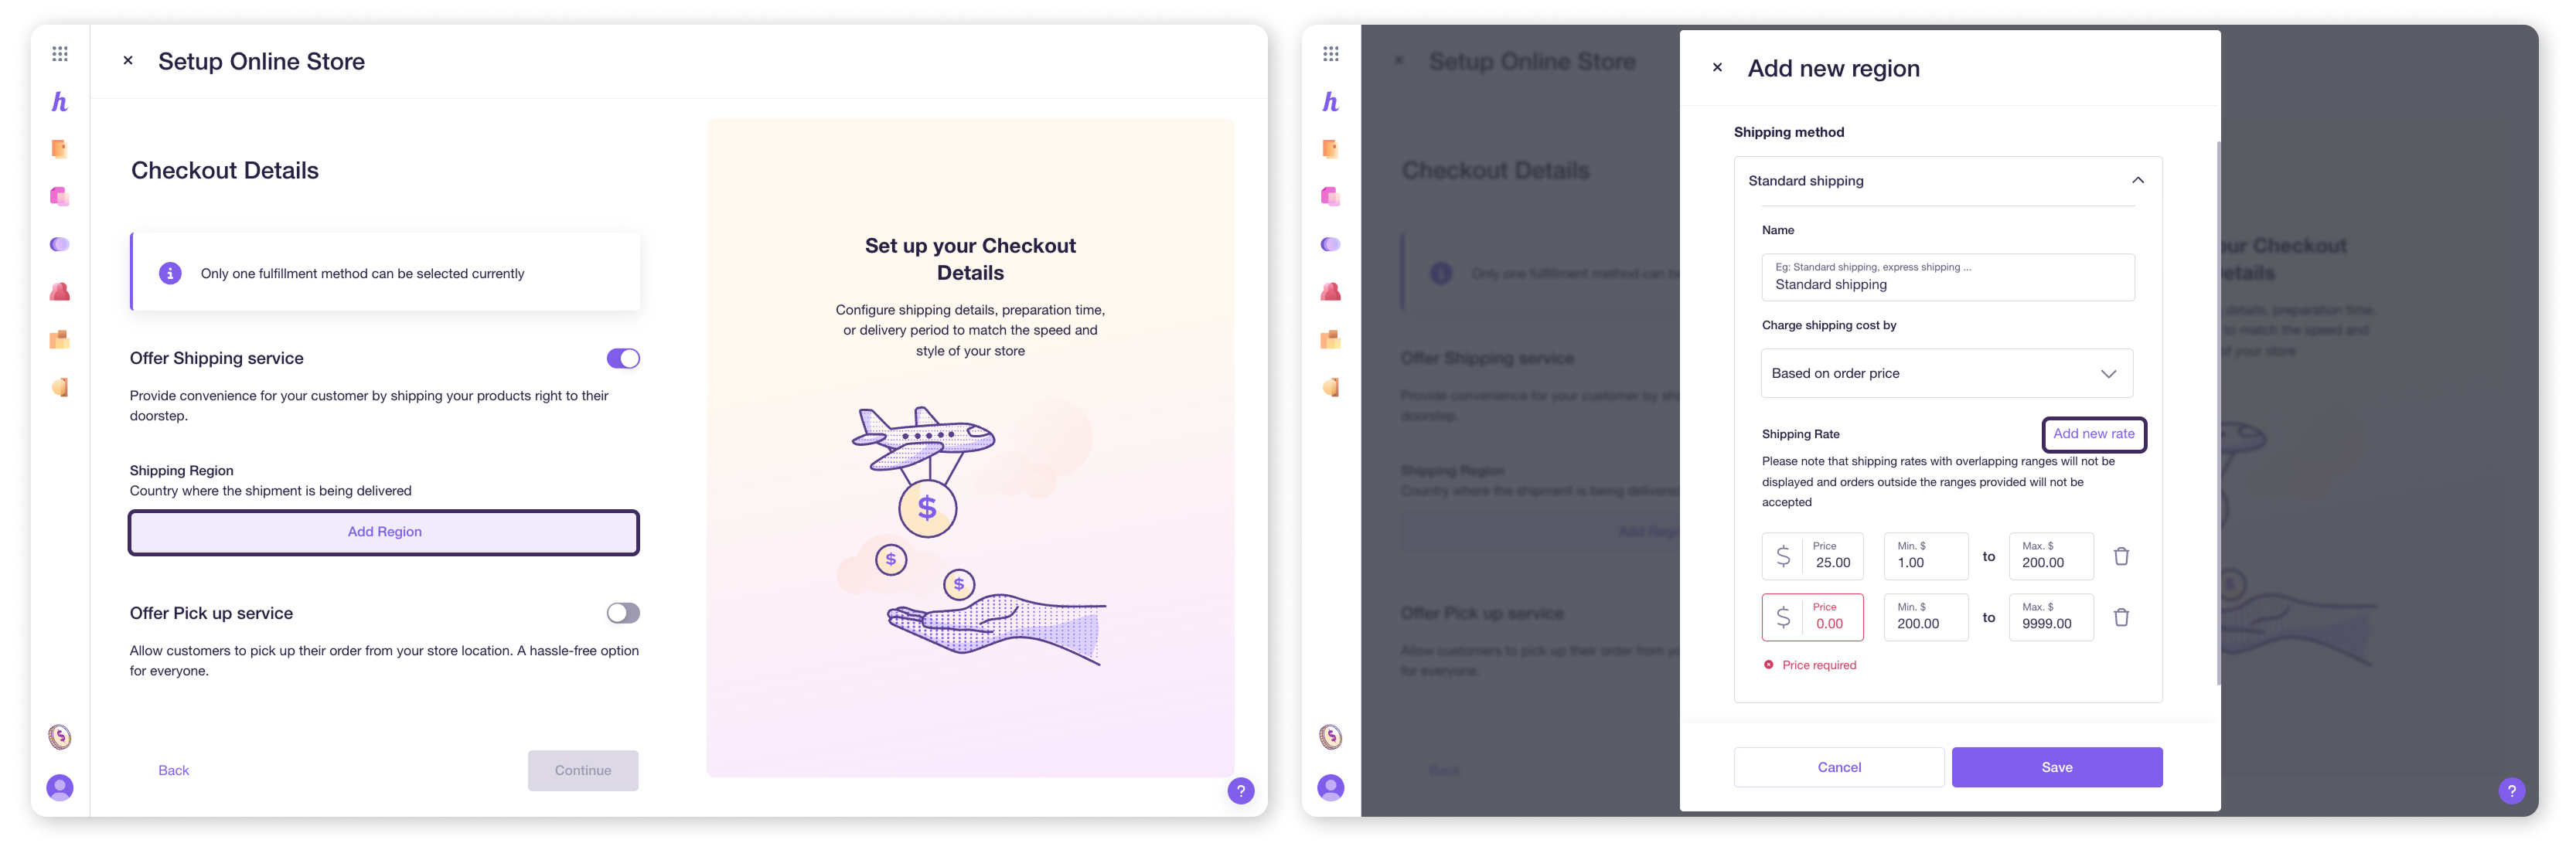
If you choose to offer shipping
To create a new shipping option
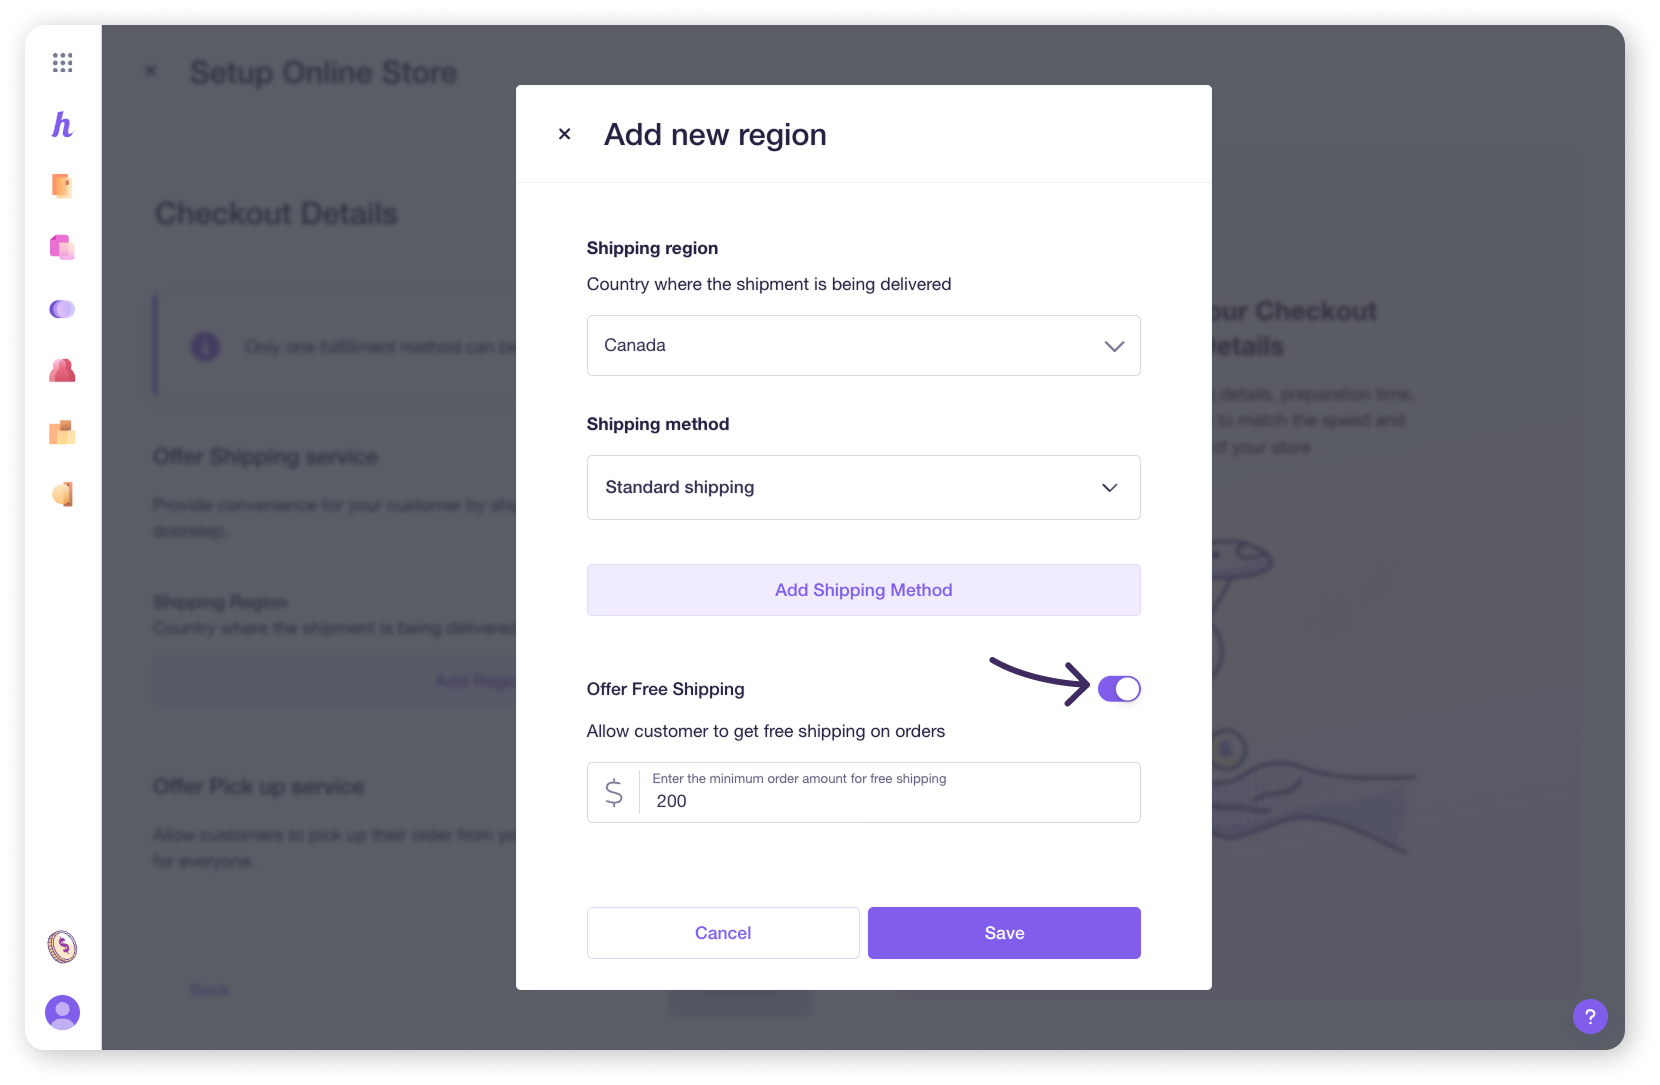
Click on Add Region. Your Shipping region will be pre-selected as the country you are located in. You can click on the drop-down to change this.
Then, click Add Shipping Method.
Enter the name of your shipping method (e.g., Regular, Express).
Choose between Charge by Weight or Charge by Order Price, and input the range and rate.
If you’d like to add multiple rate ranges for a shipping method, select Add new rate
If you’d like to add another shipping method, select Add Shipping Method
Hit Save.
You can add multiple regions and shipping methods.
To enable free shipping
You can offer free shipping by toggling Offer Free Shipping on and entering a minimum order amount. To offer free shipping on all orders, set the minimum order amount to $0.00.
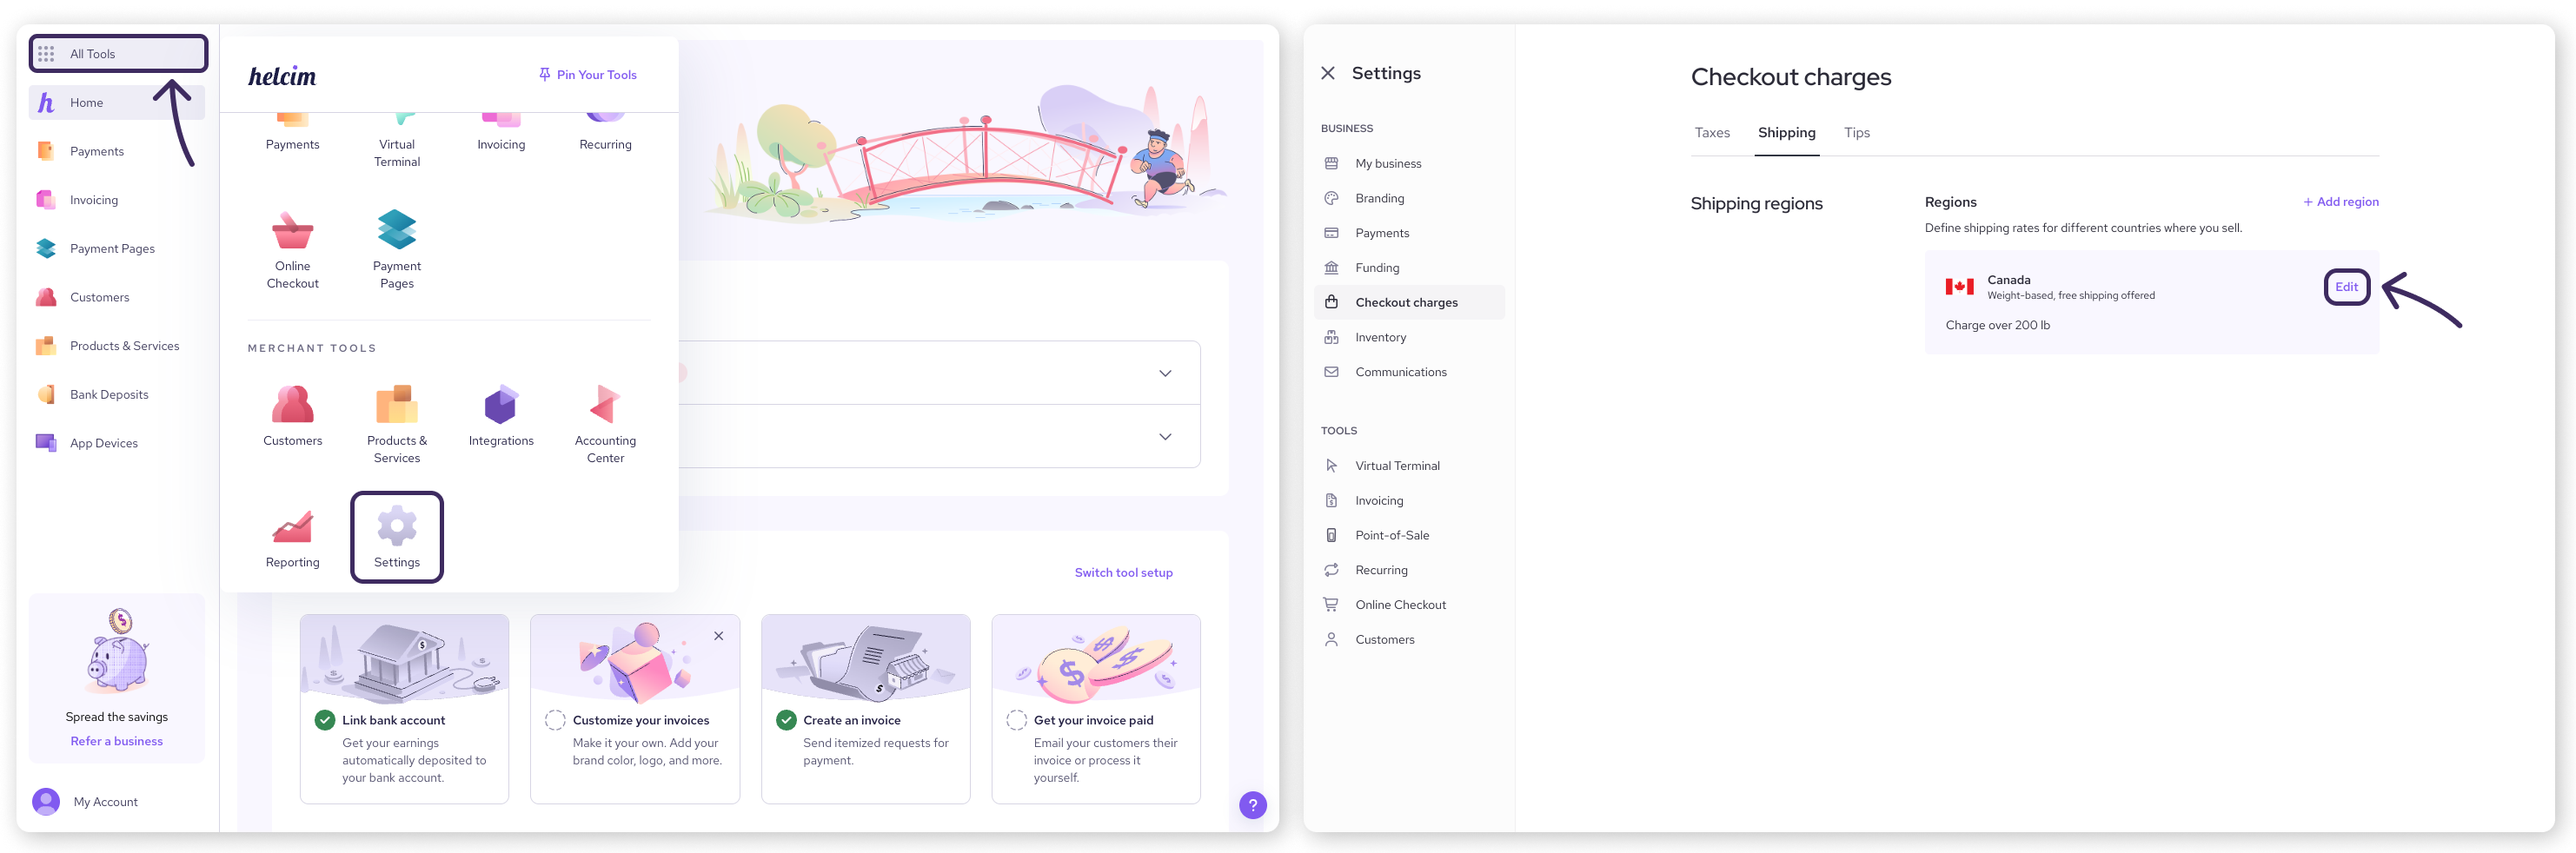
To edit or delete a shipping region
You can make changes through the Checkout charges tab in your Settings page.
Select All Tools and then Settings.
Select Checkout charges from the left-side menu.
Select the Shipping tab from the top.
Select Edit for the region you would like to change.
Click Save once your changes have been made.
If you choose to offer pick-up
Toggle Offer Pick up service on. Please note that doing this will automatically turn off shipping.
Preparation Time
Set your store’s preparation time (how long it takes you to prepare an order).
Time Interval
Select your preferred time interval between each order pick-up (e.g. 30 minutes).
Order Limit
You can set an Order Limit for the number of orders in a given time interval. Leaving this value at 0 will allow for an unlimited number.
Allow Pre-Order
Enable this to allow customers to place orders in advance and specify the number of days.
Enable Tip
This feature can be toggled on to let your store accept tips at checkout. Tip options can be based on a percentage or dollar value, and you can set recommended and default amounts.
| To learn more about tip settings, visit Enable tipping in the Helcim POS. |
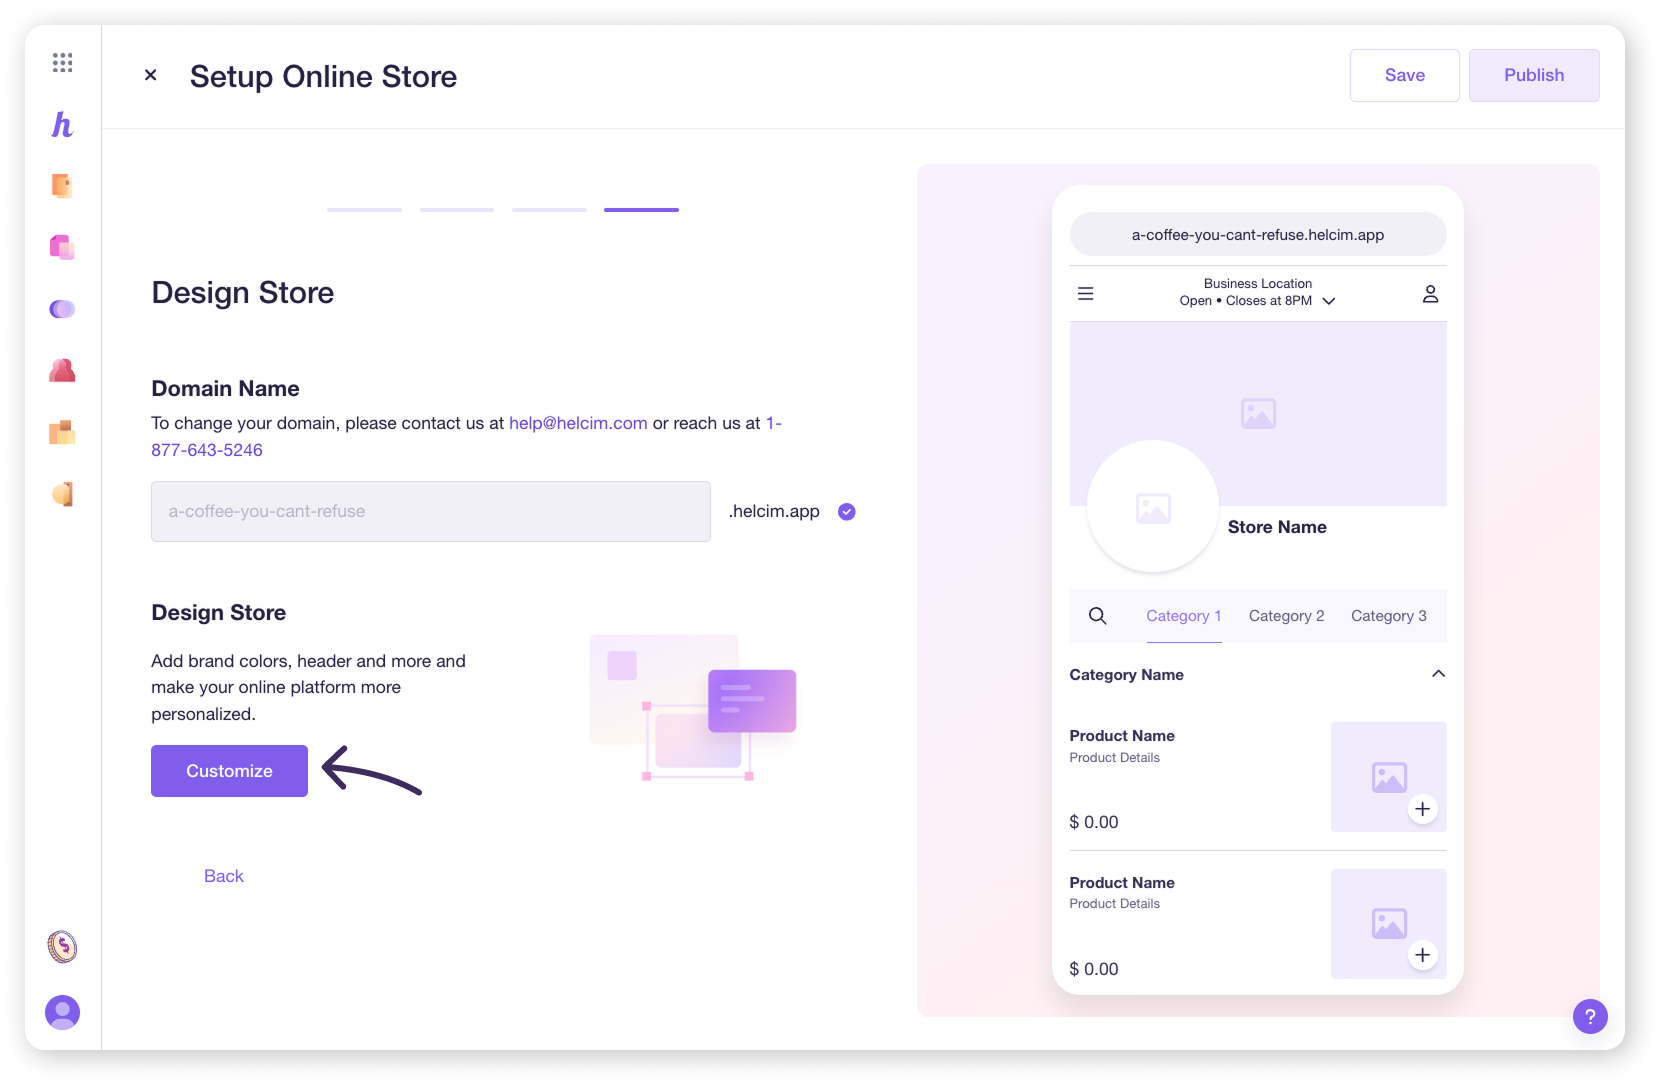
Step 4: A quick look at store design
This step in the wizard allows you to change the look and feel of your store. Select Customize to enter the Online Store Designer.
| We cover this in much more detail in this article, but this is where you can customize things like your brand color, logo, and the layout of your products. |
Step 5: Saving your store
If you’re ready to publish your store now, select Publish in the top right corner.
Otherwise, select Save to save your progress and return to the Online Checkout dashboard. From here, you’ll have the following options.
Add Products: Open the Products tool, where you can add or edit existing products. Products that are set as available for Online Checkout will automatically appear in your online store!
Publish Store: Make your store live so you and your customers can view it.
Next steps
Great job setting up the core of your online store!
Now you're ready to make it look just right: Customize your online store.
And after that, you'll want to: Add products and publish your online store.
FAQs
What if I need to change my business address later?
You can easily update your business location and contact information in the Business Details section of your Online Checkout settings even after the initial setup.
Do I have to use the policy templates for Returns and Shipping?
While the Return Policy is required to activate your Online Checkout, you don't have to use our templates. They're there to help, but you can write your own or modify ours extensively.
Can I offer both shipping and pick-up at the same time?
Currently, you can choose to offer either shipping OR pick-up as your fulfillment option through the Online Checkout settings, but not both simultaneously. Toggling one on will turn the other off.
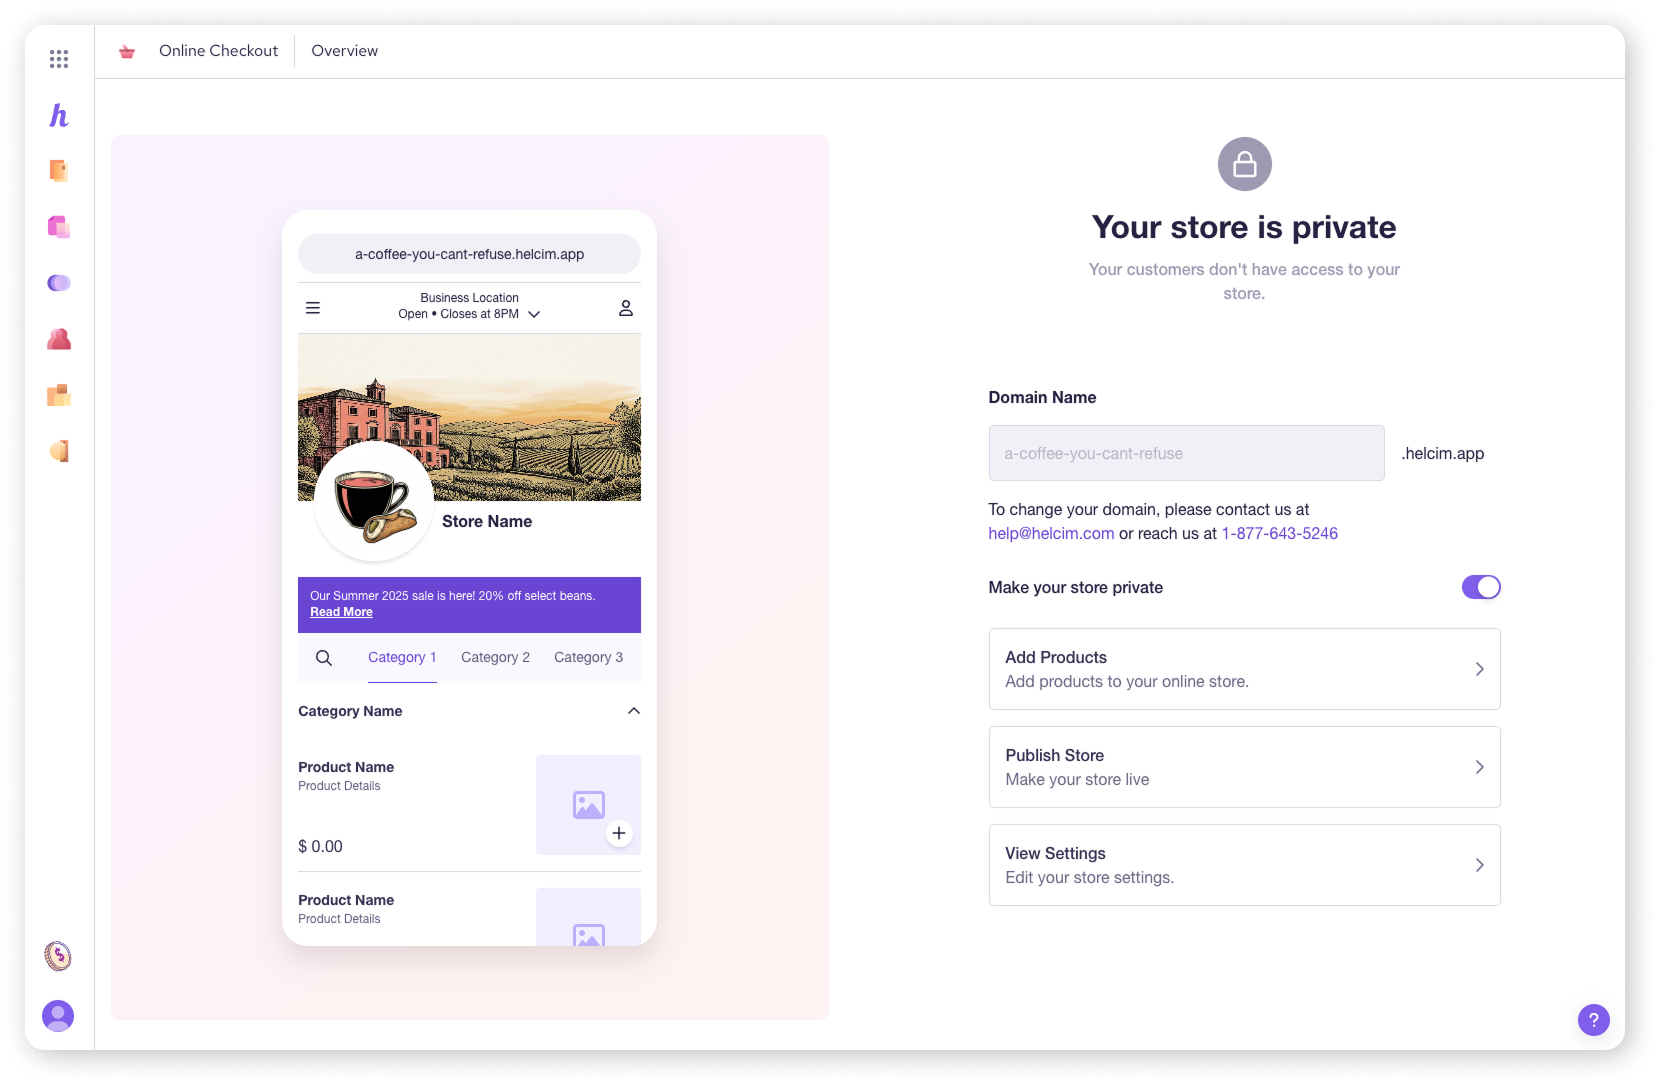
Where do I find my Online Checkout settings after this initial setup wizard?
After the initial setup, you can access and modify all these settings by going to Online Checkout from All Tools, and then clicking on View Settings.
I need a privacy policy but don't know where to start. Can you help?
Absolutely. Creating a privacy policy is important, but it can feel like a big task. While we strongly recommend consulting with a legal professional to create a policy that's perfect for your business and location, here is a general sample you can use as a starting point to understand the type of information typically included.
Sample Privacy Policy
This privacy policy is to inform you on how the information collected on this website is used. Be sure to read this privacy policy before using our website or submitting any personal information and be aware that by using our website, you are accepting the practices described in this policy. We reserve the right to make changes to this website's policy at any time without prior notice. Be also aware that privacy practices set forth in this here are for this website only and do not apply for any other linking websites.
Collection of Information: We collect personally identifiable information such as names, postal codes, addresses, emails, and so on, that are voluntarily submitted by our visitors like you. The information you provide and that is collected is used to fulfill you specific request.
Cookie/Tracking Technology: This website may use cookies and other tracking technologies depending on the features offered. These technologies are useful for gathering information such as browser type and operating system and tracking the number of visitors to our website, in our efforts to better understand how visitors use our website. Cookies are also used to customize the website experience for each visitor. Aggregate cookie and tracking information may be shared with third parties.
Distribution of Information: In the event of fraud prevention or investigation, we may be asked to share collected information with governmental agencies or other companies assisting us. We may do so when: permitted or required by law; or, trying to protect against or prevent actual or potential fraud or unauthorized transactions; or, investigating fraud which has already taken place. The information is never provided to these companies for marketing purposes.
Commitment to Data Security: Your personally identifiable information is kept secure and encrypted during the type of transmission. Only authorized employees, agents and contractors have access to this information.
Please contact us if you have any questions or concerns about our website's privacy.
| Disclaimer: This is a sample template and is not a substitute for legal advice. We recommend you consult with a legal professional to ensure your policy meets the specific needs and legal requirements of your business. |