If you have team members who will be using your Helcim account to process payments, it's important not to share your account password with them. Instead, add them as an employee to your Helcim account.
This article will guide you through adding employees and assigning them roles, so everyone on your team can start using Helcim.
In this article
Adding a new employee
Adding your employees to your Helcim account allows them to access the system, process transactions, and perform any other actions related to their role.
| With Helcim, it doesn’t cost you anything to add additional users to your account as employees. |
Here's how to do it:
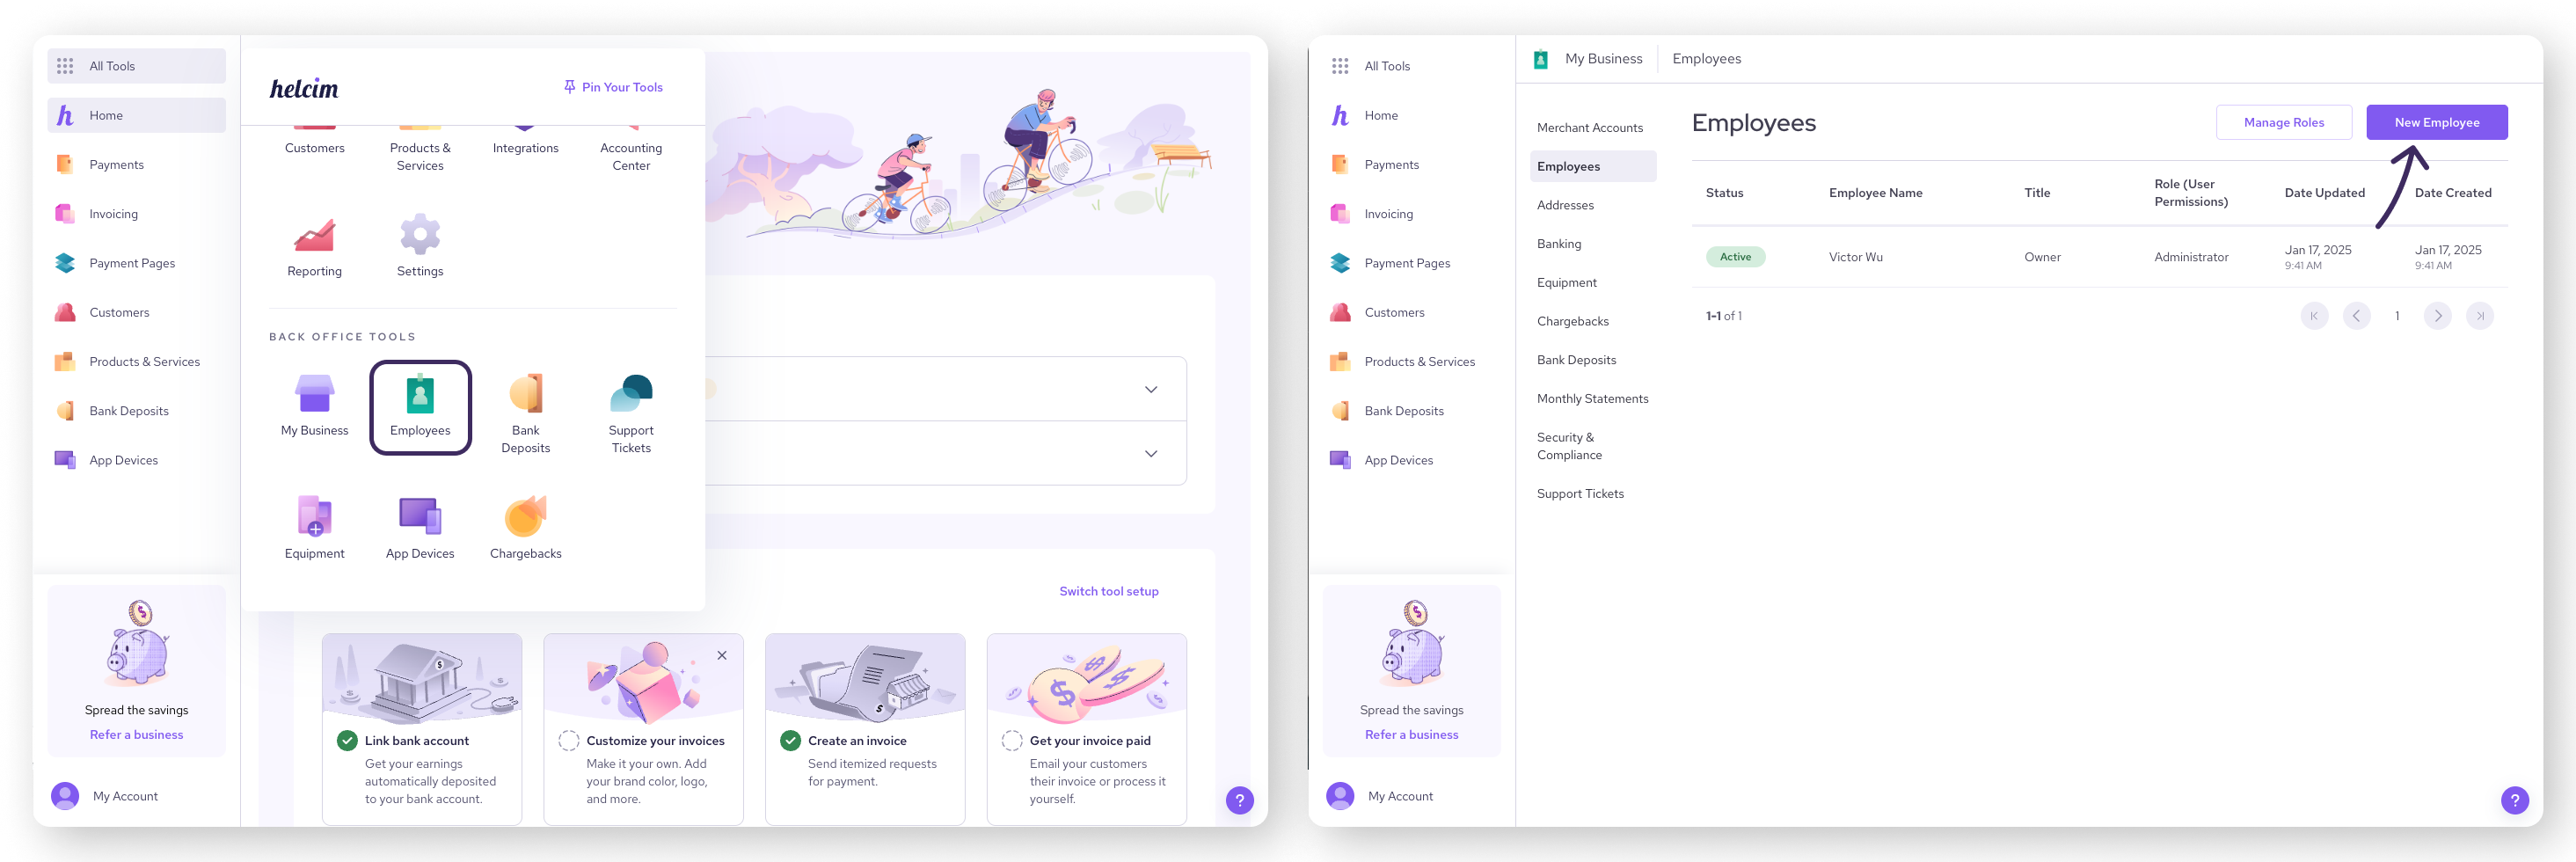
Go to All Tools > Employees.
Click on the New Employee button in the top right-hand corner.
Enter the employee's information:
Employee’s full name
Job title
Role: click on the dropdown and choose from a list of roles
You can choose from the system default roles or a custom role that you have created.
Email address
Cellphone number
Click on Save to create a new employee profile.
Setting up employee logins
Once you've added an employee, they'll receive two emails.
A notification that your business has added them as an employee.
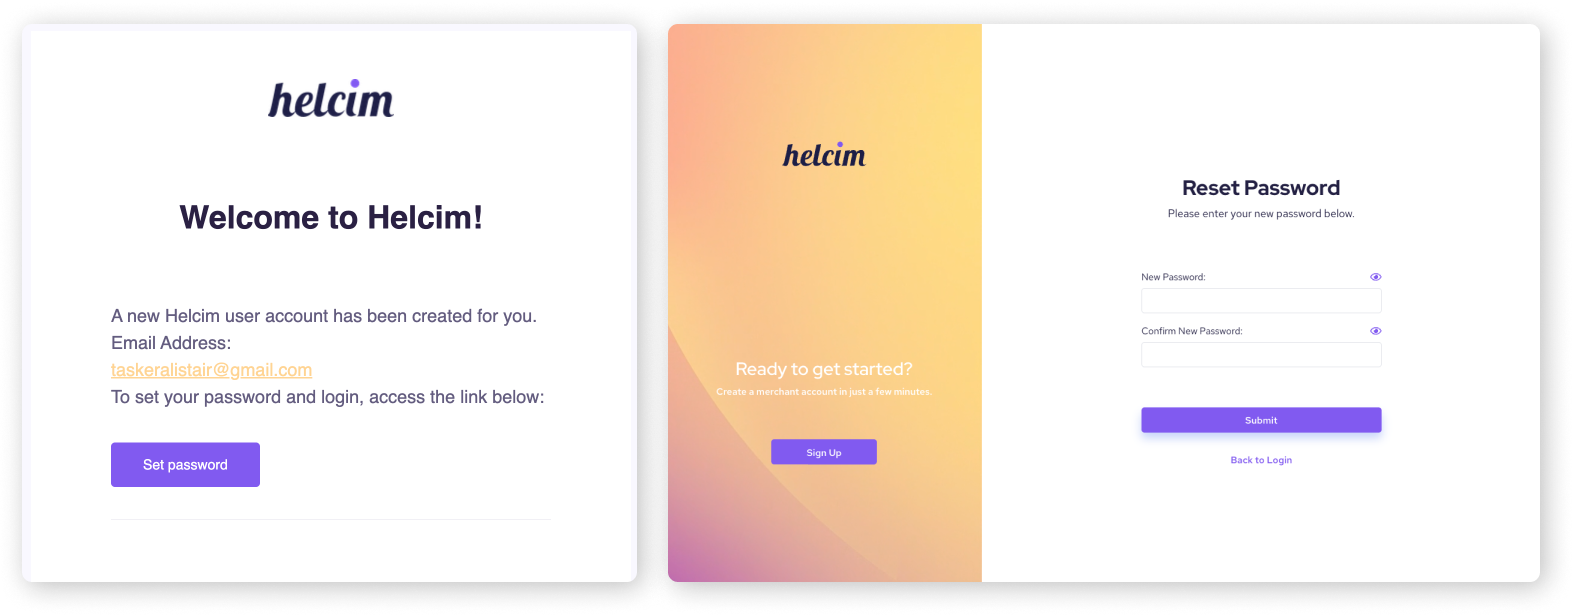
A welcome email indicating a user account has been created for them, with a link to set up a password.
Your employee can select Set password in the second email to open a secure page to set their password.
| Going forward, your employee will use this password and their email to securely log in to your Helcim account. |
Understanding system default roles
Helcim includes pre-set roles with specific permissions. It’s a good idea to understand these roles before assigning them to your employees.
To review the permissions associated with these roles:
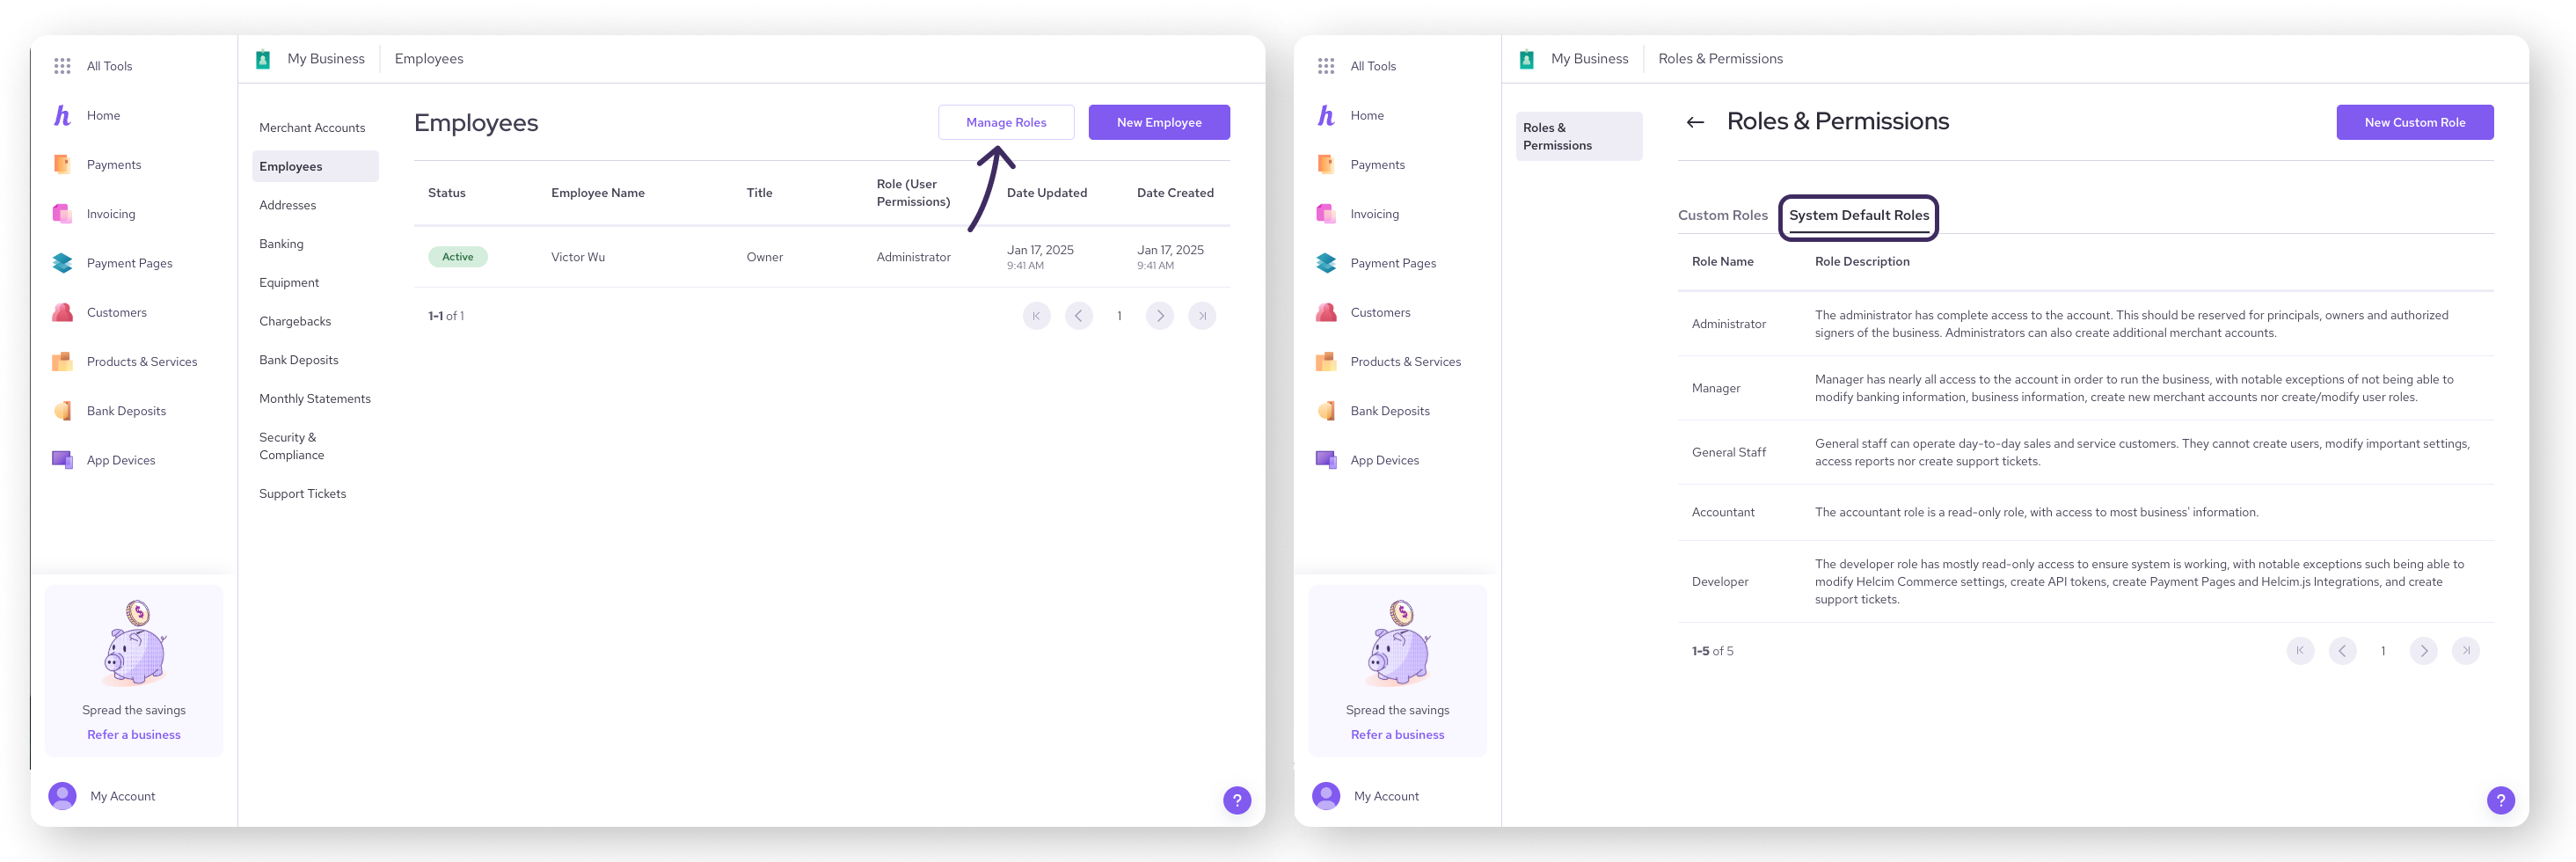
Go to All Tools > Employees.
Click on Manage Roles in the top right-hand corner of the screen.
Click on the System Default Roles option.
Clicking on the roles will let you view the associated permissions. You can also learn more about choosing roles in this article: Choosing employee roles.
| These default roles are not customizable, but are a good starting point for most businesses. To create custom roles, keep reading to the section below. |
Creating custom roles
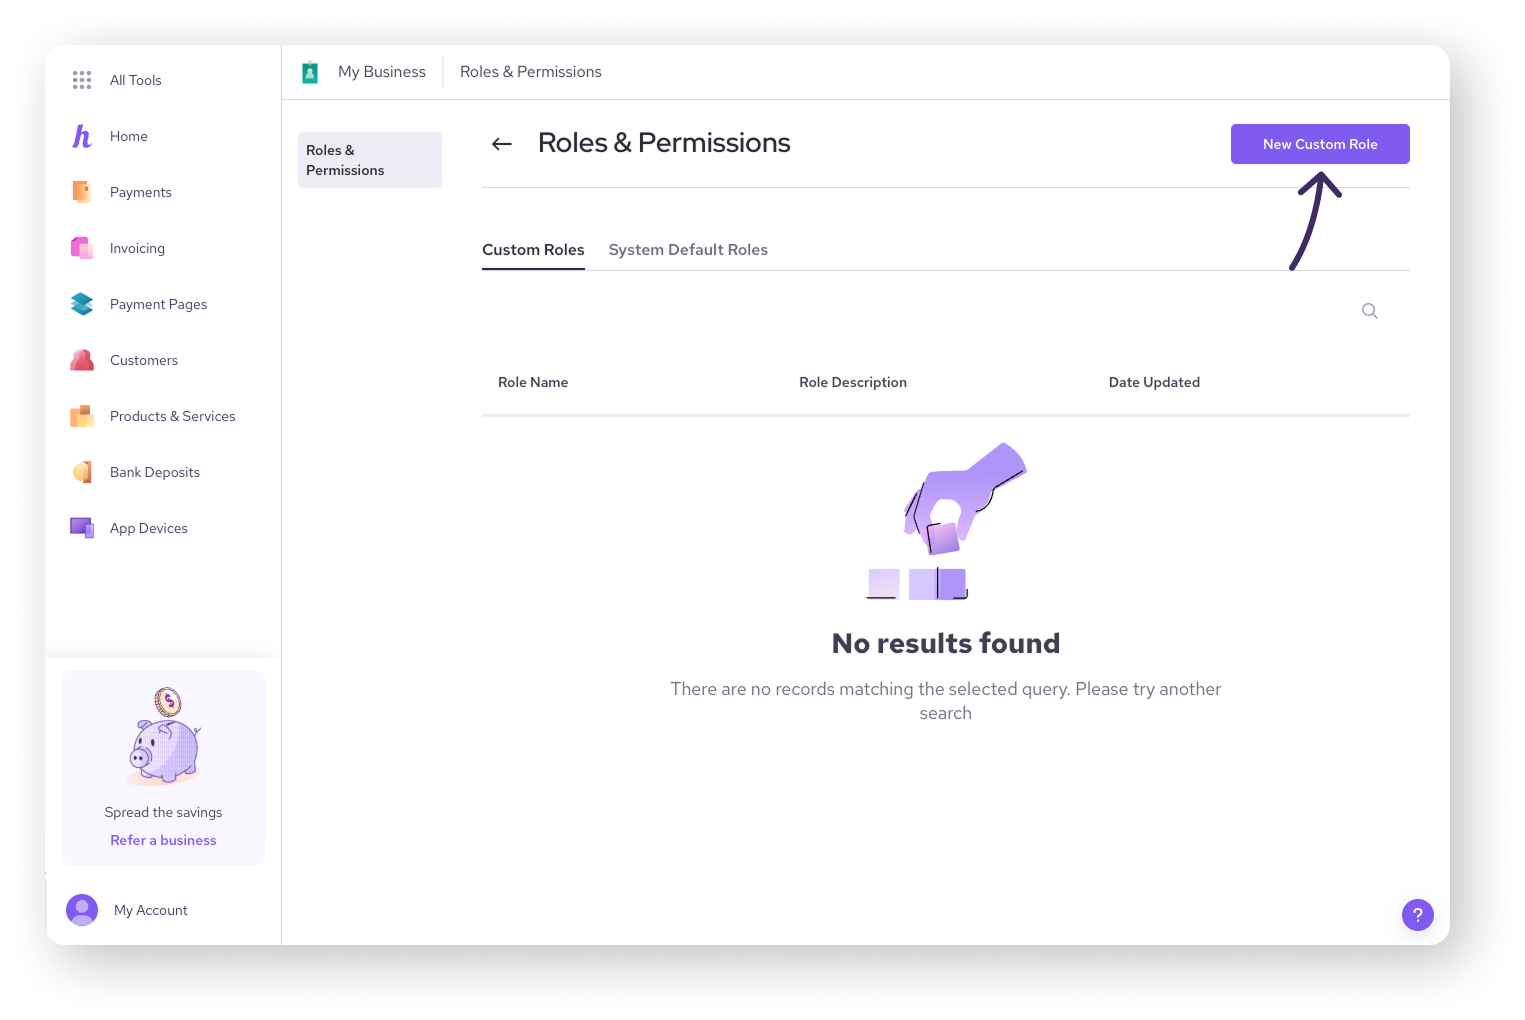
If you have specific needs for employee access, you can create custom roles with tailored permissions.
| Creating a custom role requires some knowledge of what each permission does. To learn more, visit this article: Create custom employee roles. |
Setting up employee PINs
For added security and faster access to the Helcim POS app or Smart Terminal, each employee can log into their own user profile and set up a personal PIN.
| To learn how to create these PINs, check out our article on Creating and Changing a PIN. |
Next steps
Now that you've added your employees, you're ready to start taking payments!
| The next step is to learn how to process a transaction. Check out our article on taking your first payment to get started. |
To learn more about managing employees in your Helcim account, you can also check out these articles:
Choose the right default role for an employee
Create a role with custom permissions
Remove an employee from your account
FAQs
Why shouldn't I just share my login with my employees?
Sharing your main login means employees get full access to all your business information, account settings, reports, and other sensitive data. For better security and control—and to meet PCI (Payment Card Industry) security requirements—it's essential that each employee has their own unique login.
This way, you can use roles to give team members only the permissions they need for their specific tasks, rather than handing over the keys to your entire account!
How do I remove an employee's access to our Helcim account?
If you are an administrator to your account, you can remove an employee's access by either deactivating or deleting their account. Here's how:
Go to All Tools, and then Employees.
Select the employee you want to remove.
Click on Actions.
Choose either Deactivate Employee (temporary) or Delete Employee (permanent).
Important Notes:
An administrator cannot delete another administrator.
For assistance with deleting another administrator, contact Helcim support.