The Helcim Smart Terminal works great as a handheld device, but you can also pair it with your computer for a complete front-desk setup. By connecting the terminal to the Helcim Workstation App, you combine the power of managing orders on a desktop with the convenience of a dedicated card reader.
In this article, you’ll learn how to connect your devices to streamline your checkout process.
In this article
How the connection works
In this setup, your computer runs the show. You use the large screen to build the cart, check inventory, and manage customer details.
When you click Charge on your computer, the payment amount instantly pops up on the Smart Terminal screen via the cloud.
Your customer pays on the terminal (using Tap, Chip, or PIN), and your computer screen automatically updates to show the payment went through.
Prerequisites
Before you begin, please ensure you have the following ready:
Workstation: A desktop or laptop computer with the latest version of the Helcim POS App installed (available for desktop on Windows and macOS).
Hardware: A Helcim Smart Terminal (Gen 1 or Gen 2) that is powered on and updated.
Network: Both devices must be connected to the internet.
| Unlike the Helcim Card Reader, which uses Bluetooth, the Smart Terminal pairs over the internet (Cloud pairing). You do not need a physical cable or a Bluetooth connection between the devices, but both must be online. |
Step 1: Prepare your devices
To ensure a smooth connection, make sure both your computer and terminal are ready.
On the Smart Terminal:
Ensure the device is powered on and on the home screen.
Verify the app is up to date by navigating to Settings > Hardware Settings > Device Info.
On your Workstation (Computer):
| Ensure both the Workstation App and the Smart Terminal are logged into the exact same merchant account. If they are on different accounts, they will not be able to find each other. |
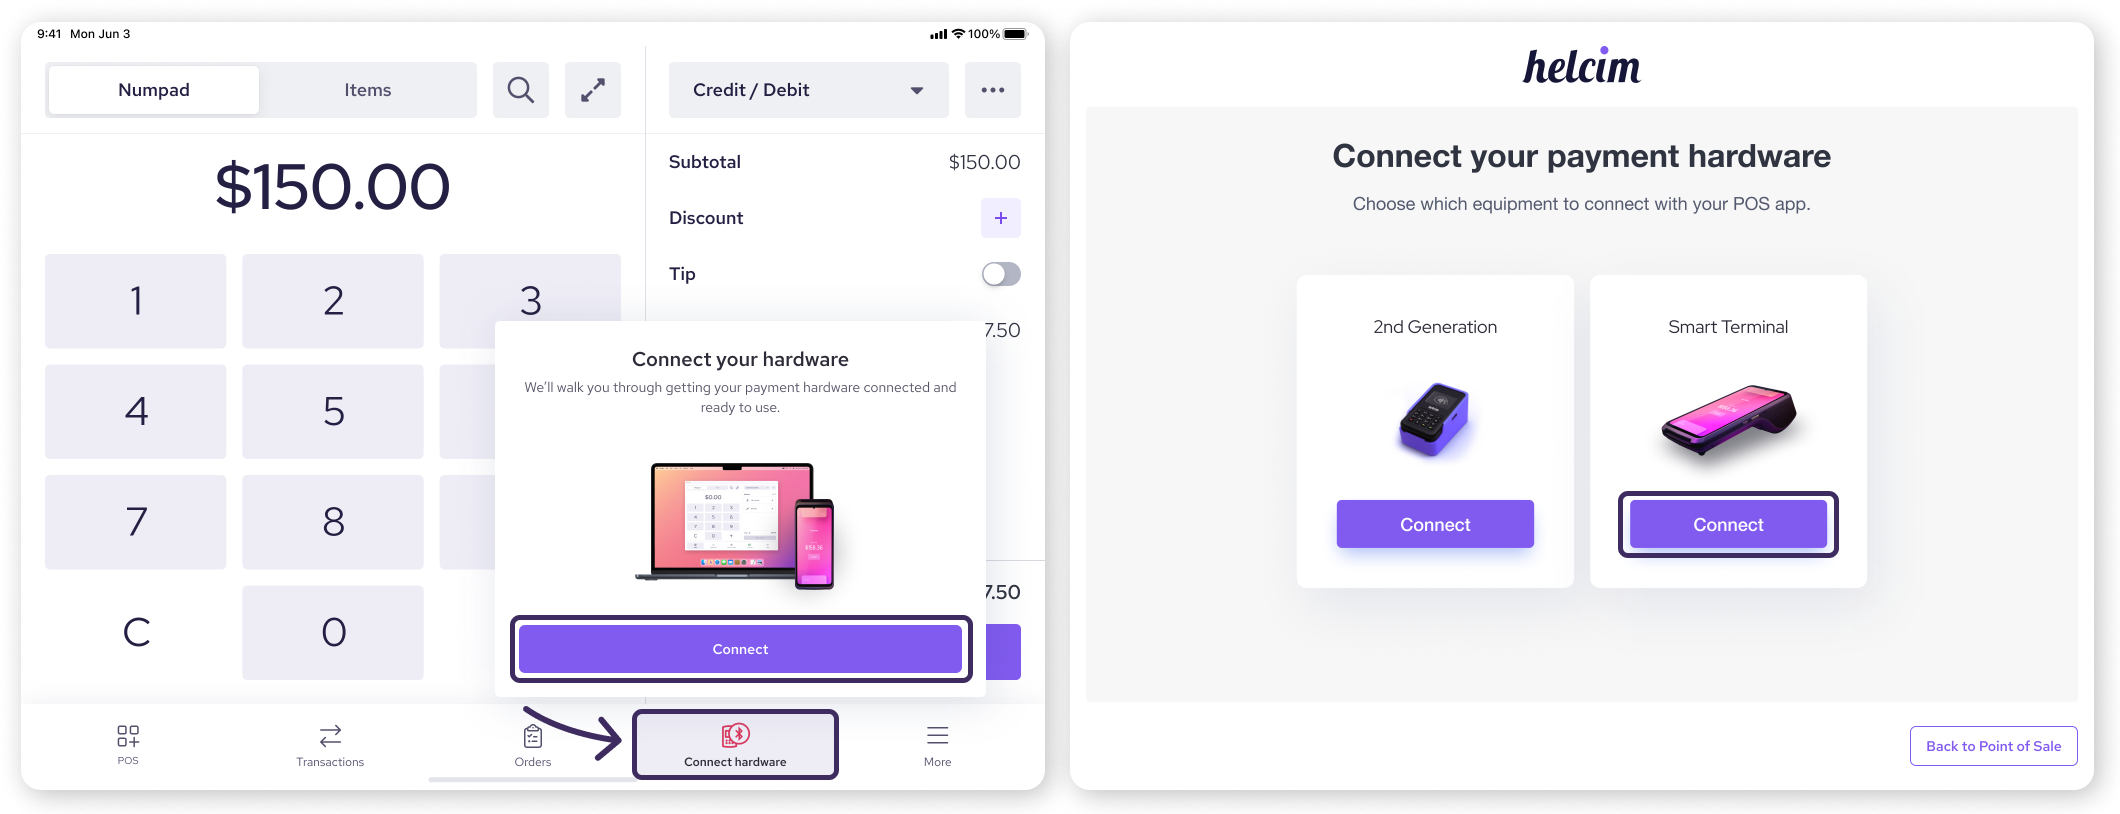
Step 2: Pair the devices
On the Workstation App, you should see a device connection icon in the bottom bar.
This will either say:
Connect hardware: if you’ve never connected a device before.
Connected: if you already have a device connected.
Disconnected: if a previous device has been disconnected.
Select Connect (or Manage hardware, if there’s already a device connected).
Select the option to Connect a Smart Terminal.
Go through the setup flow below.
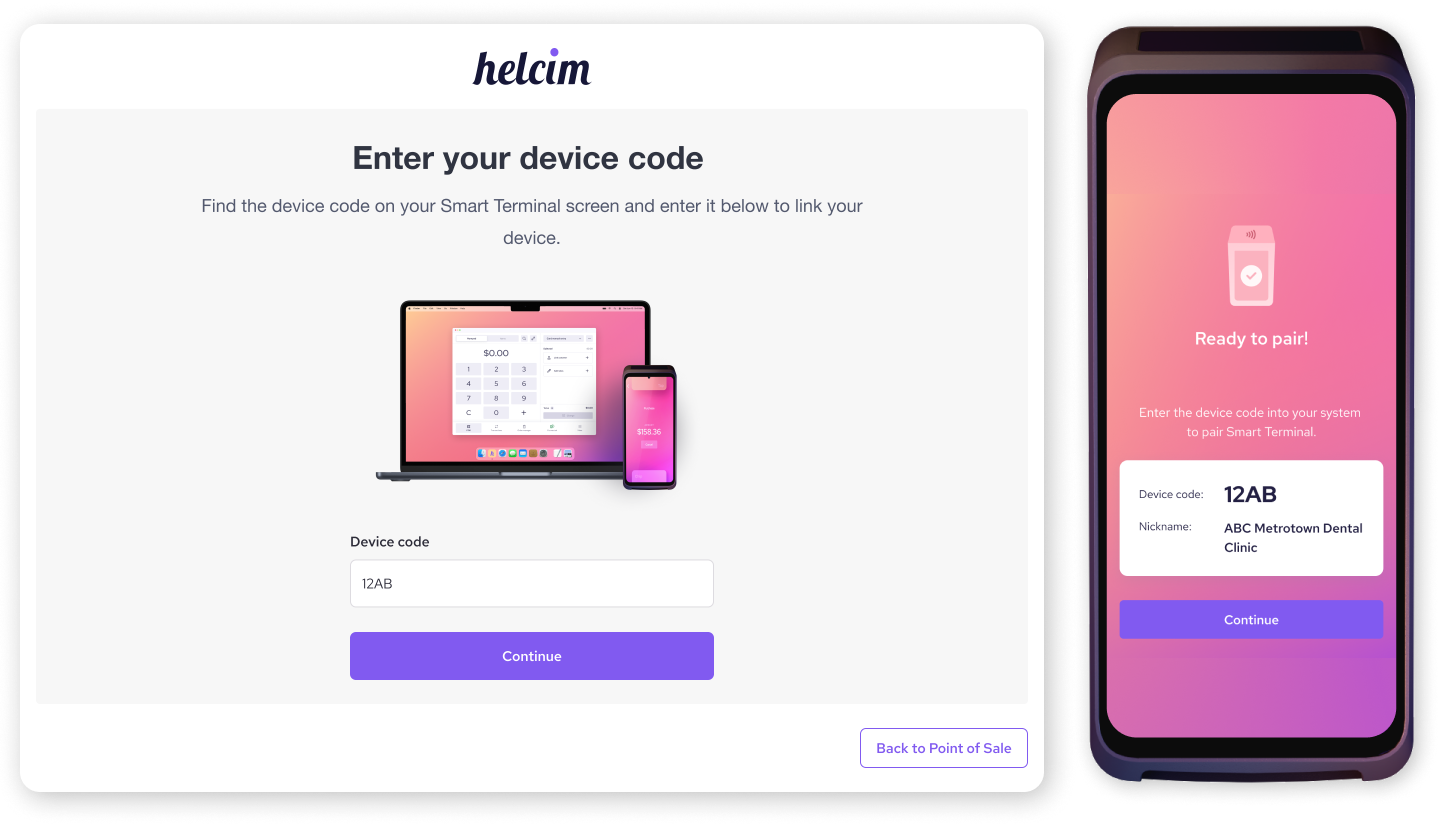
Setup flow
Start by turning on your Smart Terminal.
Then, log out and log back into your Helcim account.
Then, click Continue.
You’ll be asked for a device code. Look at your Smart Terminal screen to find its unique device code.
Enter the device code into the Workstation App.
Once confirmed, the status on your app should change to "Connected."
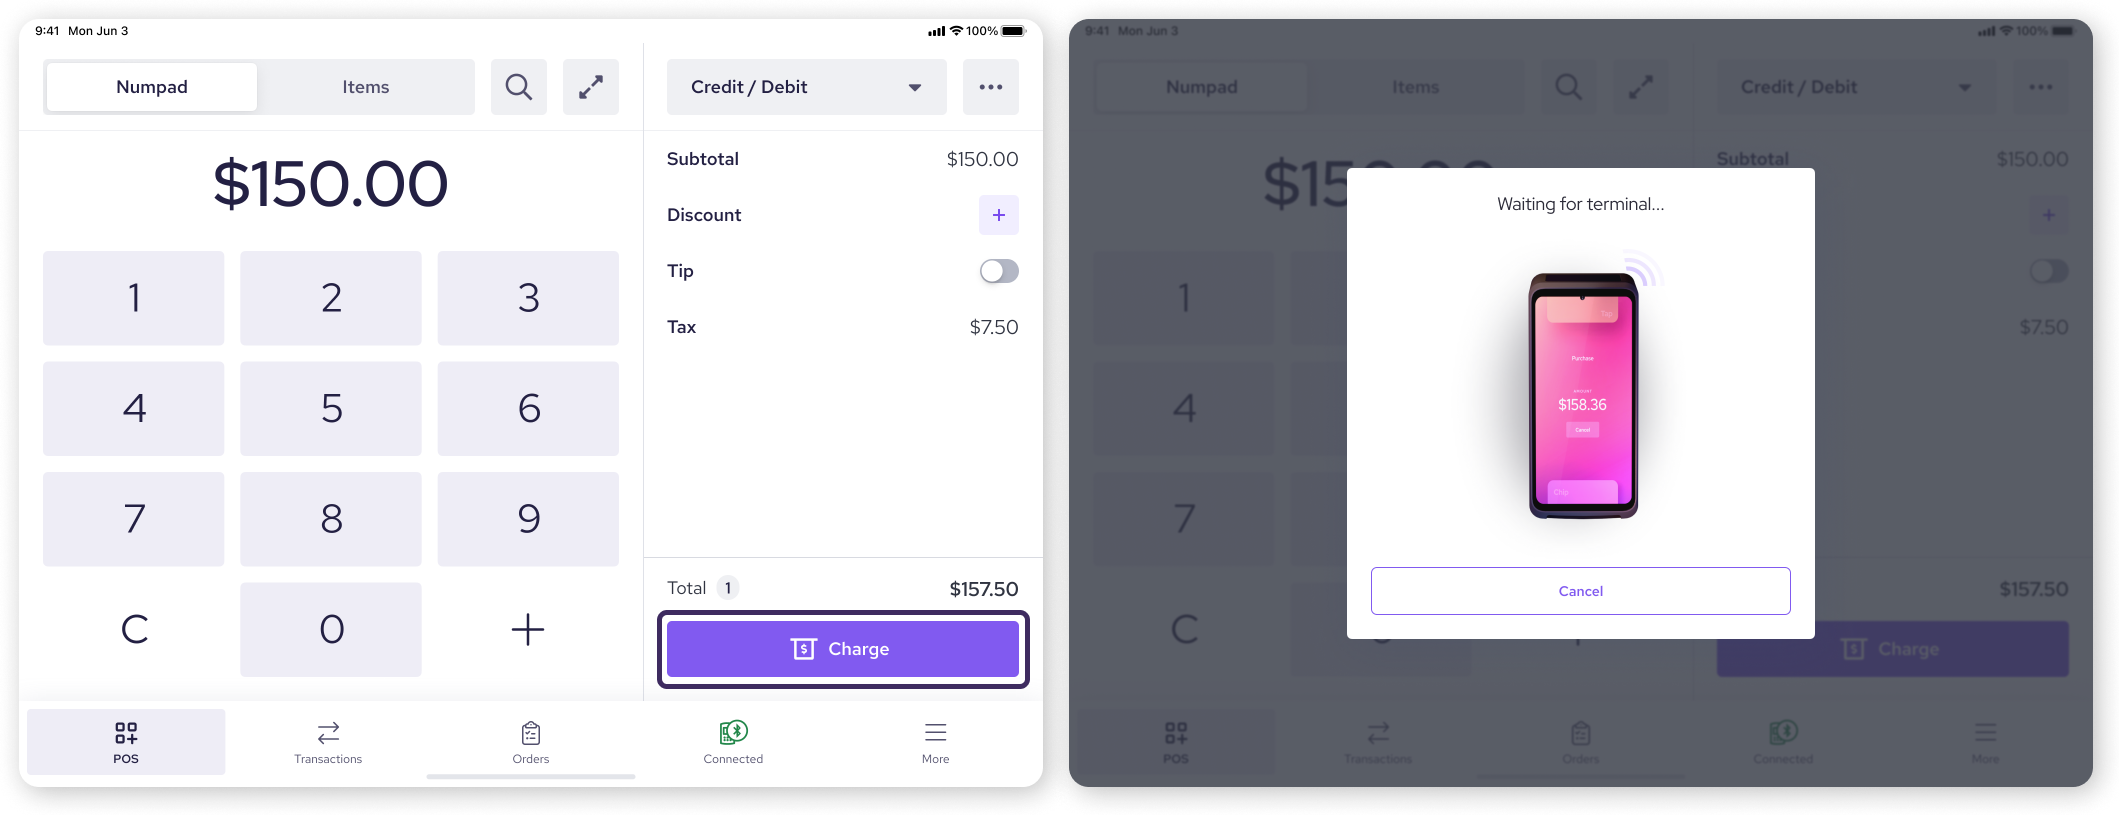
Step 3: Process a test transaction
We recommend running a small test transaction to ensure the two devices are talking to each other correctly.
On your Workstation App, create a cart with a custom item for $1.00.
Click Charge.
Look at your Smart Terminal. The screen should wake up and display the $1.00 payment prompt.
Complete the payment on the Smart Terminal (you can use a card or manual entry for the test).
Once the payment is completed on the terminal, look back at your Workstation. You should see an "Approved" status instantly appear on your computer screen.
Common troubleshooting
If you run into issues during setup, check these common solutions.
Device code not found
Check accounts: Double-check that both the Workstation App and the Smart Terminal are logged into the same Helcim account.
Check internet: Confirm that both your computer and your Smart Terminal have active internet access.
Computer: Open your web browser and try loading a website.
Smart Terminal: Check that the wi-fi or mobile data icons are present at the top of the terminal screen.
Connection timeout
Firewalls: Although cloud pairing is designed to work easily, strict firewalls can sometimes block the connection. Try connecting the Smart Terminal to a mobile hotspot temporarily to rule out local network firewall issues.
Transaction stuck or failed
Sleep mode: If the Smart Terminal is in a deep "Sleep" mode when you push a payment, it might miss the signal.
Tip: Always tap the power button to wake the Smart Terminal screen before clicking Charge on the Workstation App to ensure a reliable connection.
Next steps
Now that your terminal is connected, you are ready to start selling!
| If you need to review how to process specific payment types, check out our guide on taking a payment with the Smart Terminal. |
FAQs
Can I connect via Bluetooth or USB like the Card Reader?
No. The Smart Terminal does not support Bluetooth or USB connectivity for the POS app. It pairs exclusively over the internet (Cloud pairing).
Can I use this feature with an iPad or Android Tablet?
No. Currently, this connectivity feature is designed specifically for the desktop version of the Helcim POS App (Windows/macOS). It is not available for mobile or tablet apps at this time.
Do the devices need to be on the same Wi-Fi network?
Not strictly. While being on the same strong network is recommended for speed and stability, the connection utilizes cloud messaging. As long as both devices have stable internet access, they should pair.
What happens if the Smart Terminal goes to sleep?
If the terminal enters sleep mode, the connection usually remains active. However, for the best performance, we recommend waking the Smart Terminal screen before clicking Charge on the Workstation. You can also adjust your "Auto Sleep" settings on the terminal under Hardware Settings > Display.