The Helcim Point of Sale (POS) app can be used on a variety of devices, from smartphones and tablets to desktop computers and dedicated terminals. This article will guide you through the process of accessing the POS, setting it up for your business, and selecting the view that best suits your needs.
| If you are using a Helcim Smart Terminal, the POS and card reader are already built into the device, and some of these steps may not be required. |
In this article
Access the POS in the Helcim POS app
Helcim’s Point of Sale feature is accessed through the Helcim POS app. Click on each step below to get started.
Step 1: Download and Install
Mobile Devices (Smartphones and Tablets): Download the Helcim app from your device's app store (e.g., Apple App Store or Google Play Store).
Desktop Computers: The Helcim app for desktop is available through your Helcim dashboard.
Log in to your Helcim account and look for the option to download the desktop app.
For more detailed instructions on downloading the Helcim app, please refer to this article: [Link to Helcim app download article]
Step 2: Log into your Helcim account
Open the Helcim app on your device.
Enter your Helcim account credentials (email and password) to log in.
If you've set up a PIN for your account, you can also use that to log in.
Step 3: Navigate to the POS
Once you're logged in, the POS interface is typically the default view. On mobile, it's the first icon on the left at the bottom of your screen.
.png)
Set up your POS environment
After accessing the Helcim app, consider how you want to set up your POS to optimize your workflow.
Choose an option below that suits your needs.
Countertop setup
If you have a physical storefront, position your device (tablet or computer) in a location that's convenient for both you and your customers.
Use a stand or mount to secure the device and improve visibility.
Ensure any peripherals (card reader, barcode scanner, cash drawer) are within easy reach.
Mobile setup
For on-the-go transactions, ensure your smartphone or tablet is fully charged.
Have a secure way to hold or carry your device.
If using a card reader, make sure it's properly connected and easily accessible.
Helcim Smart Terminal setup
If you're using a Helcim Smart Terminal, it's an all-in-one device with the POS and card reader built-in.
Connect the Smart Terminal to a wifi network, or if you have a SIM installed, use mobile data.
Ensure that it is charged and connected to a power source as needed.
Tap to Pay on iPhone setup (US merchants only)
US merchants using Tap to Pay on iPhone can accept contactless payments directly with their iPhone, without needing additional hardware.
Ensure that this feature is enabled in your Helcim account settings.
Select your POS view
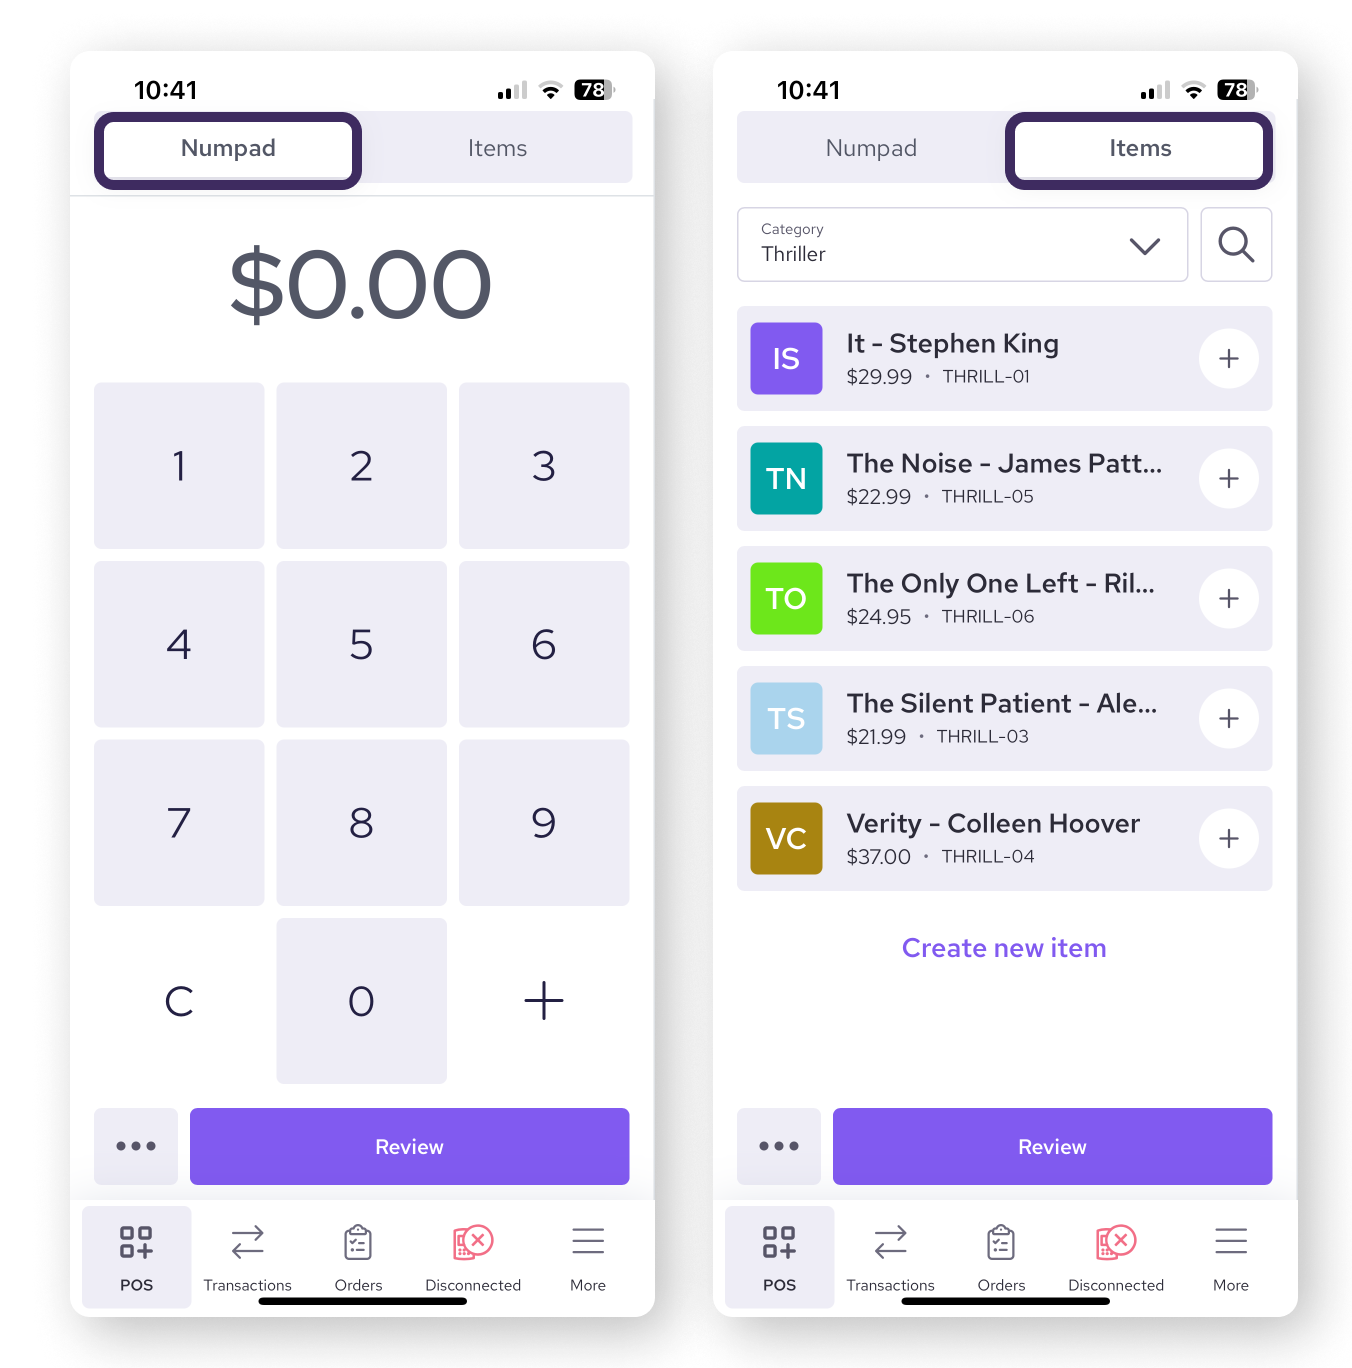
The Helcim POS offers two views to cater to different business needs: Numpad or Items.
You can customize the POS experience for your business needs by selecting either mode.
Switch between the two views by clicking Numpad or Items along the top of the screen.
Numpad view: This view is ideal for quick transactions where you simply need to enter the payment amount.
Items view: If you have a comprehensive product catalog, this view allows you to select items for sale, making it suitable for businesses with a diverse inventory.
Connecting your Helcim Card Reader (if applicable)
If you are using the Helcim Card Reader, follow the instructions provided with your device to connect it to your smartphone, tablet, or computer.
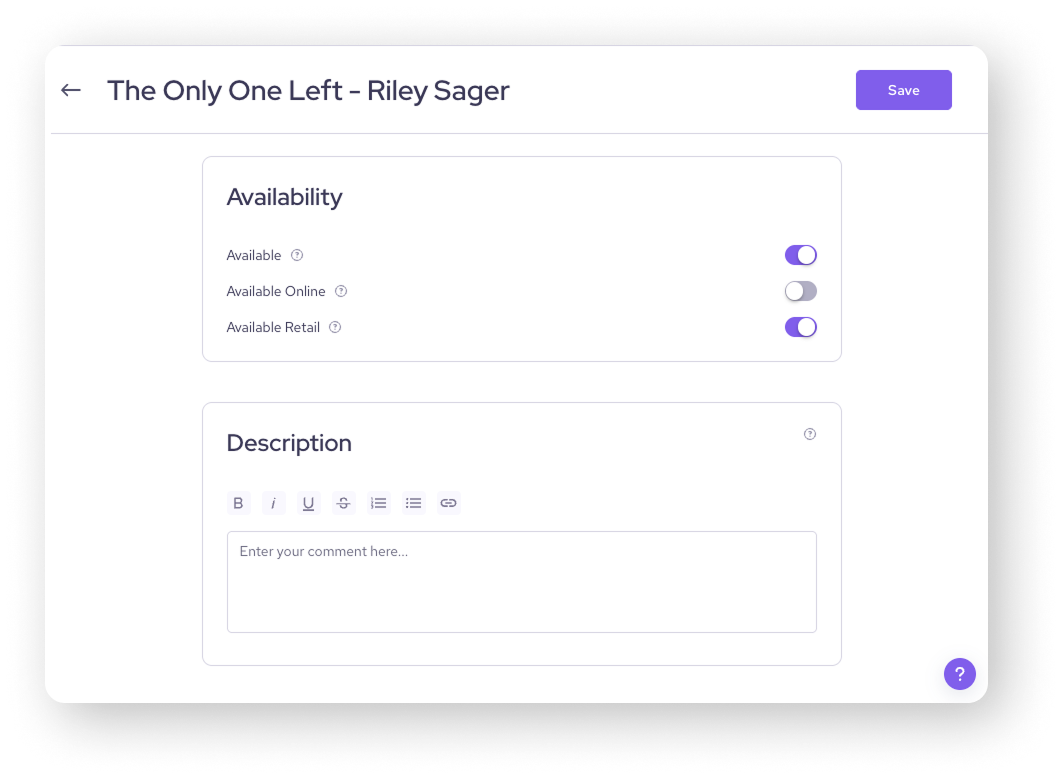
Setting product availability for POS
To use the Items view effectively, ensure your products are set as "Available" and "Available for Retail" in your Helcim account.
Go to All Tools > Products & Services
Select a product or service
Scroll down to Availability
Toggle Available and Available Retail on
Products added to your Helcim account will sync to your POS as long as you have enabled both these options.
Next steps
Now that you have set up your POS, you are ready to take a payment with it.
| Head to our next article on Taking a payment with the Helcim POS. |
FAQ & Troubleshooting
I added products to my Helcim dashboard but they aren’t showing in the Items view of the POS. What do I do?
If products aren’t showing, then you can try the following:
Go to the overview of the product and make sure Available Retail is toggled on for the product
Log out and log back into your Helcim POS app to sync your items
To avoid delays with syncing, you can also add products directly in the Items view of your POS by selecting Create new item.