You might think of a terminal as just a physical card reader, but in the Helcim system, it's a bit more than that. Think of a terminal as a specific channel that your transactions flow through. Every merchant account has at least one, and it’s what connects a payment to a specific currency and bank deposit.
Let's explore what terminals are and why they are such a powerful tool for your business.
What is a terminal used for?
Every transaction you process, whether through our Helcim POS app, Smart Terminal, or Virtual Terminal, must go through a terminal.
| Each of your payment devices is assigned a default terminal. |
This ensures payments are processed in the right currency and batched for settlement to the correct bank account.
Why would I need more than one terminal?
While many businesses only need one terminal, adding more can solve specific organizational challenges. The two most common reasons to have multiple terminals are:
Reconciling to different bank accounts: This is common for businesses like law or accounting firms that need to keep funds separate. For example, you could have one terminal for payments going into a 'Trust Account' and a second terminal for payments going into a 'General Account'.
Processing in multiple currencies: For Canadian businesses that also operate in the US or sell to American customers, having a US dollar (USD) terminal is essential. This allows you to bill your US customers in their native currency, and the funds will be deposited into your linked USD bank account, helping you avoid unnecessary currency conversion fees.
How to view your terminals
There are two main places in your dashboard to view your terminals, each serving a different purpose.
Method #1: In the Payments tool (for managing settings)
This is the main area for managing your terminal settings.
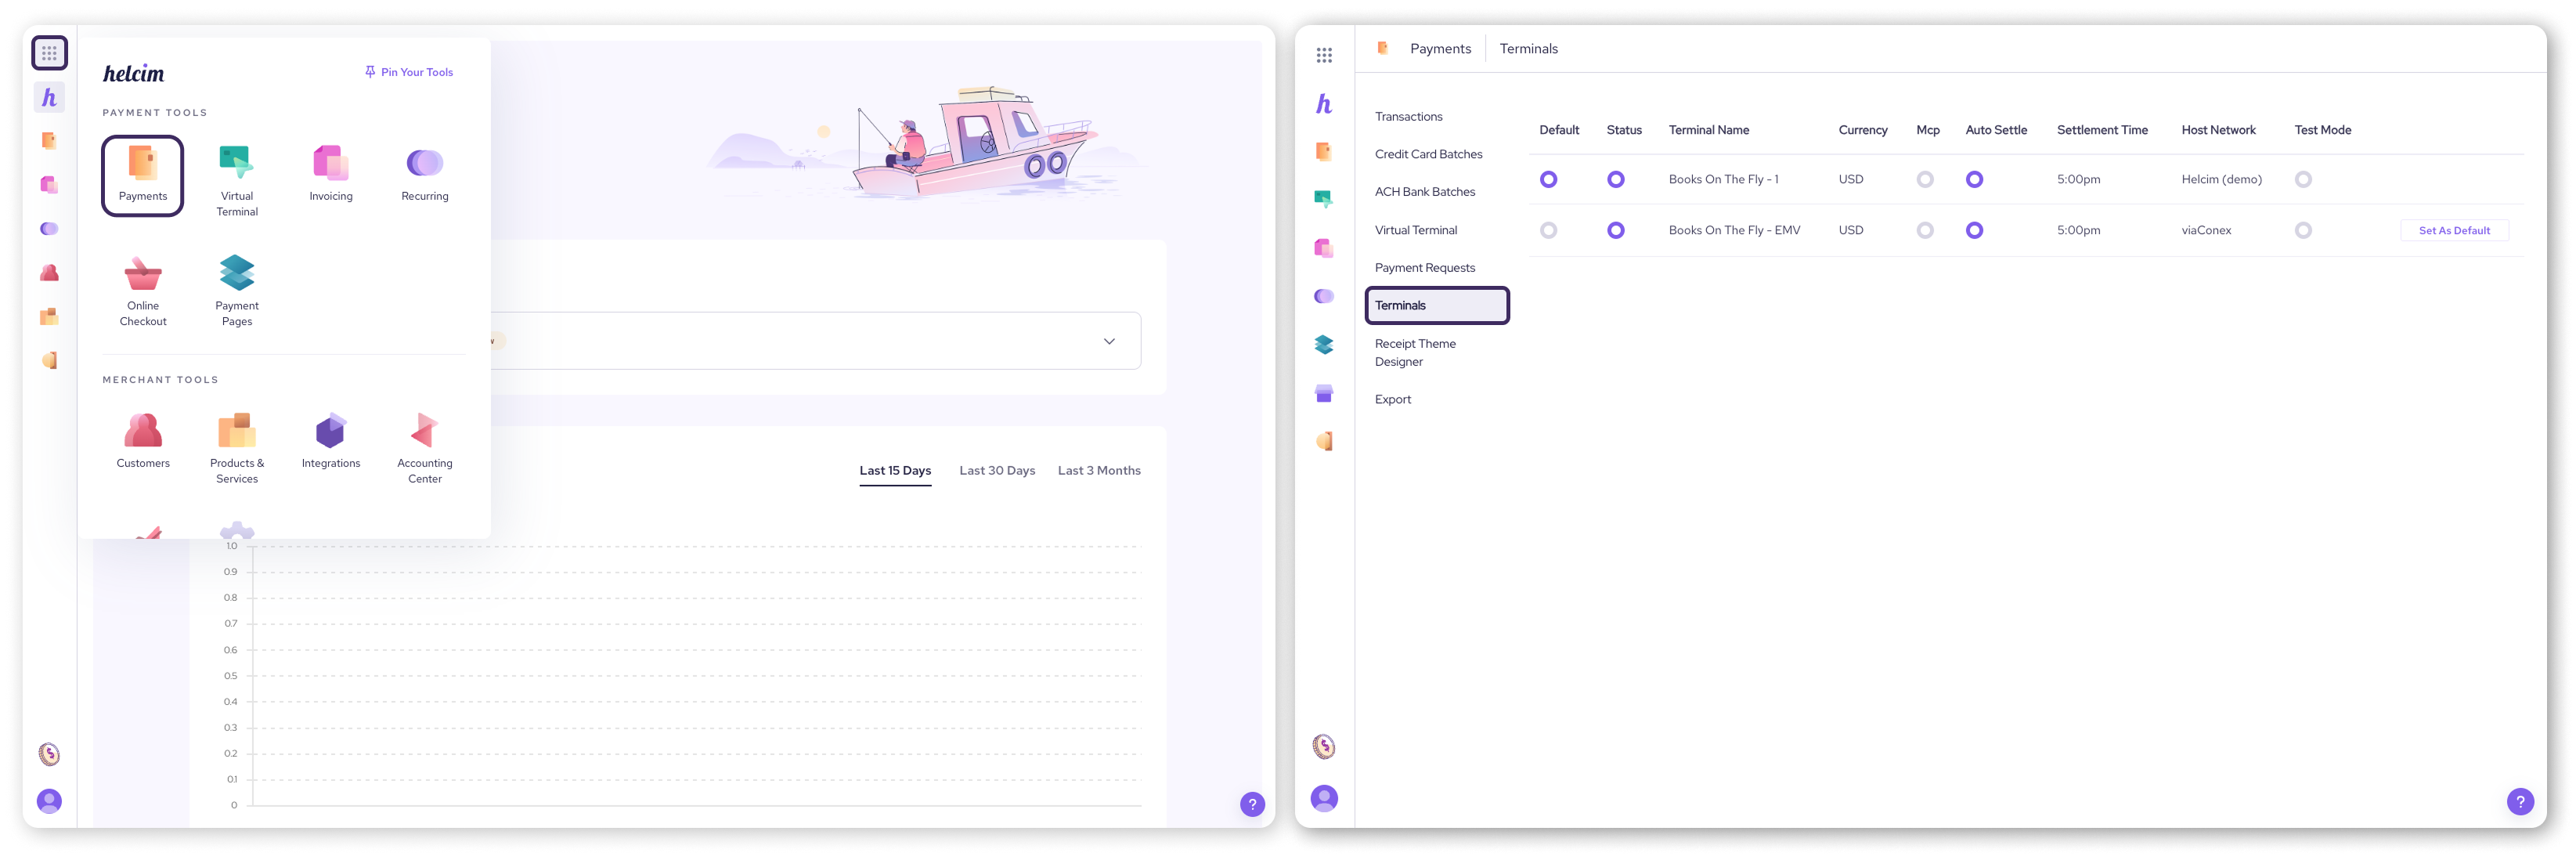
Navigate to All Tools, then Payments, and click on the Terminals tab.
Here you will see a list of your terminals and can perform actions like setting a default terminal for your devices or adjusting your auto-settlement settings.
Method #2: In the My Business tool (for viewing details)
To see the specific details associated with each terminal, you can view them in the My Business section.
Navigate to All Tools, then My Business, and click on Merchant Accounts.
On this page, you will see separate merchant accounts listed for each of your terminals. Clicking on one will allow you to see specific details like the Merchant ID (MID) and currency associated with that particular terminal.
.png)
How to add a new terminal
To add a new terminal to your merchant account, you will need to contact our support team. They can set it up for you quickly, especially if it's for the same currency you already process in.
| For a new currency terminal: If you are a Canadian business requesting a USD terminal, there are a few extra requirements. Most importantly, you will need to have a USD bank account with a Canadian financial institution. Our team can walk you through the specifics. |
How to switch between terminals
How you switch terminals depends on how you're taking the payment.
On a payment device (Smart Terminal or Helcim POS App)
Each device has one default terminal. To change it, you need to go into your settings.
From your dashboard, navigate to All Tools, then Payments
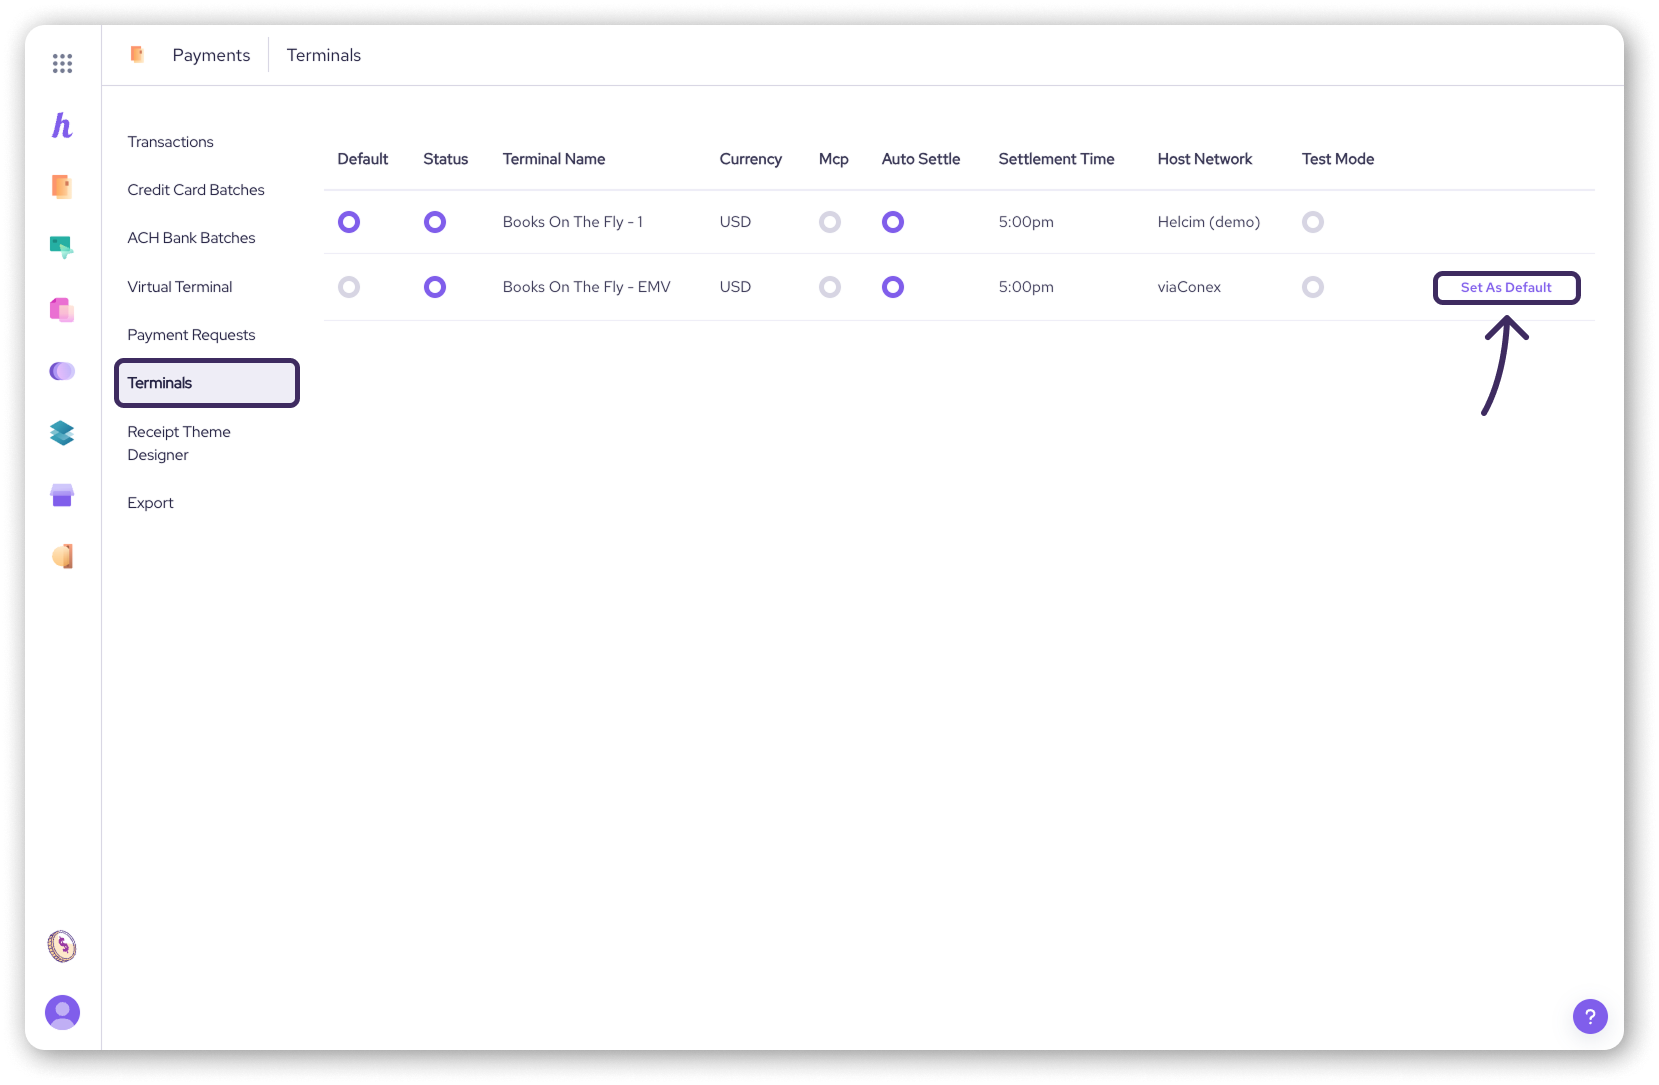
Click on the Terminals tab.
Here, you can select a terminal and use the Set As Default button.
The next time you use your device, it will use the newly assigned terminal.
In the Virtual Terminal
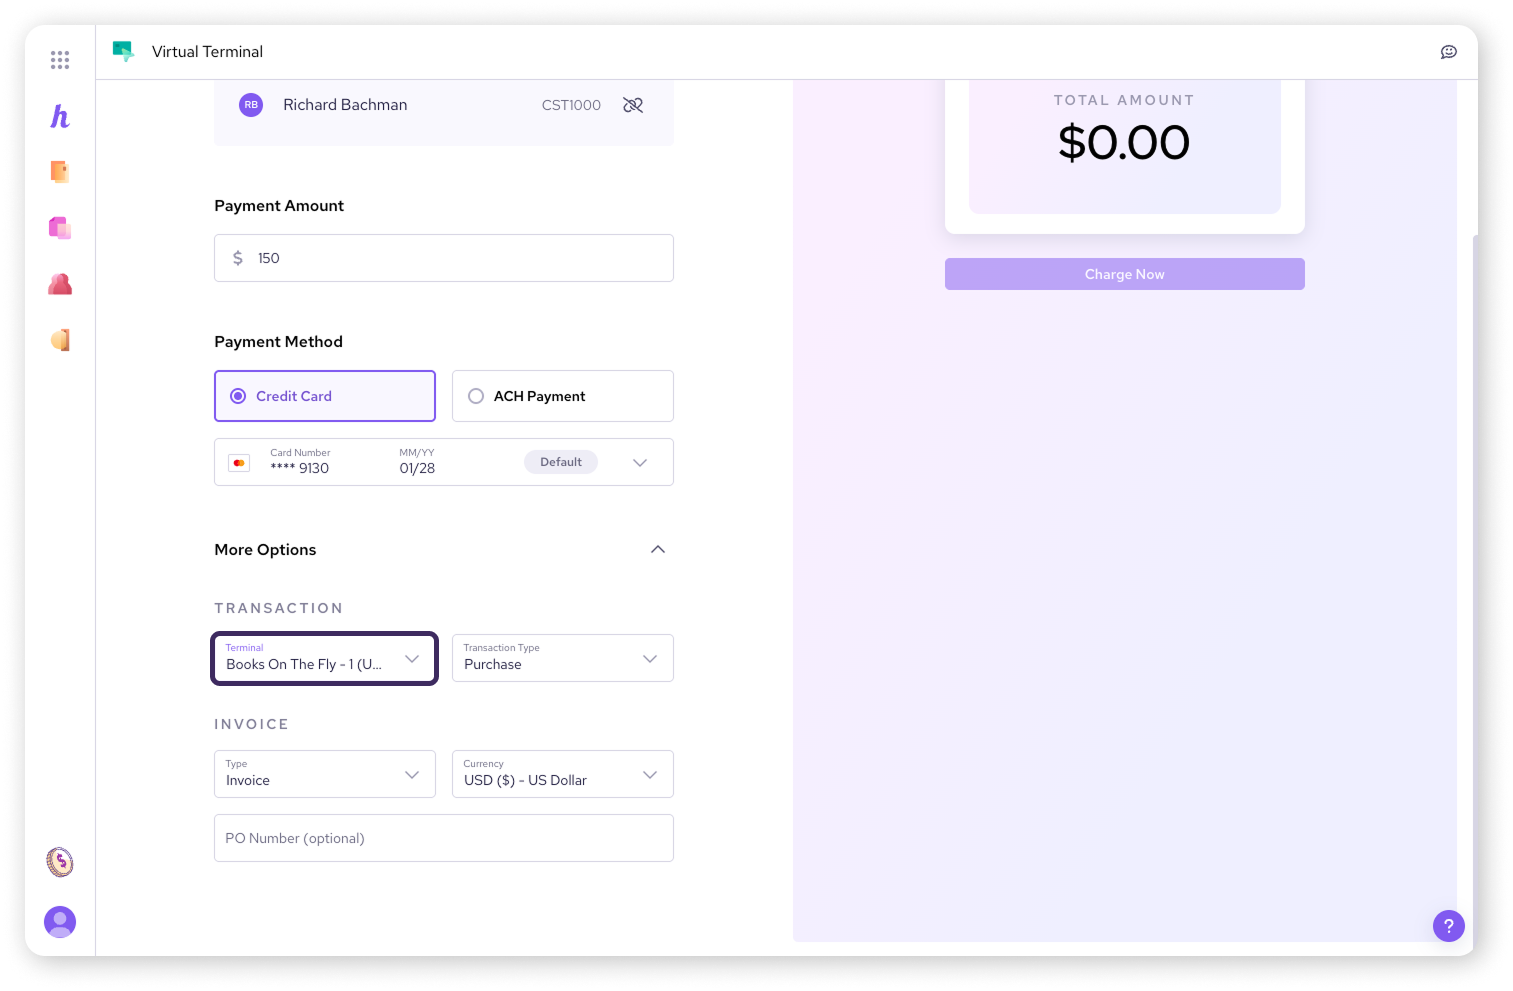
When using the Virtual Terminal, you can switch terminals on a transaction-by-transaction basis. When keying in a payment, simply click on More Options and you will see a dropdown menu to select which terminal you'd like to use for that specific payment.
Next steps
Learn how to customize your batch settlement times.
Contact our support team to add a new terminal.
FAQs
What’s the difference between a terminal and the Helcim Smart Terminal?
The Helcim Smart Terminal is a physical piece of hardware that runs our POS software and accepts credit cards. A terminal, in the broader sense, is the digital channel in your Helcim account that the transaction flows through. Your Helcim Smart Terminal is always assigned to a terminal.
As a Canadian, can my terminal accept USD payments from my customers?
Yes, you have two options for accepting payments from US customers, depending on how frequently you do business in USD.
Option 1: Using your standard CAD terminal
Your standard Canadian Dollar (CAD) terminal can accept US credit cards without any extra setup. When you do this, the transaction is processed in CAD, and your customer's bank handles the currency conversion. This often results in your customer being charged foreign exchange fees by their bank. This option is perfectly fine if you only have occasional sales to US customers.
Option 2: Adding a dedicated USD terminal
If you frequently process payments in US dollars, your best choice is to request a dedicated USD terminal. This allows you to charge your customers directly in USD, and the funds settle in your linked USD bank account. With this method, there are no foreign exchange fees applied during the transaction, which saves everyone money and creates a better experience for your US customers.
How do I change the terminal that my Helcim Smart Terminal uses?
You can set the default terminal for any device in the Terminals settings within your Helcim dashboard. Navigate to All Tools -> Payments -> Terminals to manage your settings.