Desktop App Navigation
To access settings in the Helcim Payments app, click on the More Icon

Next, select Settings from the sidebar menu on your screen.
After you click on App Settings you are able to view a menu of all the settings categories. You can make the desired changes to your settings and these will save when you navigate back to the Point-of-Sale.
.png "image(31).png")
Select Account to access contact information for an option to send in App Diagnostics. (NOTE: App diagnostics are a useful and required step in troubleshooting in many occasions!)
Mobile App Navigation
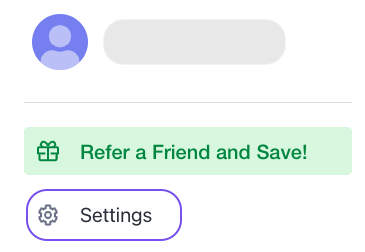
To access settings in the Helcim Payments app, click on the More option on the far bottom right.

Select Support to access contact information for our Support team, and an option to send in App Diagnostics. (NOTE: App diagnostics are a useful and required step in troubleshooting in many occasions!)

Select Settings to continue setting up your app.
On the following screen you will see two options for App device settings and Peripheral settings.

Selecting App device settings will give you options on your view, invoicing, tips and so on. Peripheral Settings will be where additional device connections are set up- primarily printers, the socket barcode scanner* or cash drawers.
(* Note that the barcode scanner can only be synced with Smart devices like iPhones or tablets, and will not connect to the desktop app)


Device
Clicking on Device will let you review or modify the settings for your device.
.png "image(21).png")
Default View: You can select whether the Point-of-Sale screen defaults to a number pad or to Products or Services
Device Nickname: If you have created a nickname for your device it will be displayed here, you can change it using the textbox if needed
Date Device Last Enabled: The day that the Helcim Payments app last synced with your Helcim account
Prompt App Updates: Toggle this option On to be notified when there is a new version of the app available
Wipe From Device: Clicking on Wipe From Device will clear the Helcim Payments app information from your device. If you want to remove the device from your account click on Disable Device from the Helcim platform under App Devices.
Login
Clicking on Login will let you adjust the security settings for how you and your team log in to the Helcim Payments app. After you click on Login you can select either your User Login Type or the Password Prompt.
.png "image(28).png")
User Login Type
Click on the different options to select between Multi User List, Multi User Manual, or Single User (Me) If you have multiple employees who need to access the Helcim Payments app you will want to select one of the multi-user options.
Password Type
Click on the different options to change how you want to enter your password when logging into the Helcim Payments app, you can select a PIN login, Full Password, or Full Password + 2FA (which refers to using two-factor authentication).
Receipts
Once you process a payment using the Helcim Card Reader you can issue customers a receipt through email or by using a printer. Use the options in this section to customize how you want receipts to be handled.
.png "image(27).png")
Default Receipt Type: Click on the buttons to select if you want customers to receive a Basic transaction receipt or a Full Invoice with product or service item details.
Merchant Copy: Toggle this option On or Off depending on if you need a copy for yourself in addition to the customer copy.
Auto Print Receipt: Toggle this option On to have your receipts print automatically.
Tips
You are able to choose between three different Tip Modes by clicking on the buttons at the top of the page to switch between Recommended Amounts, Custom Amount Prompt, and No Tips.
Recommended Amounts
.png "image(26).png")
Tip Recommendations
Set three tip recommendation options that you would like to provide customers with during each transaction. You can select % or $ for the recommendations by clicking on the buttons next to the amount.
Recommendation Amounts
Your tip recommendations need to be entered in order from lowest value to highest value starting from the first recommendation and increasing in amount for the subsequent two options.
Set Maximum Tip Limit Amount
Toggle the radio button On to set a maximum tip amount a customer can enter; this can be set as a percentage or a dollar amount.
Custom Amount
.png "image(25).png")
When you select Custom Amount the customer can enter their preferred tip amount without any guidance from you. You can toggle the radio button for Set Maximum Tip Limit Amount On if you want to set a maximum amount a customer can tip.
No Tips
Select No Tips if your business does not request tips.
.png "image(24).png")
Taxes
Your tax settings will automatically reflect what you have selected for your Helcim Account, but you can adjust them from within the Helcim Payments app at any time.
.png "image(30).png")
Automatically Calculate Taxes: Toggle the button On to enable this feature on all new payments
Optionally Add Taxes: Toggle the button On to allow the option to add taxes on individual payments
Use Custom Tax Location: Toggle the button On if you want to use a custom tax location
Tax Location Country: Use the drop-down menu to select the country of your tax location
Tax Location - State/Province: Use the drop-down menu to select the state or province of your tax location
Discounts
.png "image(23).png")
Allow Discount Codes: Toggle the button On if you would like to allow discount codes to be added to your cart. Discount codes will need to be created before they can be applied to your cart.
Allow Manual Discounts: Toggle the button On if you would like to allow manual one-time discounts to be added to individual products or services in your cart. These can be added as a percentage or dollar amount to an individual cart item.
Set Maximum Discount Amount: Toggle the button On if you would like to set a maximum discount amount. Once the option is turned On you can enter the maximum amount and specify if it is a maximum percent or dollar amount
Check for New Orders
You can use the settings under Check for New Orders to configure notifications for when new orders are received. These settings can be especially helpful for those in the food and beverage industry or for any business that receives time sensitive orders.
.png "image(29).png")
Enable Sound Notifications: Toggle this radio button On if you want to be notified with a ping each time an order is received.
Auto-Print New Orders: Toggle this radio button On if you want the new order to automatically be printed when it is received.
Terminal Settings
Terminal Language
You can update the preferred language settings so that the prompts on the card reader are in English, French, or Spanish. The changes should be reflected immediately, if you do not notice a language change please try closing the app and signing in again.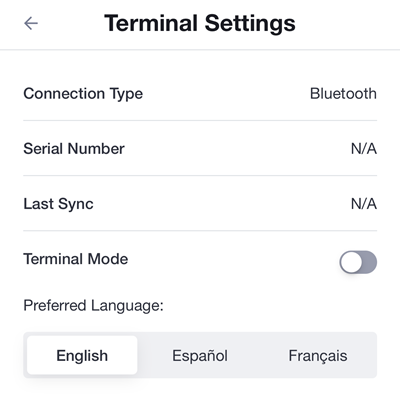
Languages
Please note that the Helcim Payments app will still remain in English. These settings only affect the Helcim Card Reader. In addition, the card reader will also default to the cardholder's language. For example, if you have selected French but an English-speaking customer inserts their credit or debit card, the prompts on the card reader will switch back to English for that transaction.
Custom Fields
Add a custom field to your checkout flow to save additional payment details to your invoice.
Once enabled, you will be automatically prompted to add a custom value in your POS cart during checkout. This value will be saved in the Details section of the invoice post-payment and will be visible on your invoice if you have custom fields enabled through Invoice Theme Designer.
.png "image(81).png")